(13) Connect propeller sha ft to pin ion flange.
NOTE: On dual rear wheel axle install axle shafts.
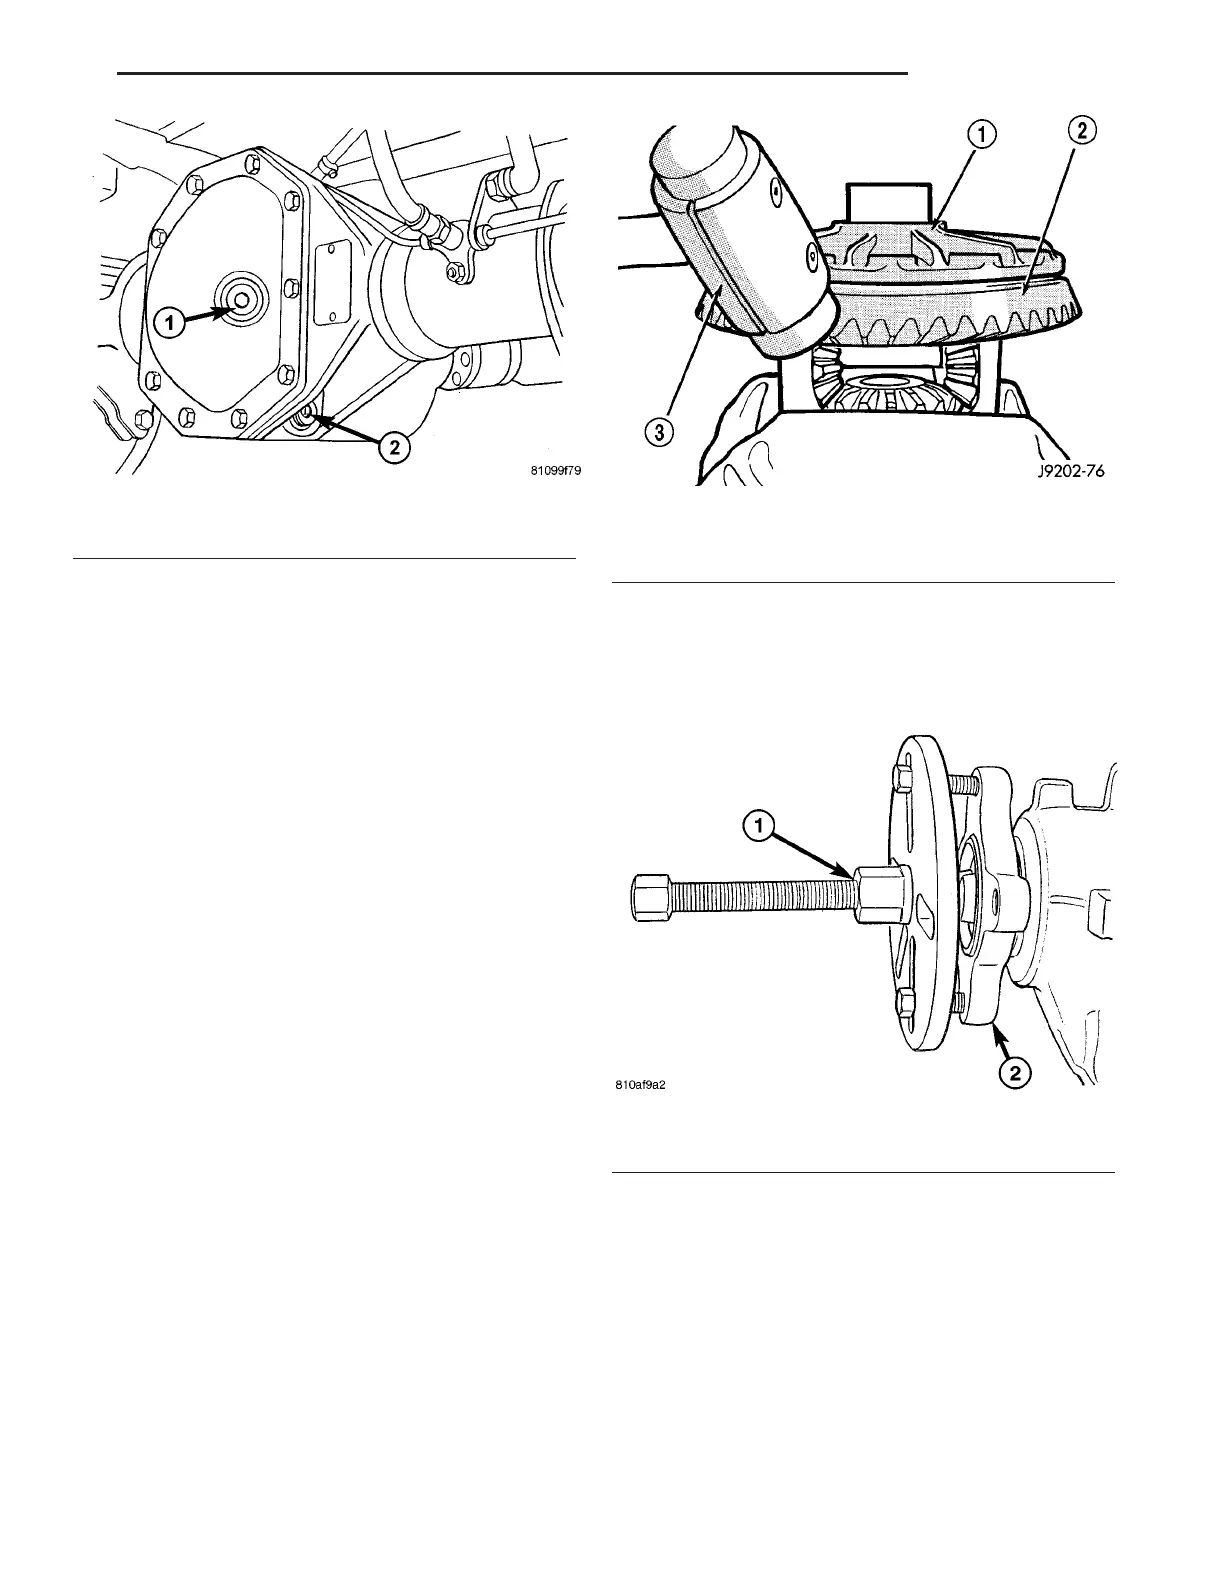
(14) Pour in oil u p to bot tom edge of oil filler hole
(1) (Fig. 63).
(15) Screw in oil filler plu g (1) and tighten to 100
N·m (74 ft. lbs.).
(16) Install wh eels at rear axle.
(17) Opera te br ake pedal several times u ntil br ake
pa ds con tact brake discs (brake pressu re built up).
(18) Atta ch rear brake cables if removed and
adjust parking brake.
GEAR - PI N I ON / RI N G
REMOVAL
NOTE: The ring and pinion gears are serviced in a
matched set. Never replace one gear without replac-
ing the other gear.
(1) Remove differ ential from housing.
(2) Pla ce differen tial case in a vise with soft metal
jaw.
(3) Remove rin g gea r bolts from the differen tia l
case.
(4) Drive rin g gear off the differ ential ca se with a
dead-blow ham mer (Fig. 64).
(5) Unlock collar ed nut.
(6) Hold pin ion flange with F lange Wrench C-3281
and rem ove nut.
(7) Remove pinion flange fr om pinion shaft with
Puller 8892 and Wrench C-3281 (F ig. 65).
(8) Remove pinion gea r from housing with a dea d-
blow h ammer.
(9) Remove pinion shaft sea l with a seal pick.
(10) Remove fron t pinion bearing.
(11) Remove fr ont pinion bear ing cup with
Remover D-103 a nd Handle C-4171.
(12) Remove rear pin ion bearing cu p with Remover
9084 a nd Han dle C-4171.
(13) Remove pinion depth shim from rea r pinion
bearing cup bore.
(14) Remove collapsible spacer (Fig. 66).
Fig. 63 FILL PLUG
1 - FILL PLUG
2 - DRAIN PLUG
Fig. 64 RING GEAR
1 - CASE
2 - RING GEAR
3 - DEAD-BLOW HAMMER
Fig. 65 FLANGE PULLER
1 - FLANGE PULLER
2 - PINION FLANGE
VA REAR AXLE 3 - 41