(3) Use a hand opera ted va cuum pum p for t est .
(4) Apply 15-20 inch es va cuum at large en d of
check valve (Fig. 18).
(5) Vacu um shou ld hold st eady. If gauge on pu mp
indicates va cuum loss, check valve is fa ulty an d
sh ould be repla ced.
STANDARD PROCEDURE - MASTER CYLINDER
BLEEDING
A new master cylin der should be bled before in stal-
lat ion on th e veh icle. Requ ired bleeding tools inclu de
bleed tubes and a wood dowel t o stroke the pistons.
Bleed t ubes can be fabr icated fr om brake line.
(1) Mount master cylin der in vise.
(2) Attach bleed tu bes to cylinder outlet ports.
Then posit ion each tube end into reservoir (Fig. 19).
(3) Fill reser voir with fresh br ake fluid.
(4) Press cylin der pistons inward with wood dowel.
Then release pistons an d allow them to return under
spring pressure. Continu e bleeding opera tion s until
air bu bbles a re no longer visible in flu id.
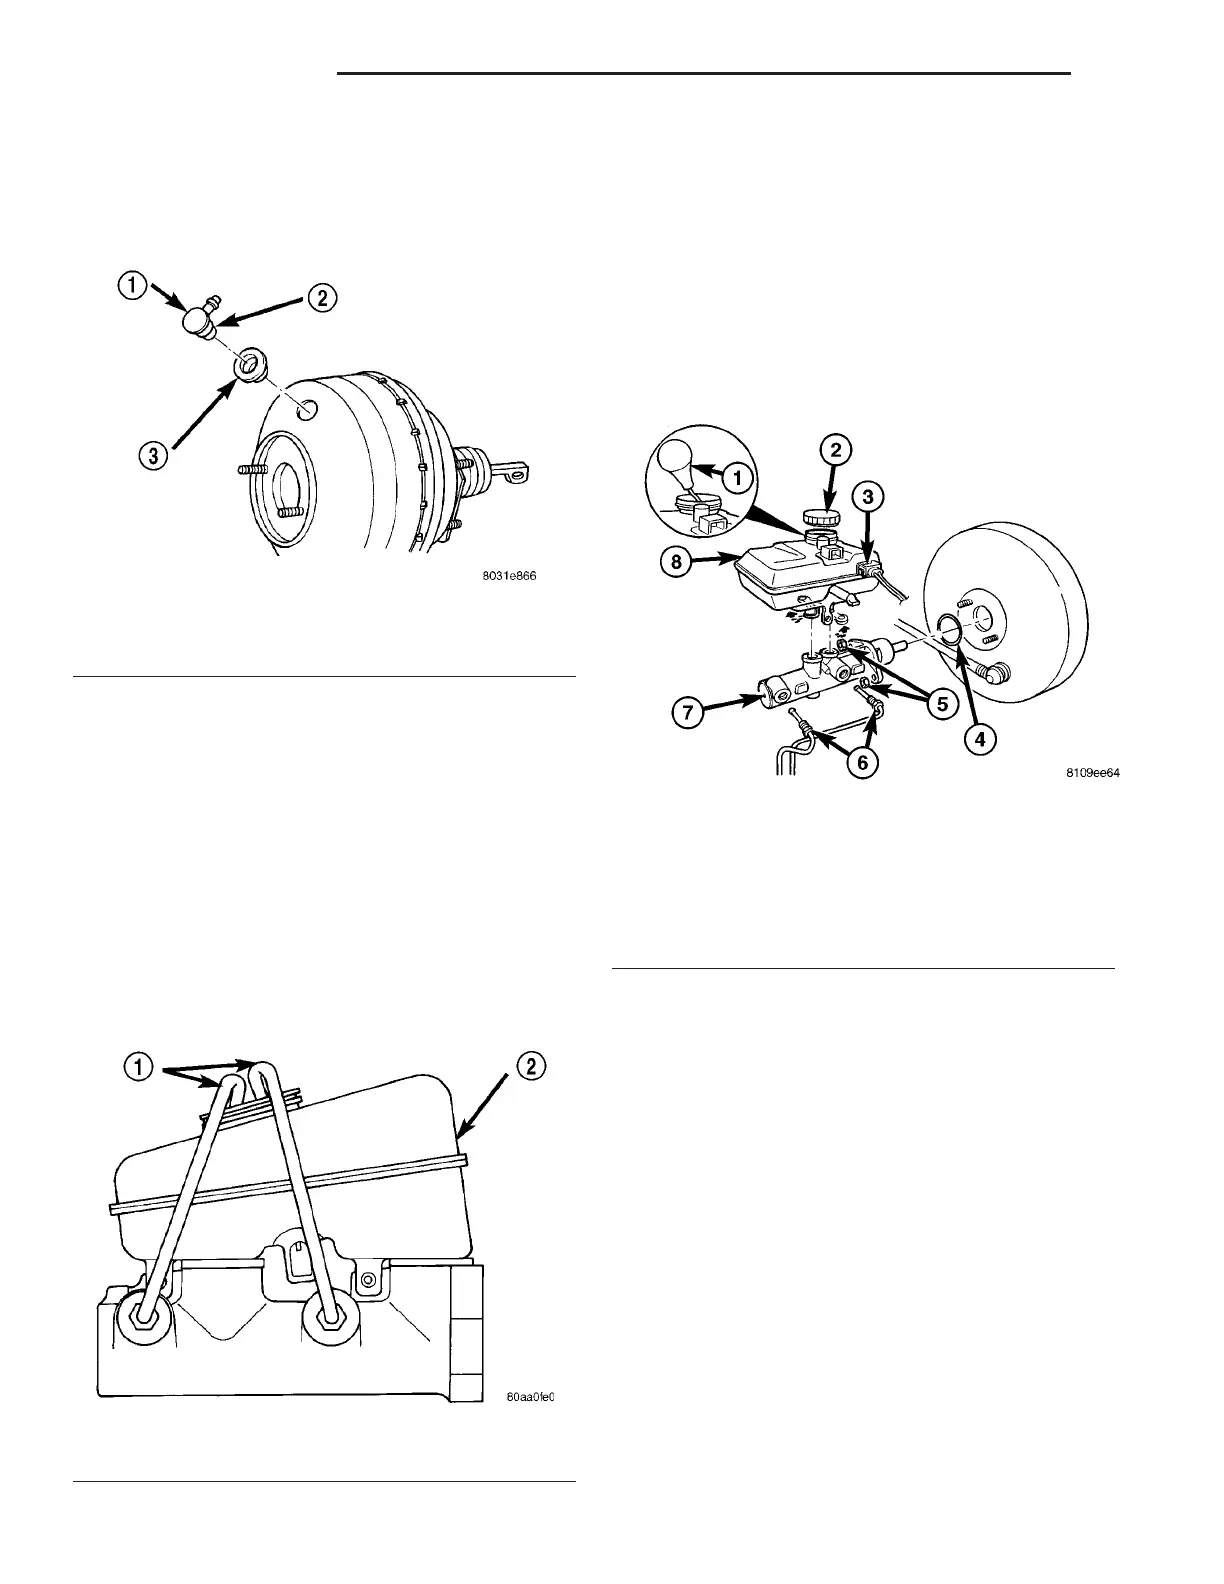
REMOVAL
(1) Usin g a suct ion gu n remove as much brake
fluid from the reservoir as possible (Fig. 20).
(2) Remove the fluid reservoir (Fig. 20) or (Fig. 21)
(Refer to 5 - BRAKES/H YDRAULIC/MECH ANICAL/
FLUID RESERVOIR - REMOVAL).
(3) Remove the brake lines Seal off the ends and
bore holes w ith plugs. (Fig. 20) or (Fig. 21)
(4) Remove the m aster cylinder mou nting nu ts
(Fig. 20) or (Fig. 21). Chec k b ra k e bo o s t e r fo r
damage due to leaking master cylinder. It is not
possible to repair the master cylinder.
Fig. 18 Vacuum Check Valve And Seal
1 - BOOSTER CHECK VALVE
2 - APPLY TEST VACUUM HERE
3 - VALVE SEAL
Fig. 19 Master Cylinder Bleeding–Typical
1 - BLEEDING TUBES
2 - RESERVOIR
Fig. 20 MASTER CYLINDER
1 - SUCTION GUN
2 - BRAKE FLUID CAP
3 - BRAKE FLUID LEVEL INDICATOR
4 - O-RING
5 - NUT
6 - BRAKE LINE
7 - MASTER CYLINDER
8 - FLUID RESERVOIR
5-18 BRAKES-BASE VA