CLEANING - REAR DRUM IN HAT BRAKE
Clean t he in dividu al br ake componen ts, in cluding
the support plat e exter ior, with a wat er dam pened
cloth or with brake cleaner. Do not use a ny other
clean ing a gent s. Rem ove light r ust and scale from
the br ake shoe con tact pa ds on the support plat e
with fine sa ndpaper.
INSTALLATION
INSTALLATION - (SRW)
NOTE: Preassemble the retracting spring with the
short hook eye from the inside together with the
adjuster wheel at the bottom. Fit the preassembled
park brake shoes on the brake carrier.
(1) Ensure that the cable lock moves easily
before installing shoes.Insta ll the pa rk brake
sh oes.
(2) In st all th e lower r etra cting sprin g using special
tool 9280.
(3) In st all th e hold down springs using special tool
9281.
(4) In st all the upper retracting spring u sing spe-
cial tool 9280.
(5) In st all the adjuster.
(6) In st all th e front park br ake cable t o the pulley
unit.
(7) In st all the disc brake rotor.
(8) In st all the rear wh eels.
(9) Adjust the parkin g bra kes.
(10) Lower th e veh icle.
(11) Pump the brake peda l severa l times to check
the operation of the brakes before moving vehicle.
INSTALLATION - (DRW)
NOTE: Preassemble the retracting spring with the
short hook eye from the inside together with the
adjuster wheel at the bottom. Fit the preassembled
park brake shoes on the brake carrier.
(1) Ensure that the cable lock moves easily
before installing shoes.Insta ll the pa rk brake
sh oes.
(2) In st all the lower r etra cting sprin g.
(3) In st all the pressure hold down sprin gs by
depr essing with your fingers an d twisting to lock in
place.
(4) In st all the upper ret racting spr ing.
(5) In st all the adjuster.
(6) In st all th e front park br ake cable t o the pulley
unit.
(7) In st all the disc brake rotor.
(8) In st all t he rear wheel flange rin g. Tighten t o
200 N·m (148 ft . lbs.).
(9) In st all the rear wh eels.
(10) Adjust the parking brakes.
(11) Lower th e vehicle.
(12) Pum p th e bra ke peda l several times to ch eck
the operation of the brakes before moving vehicle.
ADJ U ST M EN T S
ADJUSTMENT
(1) Raise and support the vehicle.
(2) Remove the rear wheels.
(3) Turn th e adjusting wheel thr ough the hole of
the wheel lug bolt u ntil it is no lon ger possible to
rotate the rear wh eel (Fig. 38).
(4) Loosen the adjusting wheel 3-4 teeth divisions
(Fig. 38).
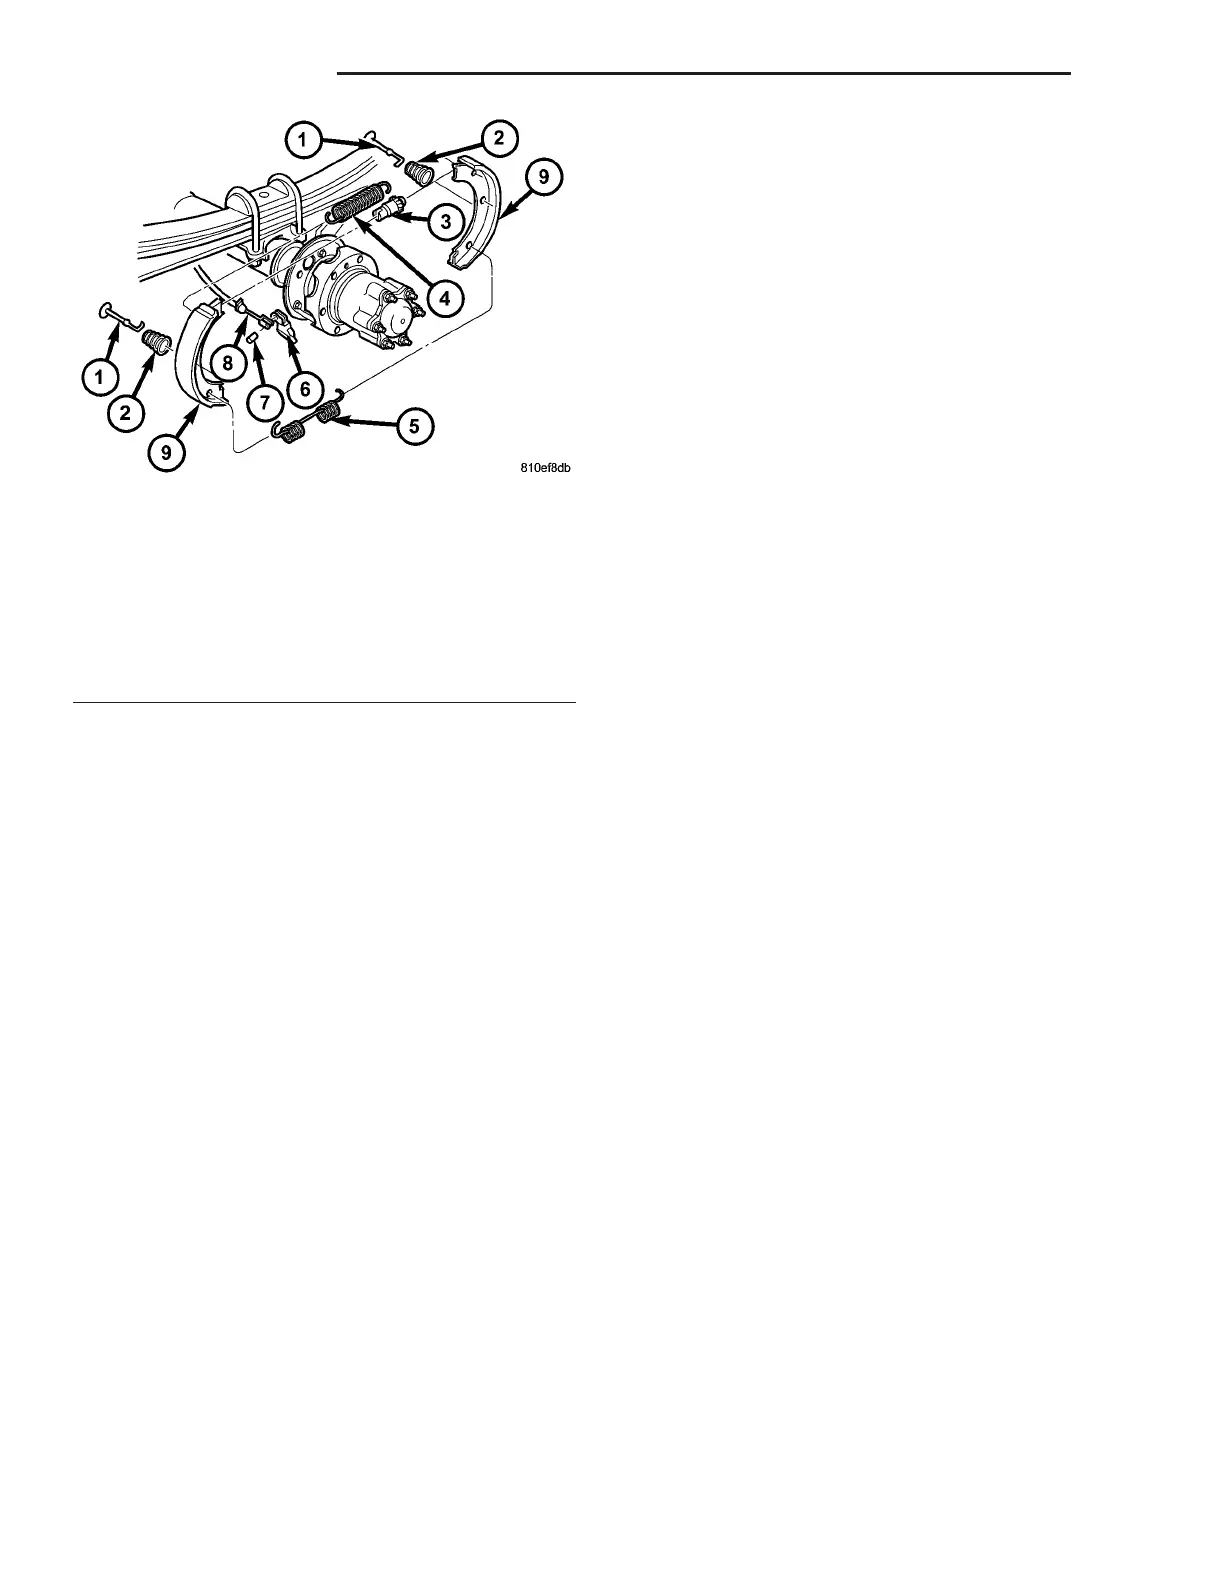
Fig. 37 PARK BRAKE SHOES WITH DUAL REAR
WHEELS
1 - HOLD DOWN PIN
2 - PRESSURE SPRING
3 - ADJUSTER
4 - UPPER RETRACTING SPRING
5 - LOWER RETRACTING SPRING
6 - CABLE LOCK
7 - LOCKING PIN
8 - BRAKE CABLE
9 - PARK BRAKE SHOE
5-28 BRAKES-BASE VA