OPERATION
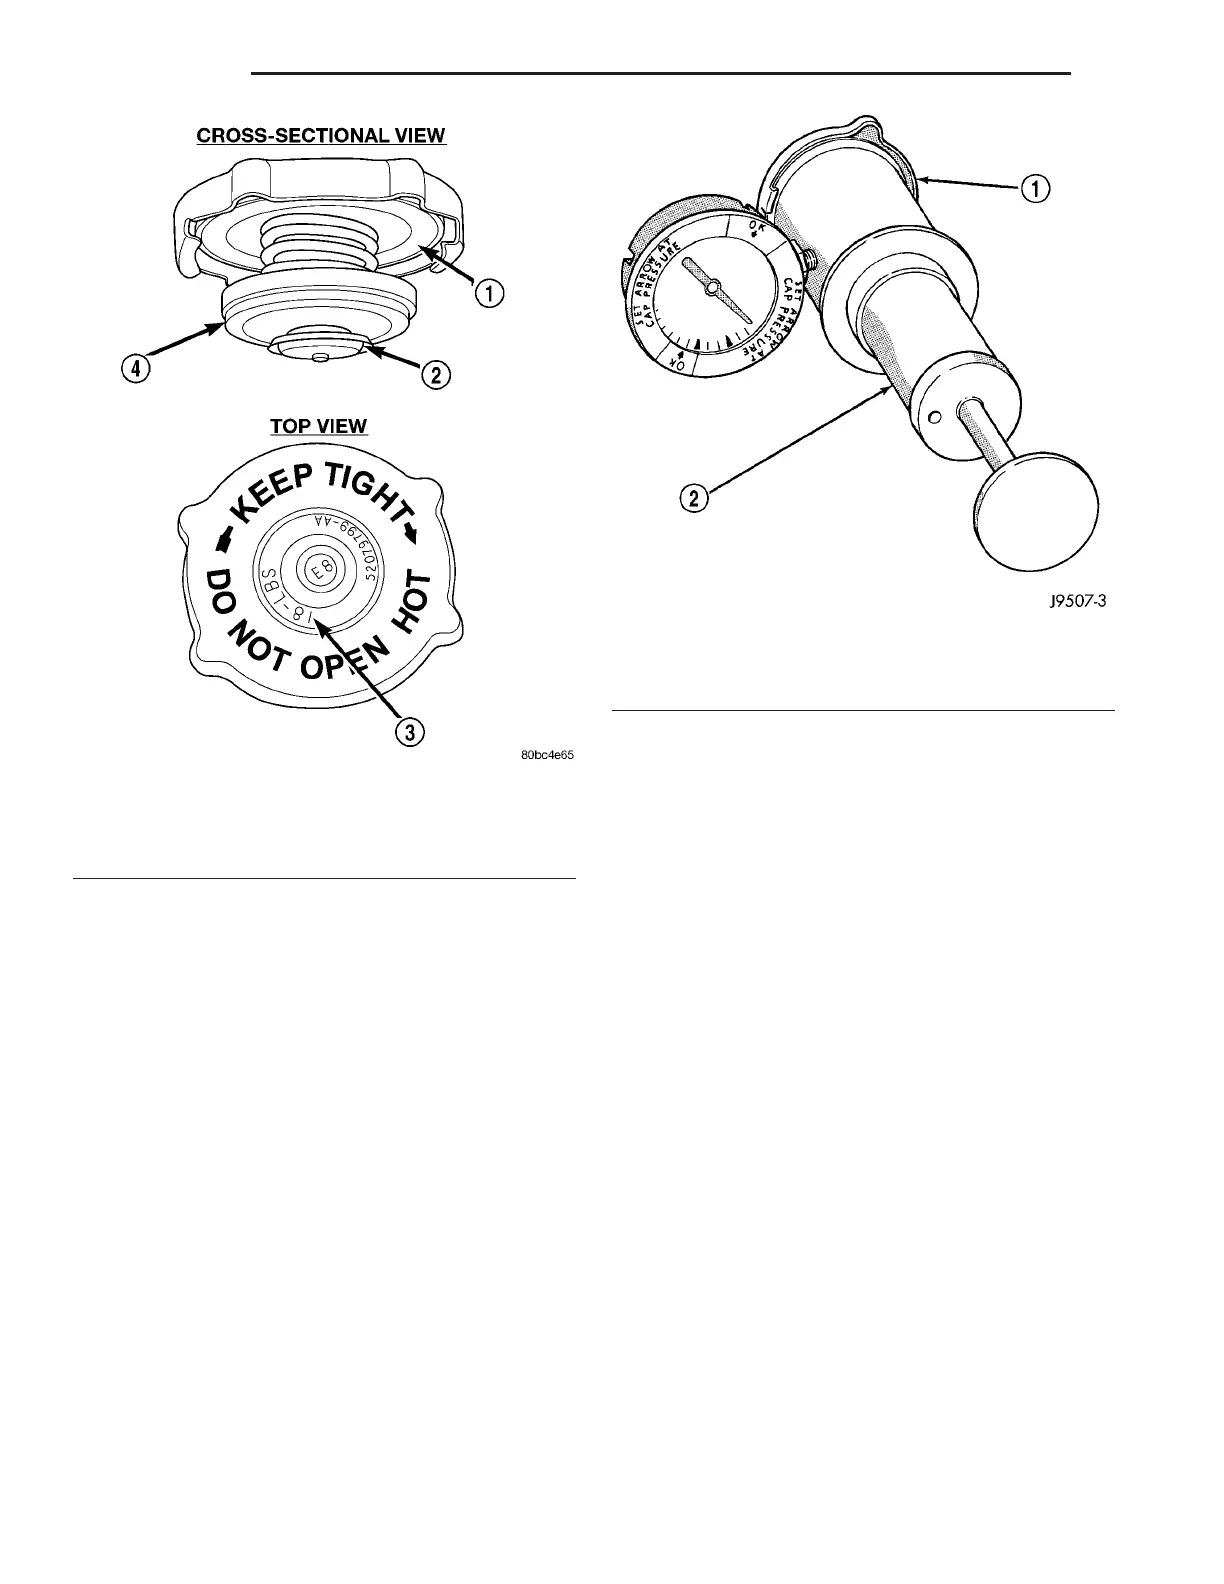
A vent va lve in the center of the cap will rema in
sh ut as lon g as th e cooling syst em is pressur ized. As
the coolant cools, it con tracts an d crea tes a vacu um
in coolin g system. This cau ses the vacuu m va lve to
open an d coolan t in reserve/over flow tank to be
dr awn thr ough connectin g hose into r adiator. If the
vacu um valve is stuck shut , or overflow hose is
kinked, radiator hoses will collapse on cool-down.
DIAGNOSIS AND TESTING - RADIATOR PRES-
SURE CAP
Remove ca p from ra diator. Be su re that sea lin g
su rfaces a re clean. Moisten rubber gasket with water
and insta ll t he cap on pressure tester Tool 7700 or an
equivalent (Fig. 12).
Operat e the tester pum p and observe the ga uge
pointer a t its highest point. Th e cap r elease pressur e
sh ould be 124-145 kPa (18-21 psi). The cap is satis-
factory wh en t he pr essu re holds st eady. It is also
good if it holds pr essu re within the 124-145 kPa
(18-21 psi) range for 30 seconds or more. If the
pointer drops qu ickly, replace t he cap.
CAUTION: Radiator pressure testing tools are very
sensitive to small air leaks, which will not cause
cooling system problems. A pressure cap that does
not have a history of coolant loss should not be
replaced just because it leaks slowly when tested
with this tool. Add water to tool. Turn tool upside
down and recheck pressure cap to confirm that cap
needs replacement.
WATER P UMP
REMOVAL
WARNING: Risk of injury to skin and eyes from
scalding with hot coolant. Risk of poisoning from
swallowing coolant. Do not open cooling system
unless coolant temperature is below 90°C (194°F)).
Open cap slowly to release pressure. store coolant
in suitable and appropriately marked container.
Wear protective gloves, clothes and eye wear.
Fig. 11 Radiator Pressure Cap - Typical
1 - FILLER NECK SEAL
2 - VACUUM VENT VALVE
3 - PRESSURE RATING
4 - PRESSURE VALVE
Fig. 12 Pressure Testing Radiator Pressure Cap -
Typical
1 - PRESSURE CAP
2 - TYPICAL COOLING SYSTEM PRESSURE TESTER
7 - 20 ENGINE VA