(4) Do not use an adjustable, ratcheting
“c li c k ty p e ” t o rq u e w re n c h . Mo s t “c l i c k ty p e ”
wrenches will only allow torque to be applied
in a clo ck w is e ro t a t io n . U s e a d i a l-ty p e o r
be a m -ty p e w re n c h . Tighten in coun ter-clockwise
rotation (Fig. 12) or, (Fig. 13). Refer to torque speci-
ficat ions.
(5) In st all a ccessory drive belt, and gen erator.
Refer to Gener ator Installa tion .
(6) Connect nega tive bat tery cable.
Litens Decoupler
(1) Thread decoupler pulley on to gener ator sh aft
by hand (right -han d t hrea ds).
(2) Position Special Tool 8433 (Fig. 10) in to decou-
pler. Align tool to hex en d of generator sha ft.
(3) Do not use an adjustable, ratcheting
“c li c k ty p e ” t o rq u e w re n c h . Mo s t “c l i c k ty p e ”
wrenches will only allow torque to be applied
in a clo ck w is e ro t a t io n . U s e a d i a l-ty p e o r
be a m -ty p e w re n c h . Tighten in coun ter-clockwise
rotation (Fig. 14). Refer to torqu e specifica tion s.
(4) In st all a ccessory drive belt, and gen erator.
Refer to Gener ator Installa tion .
(5) Connect nega tive bat tery cable.
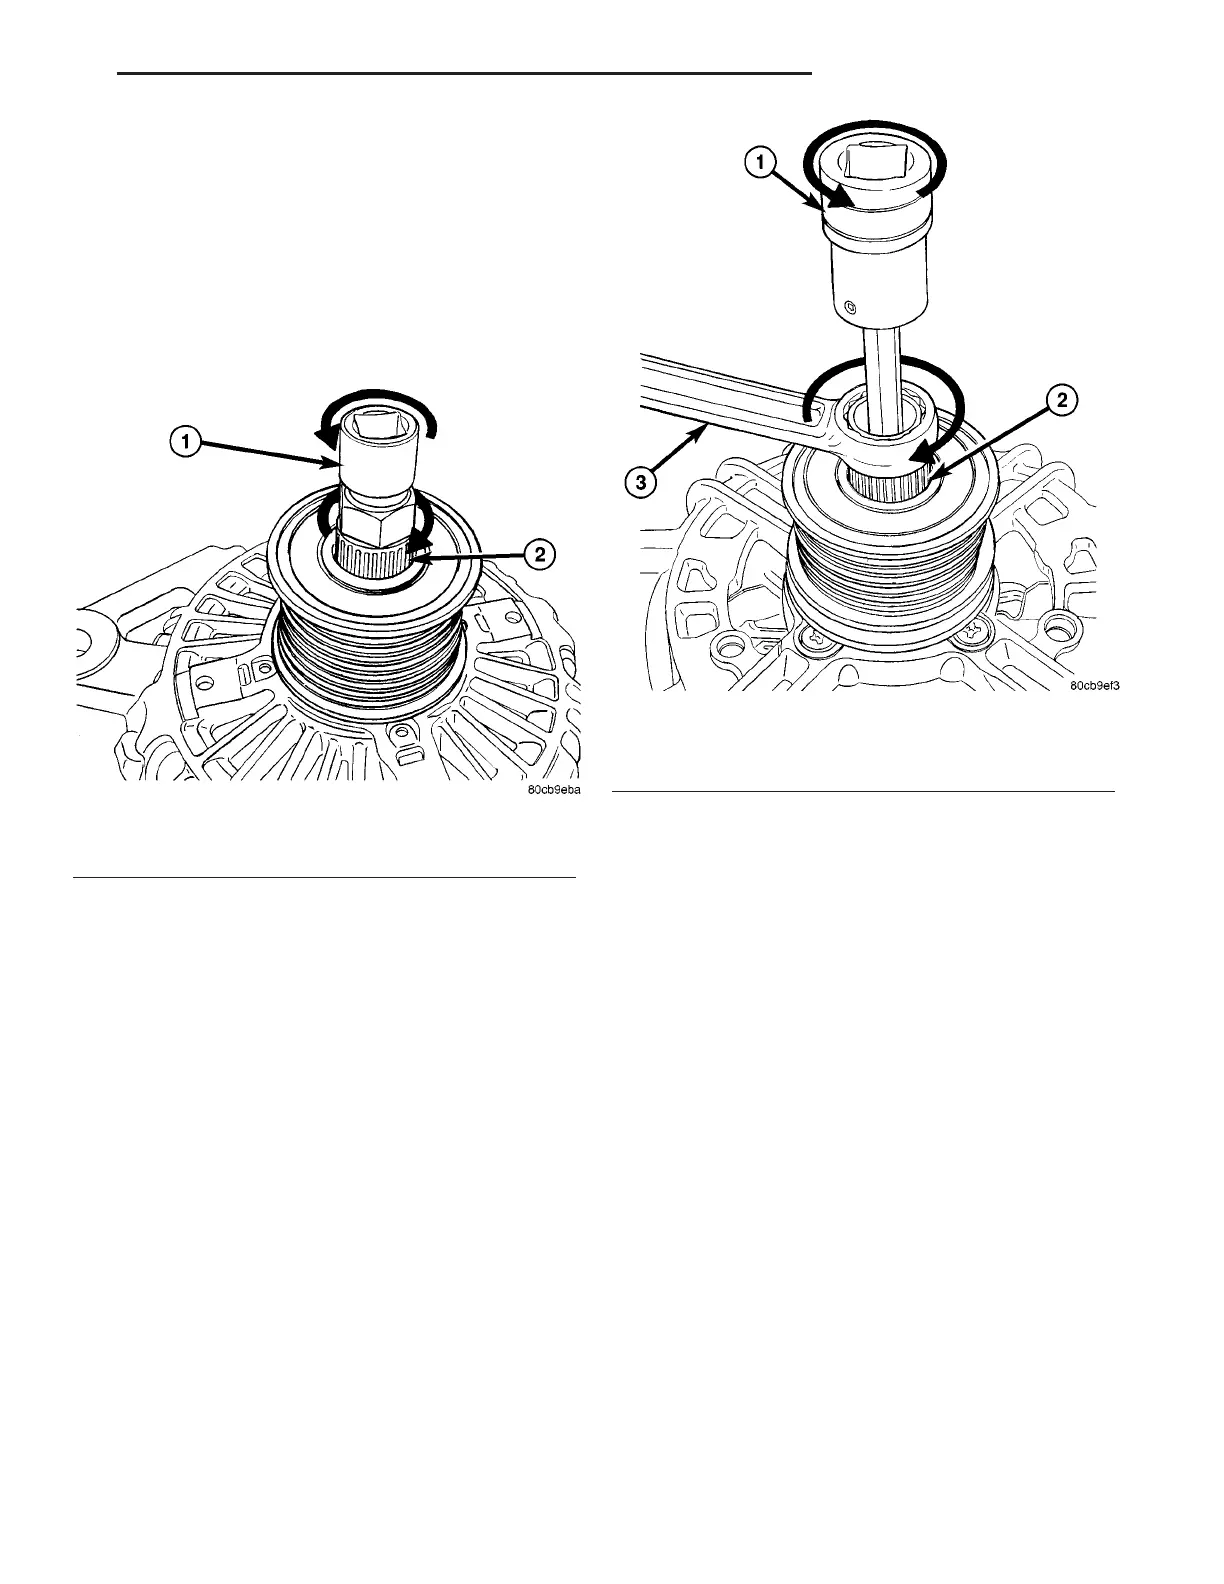
Fig. 12 DECOUPLER INSTALLATION (INA-HEX)
1 - 10MM DEEP SOCKET
2 - TOOL # 8823 (VM.1048)
Fig. 13 DECOUPLER INSTALLATION (INA SPLINED)
1 - DRIVER
2 - TOOL # 8823 (VM.1048)
3 - BACKUP WRENCH
VA CHARGING SYSTEM 8F - 23