energizes the timin g circuit of th e rear window defog-
ger module which t hen activates the rea r window
defogger (EBL) rela ys. The EBL rela ys controls the
curren t flow to the r ear window defogger grids. The
EBL system will oper ate for approximately five min-
utes or until the rea r window defogger swit ch or igni-
tion switch is t urned off. Refer to 8 - ELE CTRICAL/
HEATED GLASS - DIAGNOSIS AND TE STING for
diagnosis and testing of the rea r window defogger
switch .
The rea r window defogger switch cannot be
repaired a nd, if faulty or dam aged, it must be
repla ced.
DI AGN OSI S AN D T EST I N G
REAR WINDOW DEFOGGER SWITCH
WARNING: On vehicles equipped with airbags, dis-
able the airbag system before attempting any steer-
ing wheel, steering column, or instrument panel
component diagnosis or service. Disconnect and
isolate the battery negative (ground) cable, then
wait two minutes for the airbag system capacitor to
discharge before performing further diagnosis or
service. This is the only sure way to disable the air-
bag system. Failure to take the proper precautions
could result in an accidental airbag deployment and
possible personal injury.
NOTE: The rear window defogger switch may be
tested in the vehicle or out of the vehicle, on a
bench.
NOTE: For circuit descriptions and diagrams of the
rear window defogger system, refer to 8W - WIRING
DIAGRAM INFORMATION.
(1) Remove th e rear win dow defogger switch from
the instr umen t panel, but leave th e switch connected
(Refer t o 8 - ELECTRICAL/HEATE D GLASS/RE AR
WINDOW DE FOGGE R SWITCH - RE MOVAL).
(2) Turn the ignition switch ON.
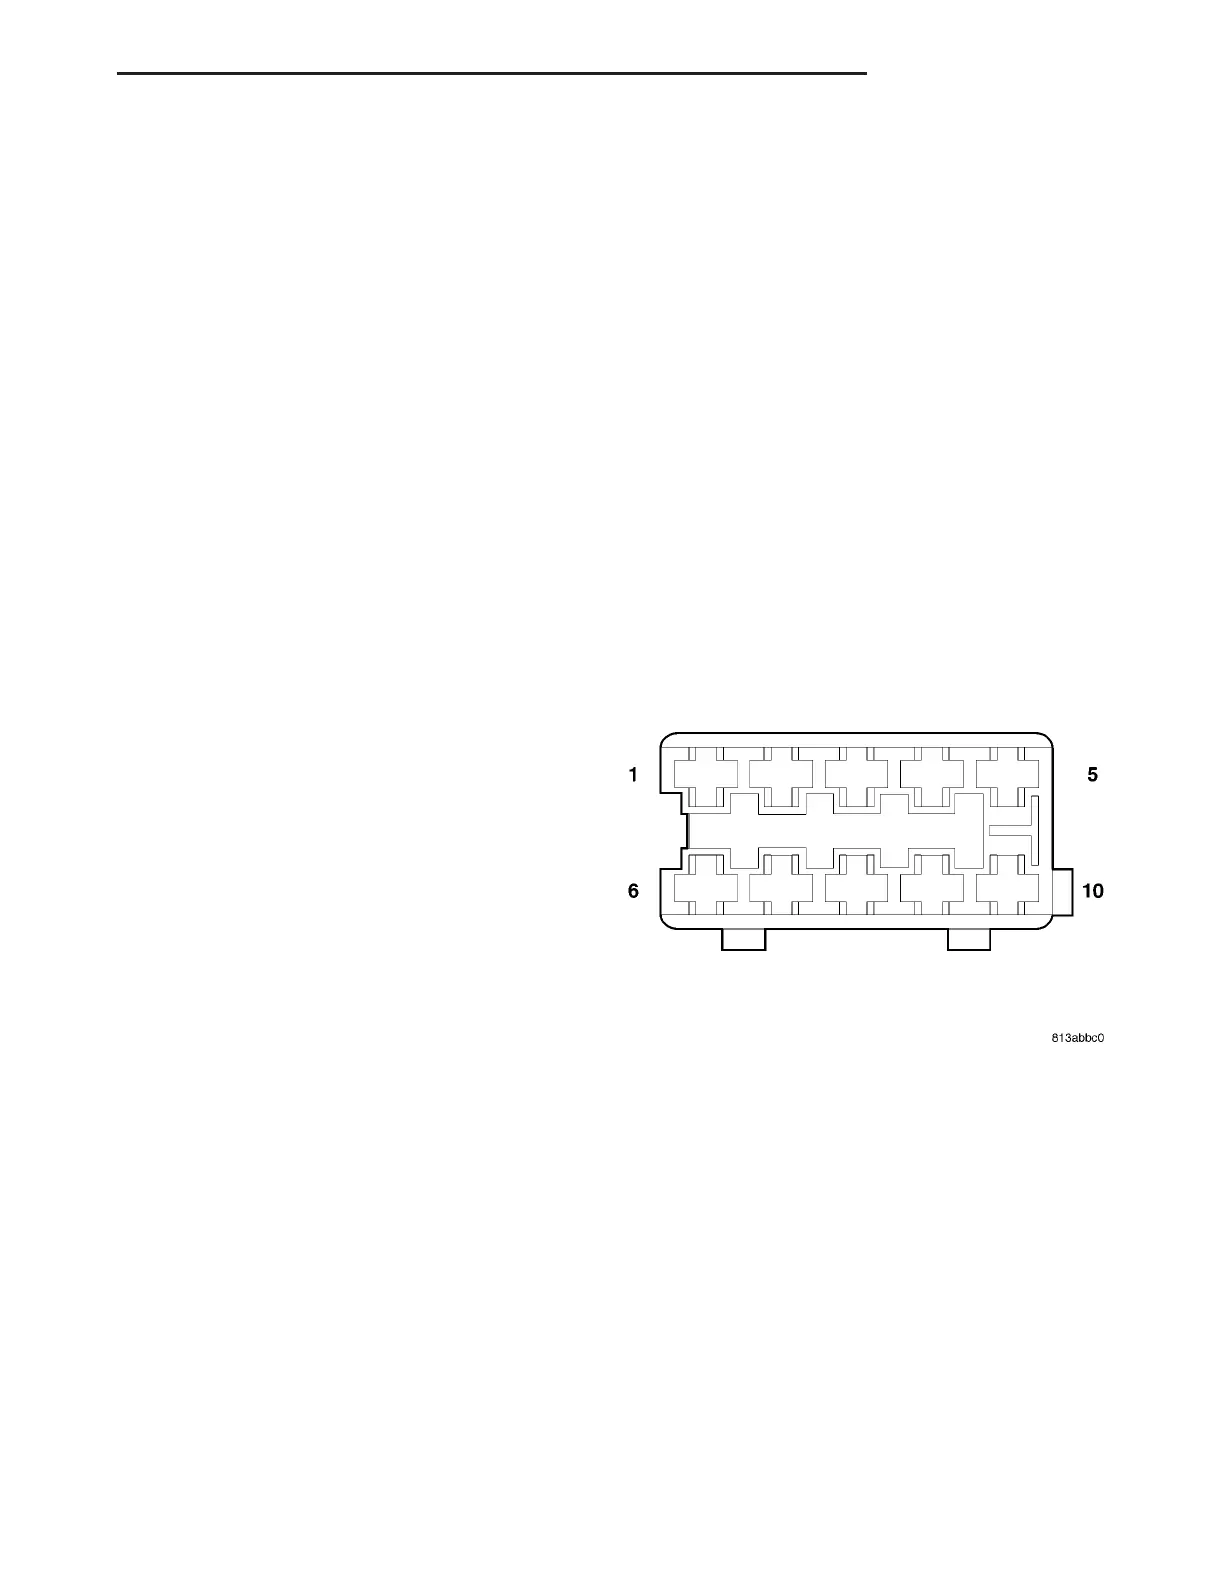
(3) Usin g a voltmeter, check for ba tter y volta ge at
Pin 3 of the r ear window defogger switch (Fig. 6).
(a) If OK, go to Step 4.
(b) If NOT OK, check fuse 7 (15 am p) in fuse
block #1. If fuse is OK, check t he wiring circu its.
Refer to 8W - WIRING DIAGRAM INFORMA-
TION .
(4) Check Pin 7, with defogger switch in th e On
position th ere should be batt ery voltage an d, n o volt-
age with t he switch in the Off posit ion.
(a) If OK, go to Step 5.
(b) If NOT OK, no volta ge in the On posit ion or
volt age in t he Off position, replace the rea r window
defogger switch.
(5) Press the defogger swit ch to the On position.
The in dicator la mp sh ould come on and rem ain on
for approximat ely 5 minut es.
(a) If OK, insta ll the rear window defogger
switch (Refer to 8 - ELECTRICAL/HEATED
GLASS/REAR WINDOW DE FOGGE R SWITCH -
INSTALLATION).
(b) If NOT OK, go to Step 6.
(6) Check Pin 9, with defogger switch in th e On
position t here sh ould be battery volt age.
(a) If OK, go to Step 7.
(b) If NOT OK, check the wirin g circuits. Refer
to 8W - WIRING DIAGRAM INFORMATION.
(7) Check Pin 10 for a good grou nd.
(a) If OK, replace the rear window defogger
switch .
(b) If NOT OK, check the wirin g circuits. Refer
to 8W - WIRING DIAGRAM INFORMATION.
Fig. 6 Rear Window Defogger Switch Connector
VA HEA TED GLASS 8G - 5