Post-Service Checkout Protocol
DSX™ System Service Manual 3-13
ce Checkout Protocol
DSX™ System Service Manual 3-13
Note (continued): Depending on the particular situation, you can either
increase or decrease the number to achieve the optimal position. Try small
increases or decrease around 5 until you gain a thorough understanding.
Note (continued): Depending on the particular situation, you can either
increase or decrease the number to achieve the optimal position. Try small
increases or decrease around 5 until you gain a thorough understanding.
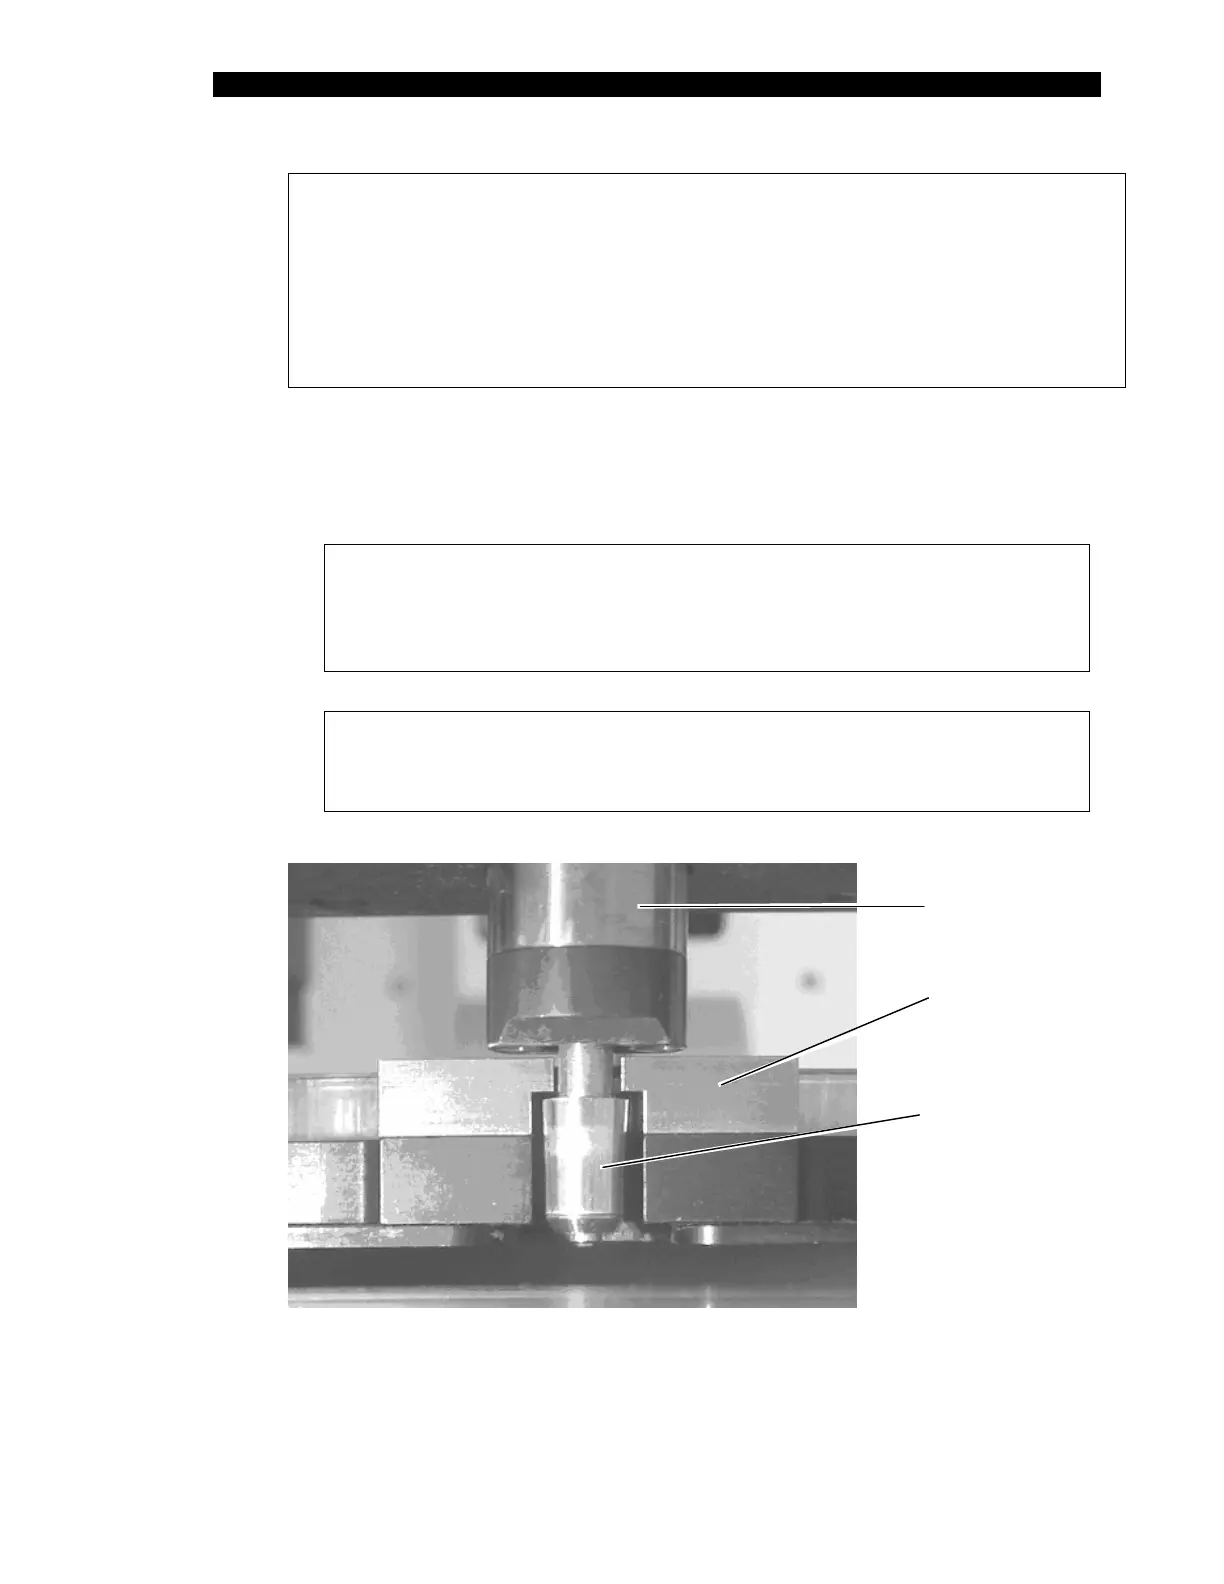
3 Select Get Plate while observing the pipette spigot as it enters the plate holder
assembly (Figure 3-6). As the pipette moves back into the clamping slot, the
spigot must align with the plate holder as shown. Skip to the next step if this is
correct. If not, the X and Z coordinates will need to be adjusted to achieve this
alignment.
Note: If only a slight adjustment to the coordinates is necessary, it is
easier to check for proper alignment at the alignment Vees shown in
Figure 3-7. For coarser adjustments, begin with the spigot
alignment, then move to the alignment Vees.
Note: If an error occurs, choose Recovery Options followed by
Abort the Operation. The coordinates can then be modified and
the attempt repeated.
Clamp
Body
Pick-up
Block
Pipette
Spigot
Figure 3-6 Pipette Entering Plate Holder Assembly Prior to Clamping