iPECS eMG80/100& eMG800 & UCP & vUCP
Administration and Programming Manual Issue 2.5
388
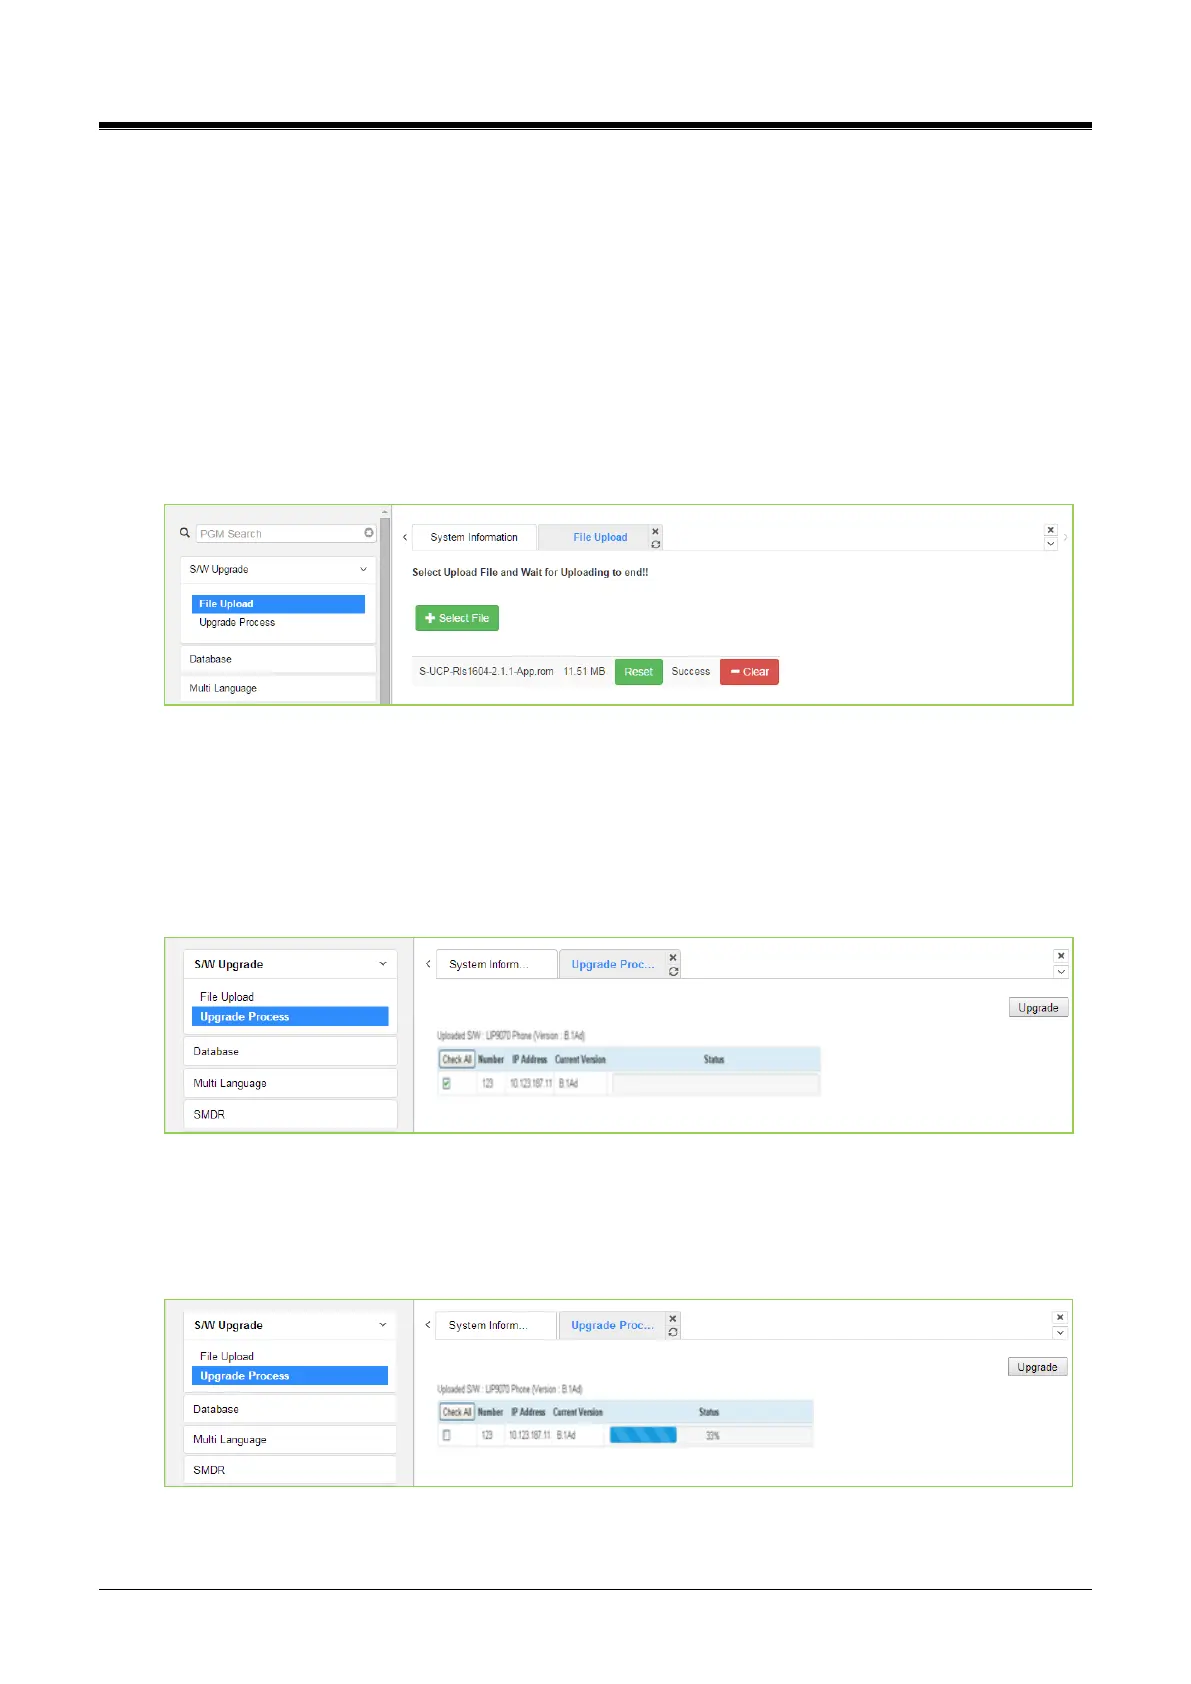
4.5.1.1 File Upload
From the File Upload page, click the [Select file] button and open the pop-up folder. Select the desired file to
upload to the system’s memory and click the [Start] button. The file is sent to the system’s memory, saved,
and automatically loaded upon reset or restart.
Before upload, verify sufficient memory is available in eMG/UCP File System for the files to be uploaded.
Refer to the ‘File System section’ to view the free disk space and delete unused files. Note names of files
required for normal system operation will be grey out and cannot be deleted.
Html image files are extracted, and previous HTML files are deleted after the upload process. New VSF
prompt files are also available immediately upon successful upload. If file upload succeeds, a success page
will be displayed.
Figure 4.5.1.1-1 File Upload
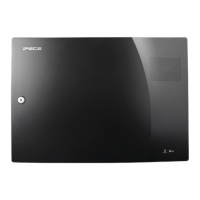
4.5.1.2 Upgrade Process
If the iPECS Appliance image is uploaded, the appliances of the type for which an image was uploaded will be
displayed and can be selected to upgrade, as shown in the following figure Upgrade Process. Select the
desired appliance and click the [Upgrade] button, the upgrade process will start, and a progress screen will
be displayed.
Figure 4.5.1.2-1 Upgrade Process
4.5.1.2.1 Upgrade Process View
The Upgrade Process View provides a status window; refer to the following Upgrade Process View for Module
and terminal upgrade activity in a process.
Figure 4.5.1.2-1 Upgrade Process View