4-4 MFP Service Manual
7500-432, -632, and -832
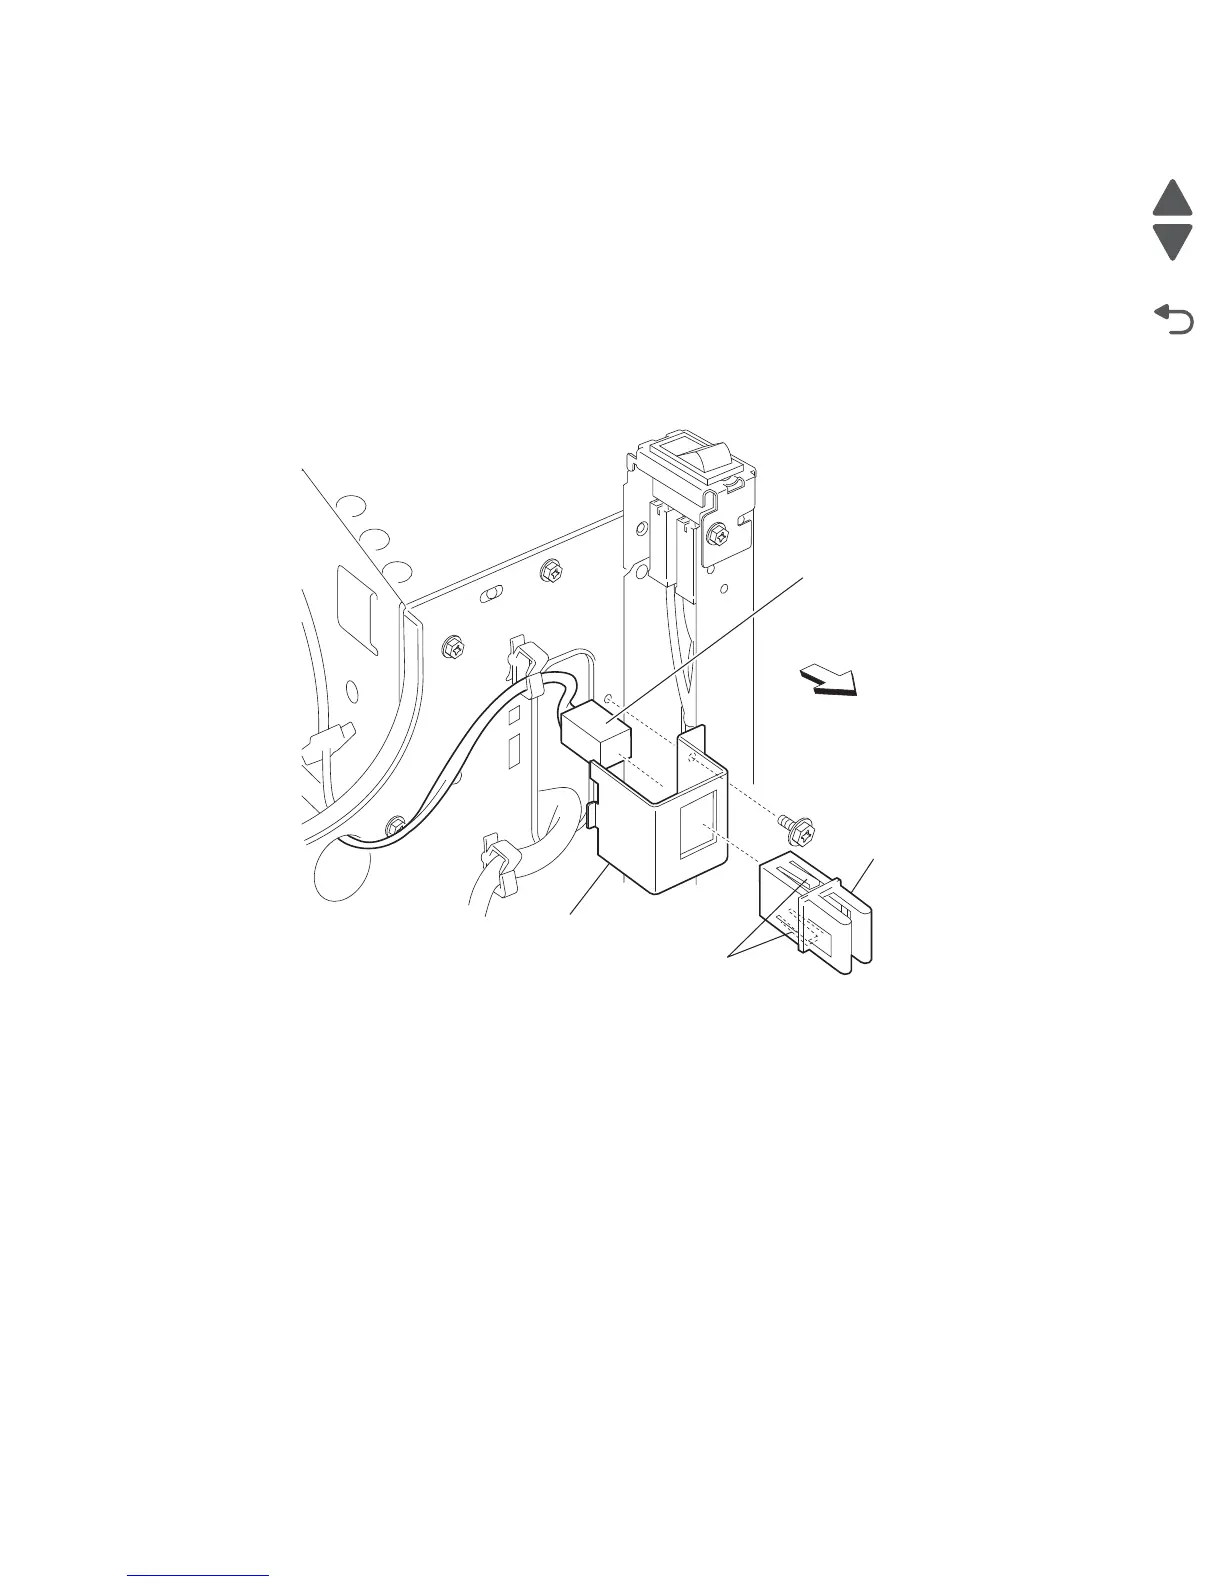
Switch (printer front door interlock) removal
Note: First remove the bridge unit and finisher, if equipped. Refer to the Options Service Manual.
1. Remove the top cover assembly. See “Top cover assembly removal” on page 4-5.
2. Remove the printer front door assembly. See “Printer front door assembly removal” on page 4-6.
3. Remove the printer front left cover. See “Printer front left cover removal” on page 4-3.
4. Remove the front inner cover. See “Front inner cover removal” on page 4-8.
5. Remove one screw securing the bracket (A).
6. Disconnect the connector from the switch (printer front door interlock) (B).
7. Release the hooks securing the switch (printer front door interlock) (B) to the bracket (A).
8. Remove the switch (printer front door interlock) (B).