Chapter 9: Video Module, Rev. 1.2
a. Click the Start button in the Horizontal/Vertical Offset section of the Sizing page;
b. Decrease the Vertical Offset.
NOTE: In most cases, the Vertical Offset value will only need to be decreased slightly (for
example, if the setting is 24 adjust to 16.);
6. Zoom in on upper image using Zoom in toolbar button OR View\Zoom In menu item;
7. Use the scrollbars to pan the image and find the top edge of the first image;
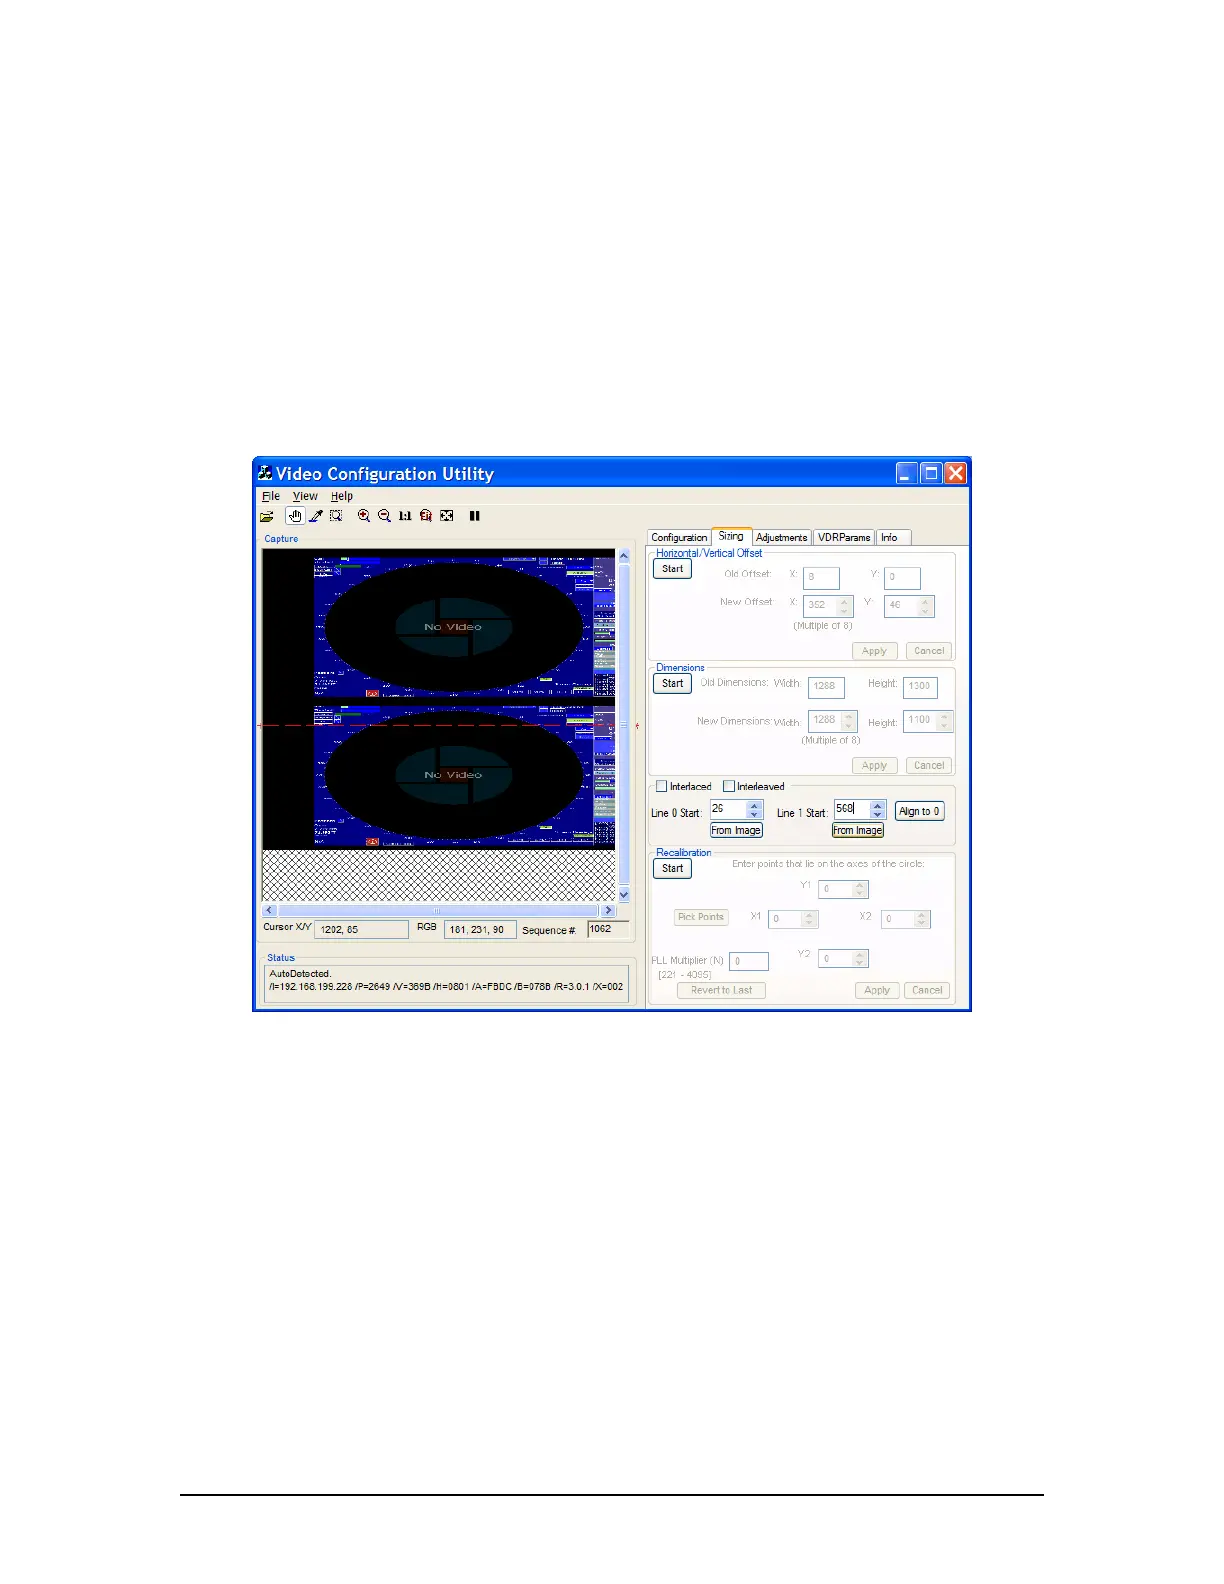
8. Click the From Image button under the Line 0 Start scroll box,
9. A message will allow user to click a point to find the top edge of the image.
10. Once the top edge of the image is found, scroll down to the lower image
11. Locate the top edge of the second image using the same process; however click the
“From Image” button in the Line 1 Start section instead for the bottom image.
Figure 9-15 - Interlaced values chosen
12. The image values have now been set;
13. Click the Interlaced checkbox on the Sizing tab page;
14. The interlaced images automatically merge into a single image.
15. If the image does not appear corrected or the image’s numbers look blurry (see
Figure below), it is very likely the installer chose the wrong pixel coordinates. That
means the image is interlaced incorrectly. To correct the interlacing and sharpen the
image:
i. Click the up or down arrow on the Line 0 Start scroll box, adjusting the
value 1 pixel at a time;
ii. Wait for the next image before making another adjustment;
iii. Click the up or down arrow on the Line 1 Start scroll box adjusting the
value 1 pixel at a time;
iv. Wait for the next image before making another adjustment.
v. Repeat steps i-iv above until the image is clear and sharp.
16. Once the image is properly interlaced, it can now be adjusted to finish correcting the
image.
VDR-100G3/G3S Installation Manual 06/10/2008
9-15