31
WEB CONTROL
(4) To unselect the crosspoint, click a Destination number.
(Clicking a Destination number without selecting a crosspoint will change the displayed
grid area.)
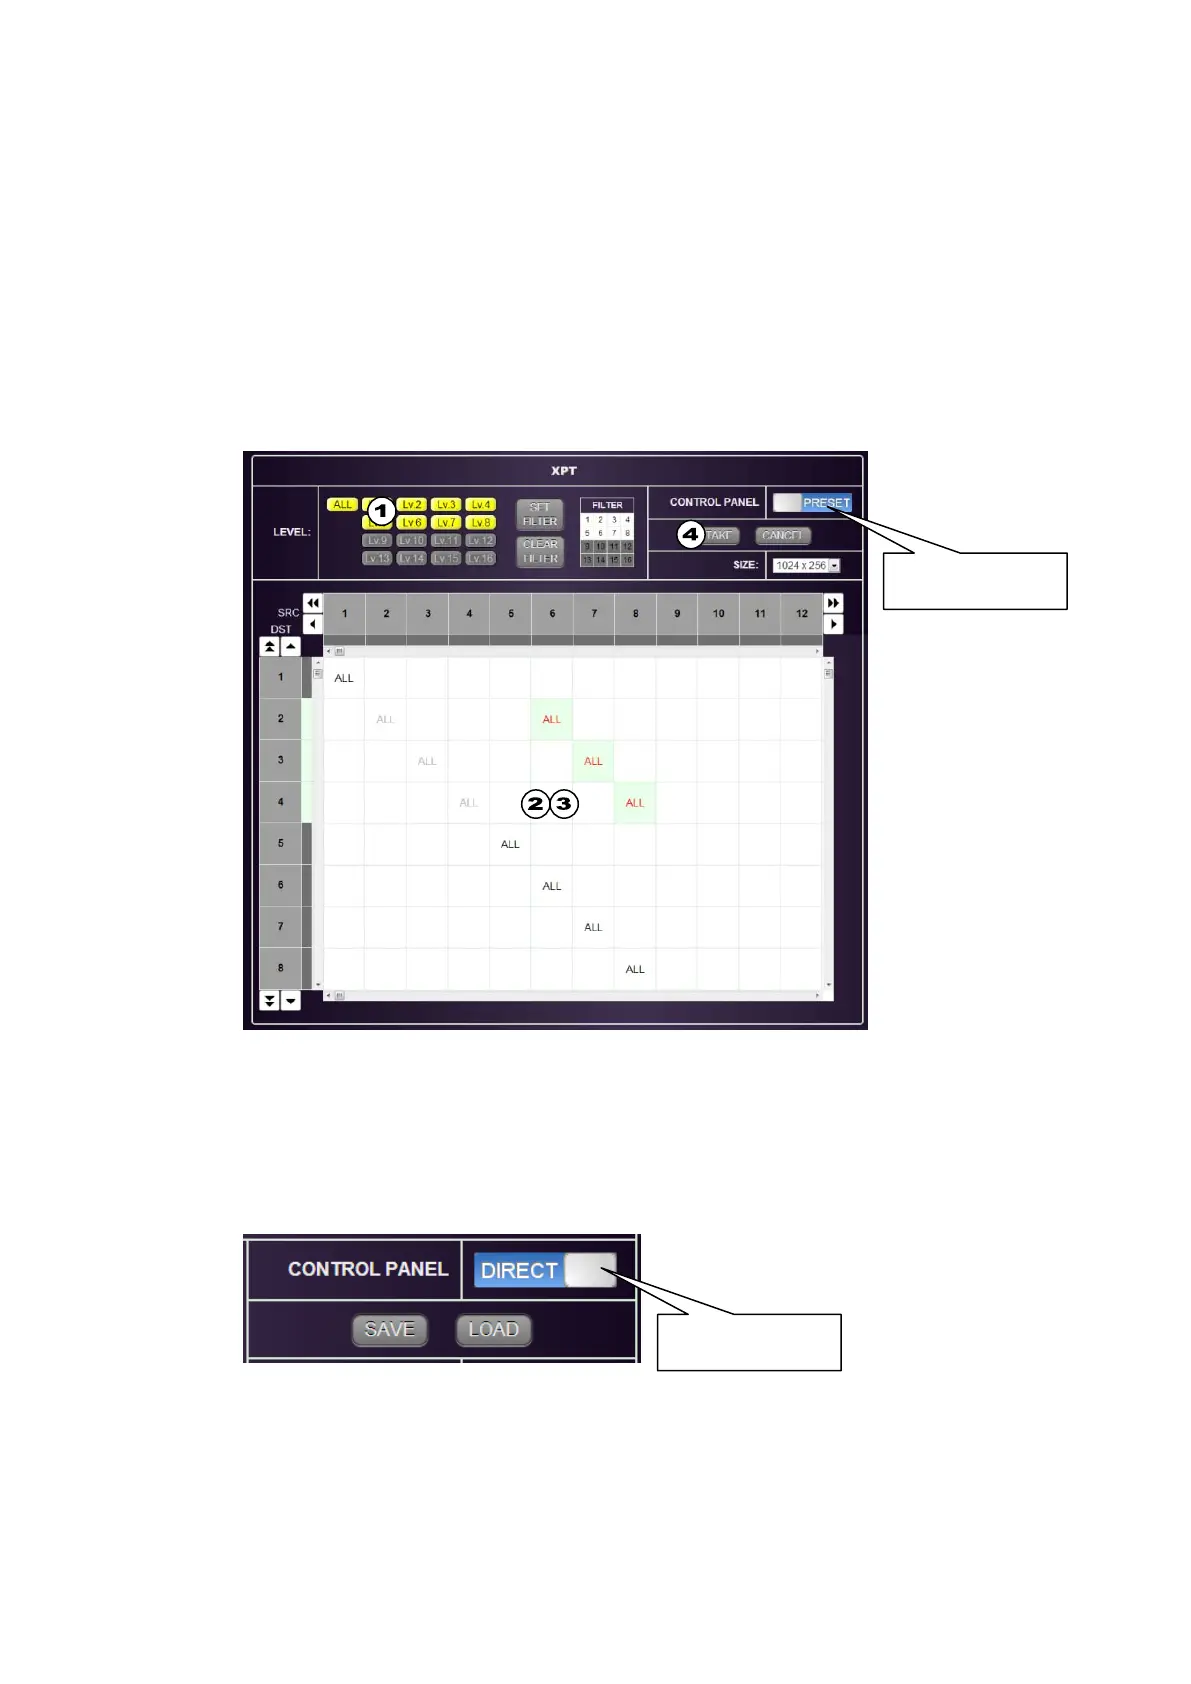
Crosspoint Switches using the TAKE function (CONTROL PANEL: PRESET)
(1) Set the desired level(s) to ON.
(2) Click to select a crosspoint, and click the crosspoint again to change the character to red .
(3) Repeat Step (2), as needed.
* Up to 256 crosspoints can be set.
(4) Click TAKE. A confirmation dialog will appear. Click OK to perform the assigned
crosspoint switches. (Clicking CANCEL clears all crosspoint settings.)
Saving and Loading Crosspoint Settings
All crosspoint selections on the router can be saved as a set of setting data, which is stored in
the switcher and can be loaded, as needed.
(1) Set CONTROL PANEL to DIRECT.
(2) To save the current crosspoint settings, click SAVE. To load the stored data, click LOAD.
setting: PRESET
setting: DIRECT

 Loading...