EasyManua.ls Logo

Austro Engine E4 Series - Acceptance Criteria for Alternator Bench Tests; Inspection of Alternator E4 A-91-400-000 and Carbon Brushes; Special Tools; Remove the Brush the Holder Assembly

Default Icon
658 pages
Print Icon
To Next Page IconTo Next Page
To Previous Page IconTo Previous Page
Loading...
E4 Series
Maintenance Manual
Electrical Power
Page 226
E4.08.04
Rev. 29
24-31-00
01-Jul-2020
3. Acceptance criteria for alternator bench tests
For alternator tests on an alternator test bench, the following acceptance criteria apply:
Alternator [RPM]
Voltage [V]
Load Current [A]
Hold time of load
Currents [s]
9700 (+/-50)
28 (+/- 0,5)
>0<5
30
5200 (+/-50)
27.7 (+/- 0,5)
>35<40
30
9700 (+/-50)
27.7 (+/- 0,5)
>65<72
30
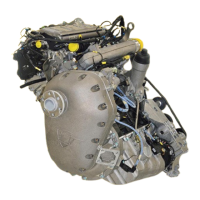
4. Inspection of Alternator E4A-91-400-000 and Carbon Brushes
This section lists the steps to disassemble the alternator and its components (e.g. brush holder) and
to measure the length of the carbon brushes.
This section contains also the criteria for replacing the Brush Holder assembly E4A-91-410-000.
A. Special Tools
Number
Description
Dimensions
1
Screw Driver
Slotted Screw Driver (~2mm)
2
Sliding Caliper
---
3
Multimeter
---
4
Torx
T20
Wrench
(hexagonal)
Size 7
5
Wrench
(hexagonal)
Size 13
6
Wrench
(hexagonal)
Size 8
B. Remove the Brush the Holder Assembly
Detail Steps/Work Items
Key Items/References
(1)
Remove all black covers of the terminals
B+/W/L.
Refer to Fig. 24 - 32.
Refer to Fig. 24 - 33 and Fig. 24 - 34.
Use Torx T20 or with wrench
(hexagonal) size 7, depending on the
screwing.
(2)
Remove the two screws/hexagon nuts G and
G2.
(3)
Remove the plastic cover on the backside of
the alternator.
(4)
Remove R1, R2 and R3.
Remove the hexagon nut T2
(R1 screw/washer + spacer).
Refer to Fig. 24 - 35.
Use wrench Torx T20, and Terminal
Screw T2.
(5)
Carefully remove Brush Holder Assembly.
Refer to Fig. 24 - 36.

Table of Contents

Other manuals for Austro Engine E4 Series

Related product manuals