EasyManuals Logo

Fujitsu PRIMERGY RX2540 M6 Upgrade And Maintenance Manual

Fujitsu PRIMERGY RX2540 M6
680 pages
To Next Page IconTo Next Page
To Previous Page IconTo Previous Page
Page #137 background imageLoading...
Page #137 background image
â–
Lay the 3.5-inch HDD into the 3.5-inch installation frame as shown.
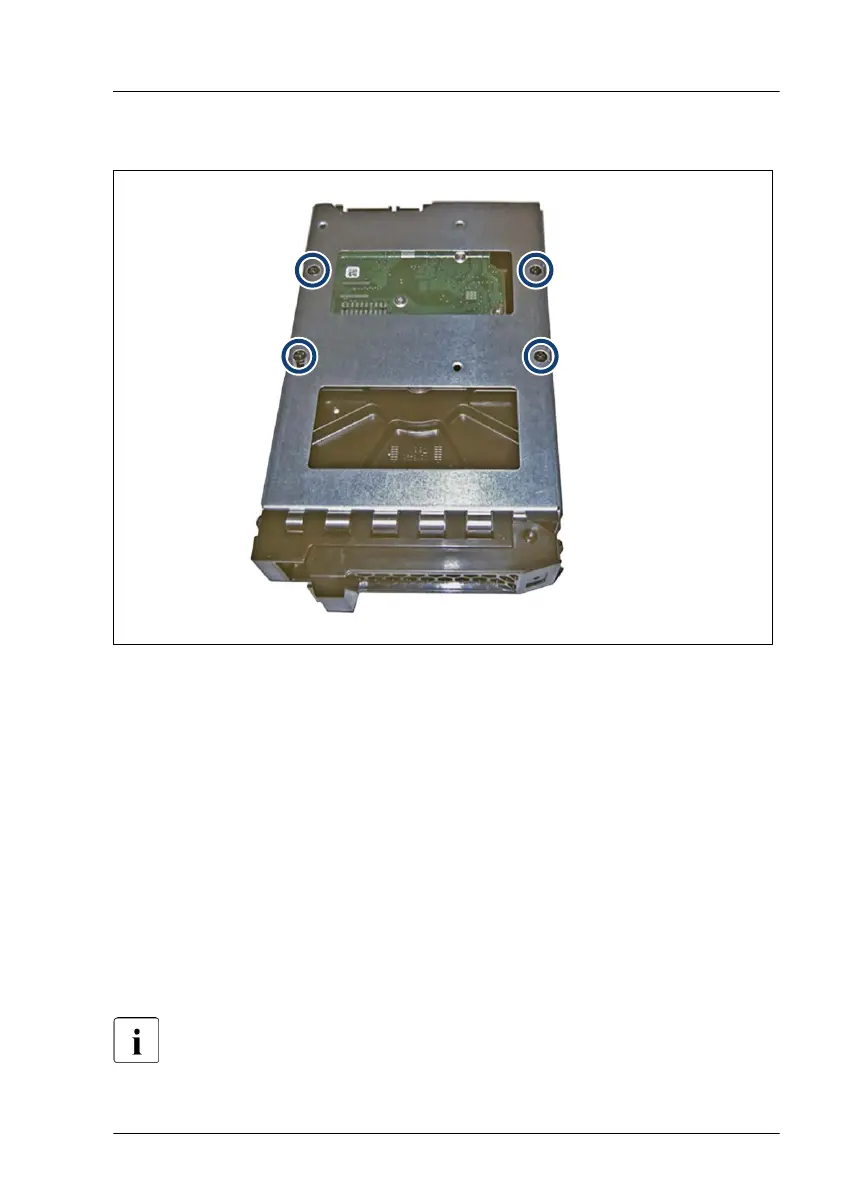
Figure 49: Installing the 3.5-inch HDD in the 3.5-inch installation frame (B)
â–
Fasten the 3.5-inch HDD with four screws.
Removing a 3.5-inch HDD from a 3.5-inch installation frame
â–
Please proceed in reversed order
.
Concluding steps
No steps needed.
7.3.2
2.5-inch HDD/SSD and 2.5-inch installation frame
Installing or removing the installation frame is only necessary for Japan.
Hard disk drive (HDD) / solid state disk (SSD)
RX2540 M6 Upgrade and Maintenance Manual 137

Table of Contents

Other manuals for Fujitsu PRIMERGY RX2540 M6

Questions and Answers:

Question and Answer IconNeed help?

Do you have a question about the Fujitsu PRIMERGY RX2540 M6 and is the answer not in the manual?

Fujitsu PRIMERGY RX2540 M6 Specifications

General IconGeneral
Memory Slots32 DIMM slots
Form Factor2U rack server
ProcessorIntel Xeon Scalable Processors (3rd generation)
StorageUp to 24 x 2.5" or 12 x 3.5" drives
RAID SupportRAID 0, 1, 5, 6, 10
Network4 x 1GbE ports (onboard), optional 10/25GbE
Power Supply800 W, 1200 W, 1600 W
Expansion SlotsUp to 8x PCIe Gen4 slots
Operating System SupportWindows Server, Red Hat Enterprise Linux, SUSE Linux Enterprise Server, VMware
ManagementiRMC S5

Related product manuals