▶
If applicable, "Installing the front cover with lock" on page 69
.
Software configuration
To install the ESXi to the M.2 SSD, see "Software configuration" on
page 501.
16.7 Dual microSD 64GB Enterprise
16.7.1
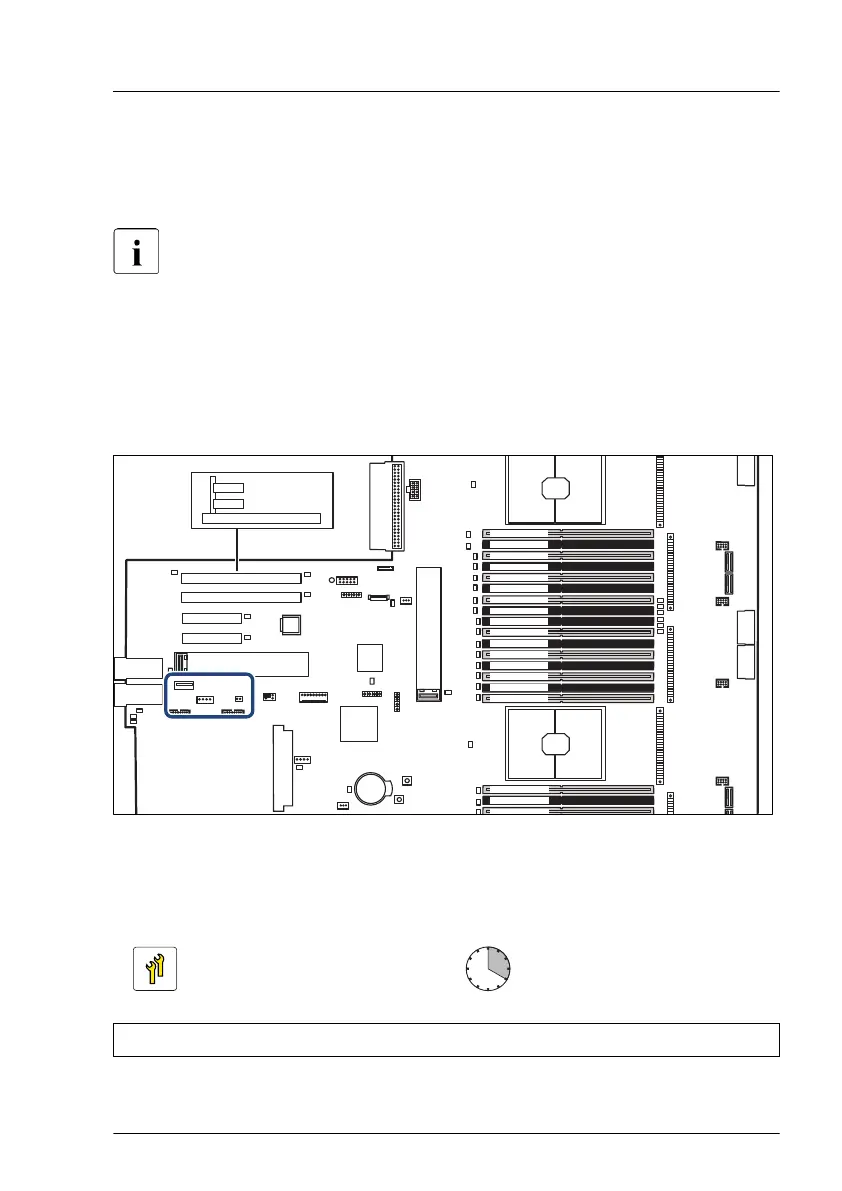
Position of the Dual microSD 64GB Enterprise
INDICATE
CSS
TPM
Battery
Slot 8 (CPU 2) Riser slot 2
Rear Serial
Front Panel
PSU2
JP3
1
JP2 JP1
1
2
Micro
SD
3.0
SSD2
M.2
HDD LED2
Slot 7 (CPU2)
Slot 6 (CPU2)
Front VGA
Slot 5 (CPU2)
nagement
Internal USB3.0/
USB 3
Rear VGA
CPU 2
CPU 1
CPU 1 DIMM 2A
CPU 1 DIMM 1D
CPU 1 DIMM 1C
CPU 1 DIMM 2C
CPU 1 DIMM 1A
CPU 1 DIMM 2D
CPU 1 DIMM 2B
CPU 1 DIMM 1B
CPU 2 DIMM 1R
CPU 2 DIMM 2N
CPU 2 DIMM 2P
CPU 2 DIMM 1P
CPU 2 DIMM 2R
CPU 2 DIMM 1N
CPU 2 DIMM 1Q
CPU 2 DIMM 2Q
CPU 1 DIMM 1G
CPU 1 DIMM 2G
SLIMLINE
4 (CPU 2)
LC2
PWR10
HDD LED3
HDD
LED1
PWR4PWR3PWR2
SLIMLINE
3 (CPU 2)
SLIMLINE
2 (CPU 1)
FAN5_SYS
FAN4_SYS
FAN3_SYS
FAN2_SYS
ROC
VROC
SMB 3
Clear RTC
PCH
Slot riser card
Riser card
Slot 10
Slot 9
Figure 352: Position on the system board
16.7.2 Installing the Dual microSD 64GB Enterprise
Upgrade and Repair Unit
(URU)
Hardware: 5 minutes
Software: 15 minutes
Tools: Phillips PH2 / (+) No. 2 screw driver (for cover 2)
System board and components
RX2540 M6 Upgrade and Maintenance Manual 505

 Loading...


