1126800 SmartPAC 2 with WPC Integration
Page 196 Chapter 3 SmartPAC 2 Keyboard, Displays
and Operating Modes
that you programmed for a sensor and/or cam channel. The cursor keys graphically move a
circular arc around this diagram. These cursor keys function in this way only when you have
selected a display to make or change timing settings. See Chapter 5 for complete instructions
on how to create a tool number and make all settings.
•
••
• RIGHT cursor key () increases the "ON" setting – moves the ON end of the arc
clockwise.
• LEFT cursor key () decreases the "ON" setting – moves the ON end of the arc
counter-clockwise.
• UP cursor key () increases the "OFF" setting – moves the OFF end of the arc
clockwise.
• UP cursor key () decreases the "OFF" setting – moves the OFF end of the arc
counter-clockwise.
Go to the next page and follow the instructions for setting timing.
NOTICE
See page 307 for information on programming multiple ON/OFF arcs.
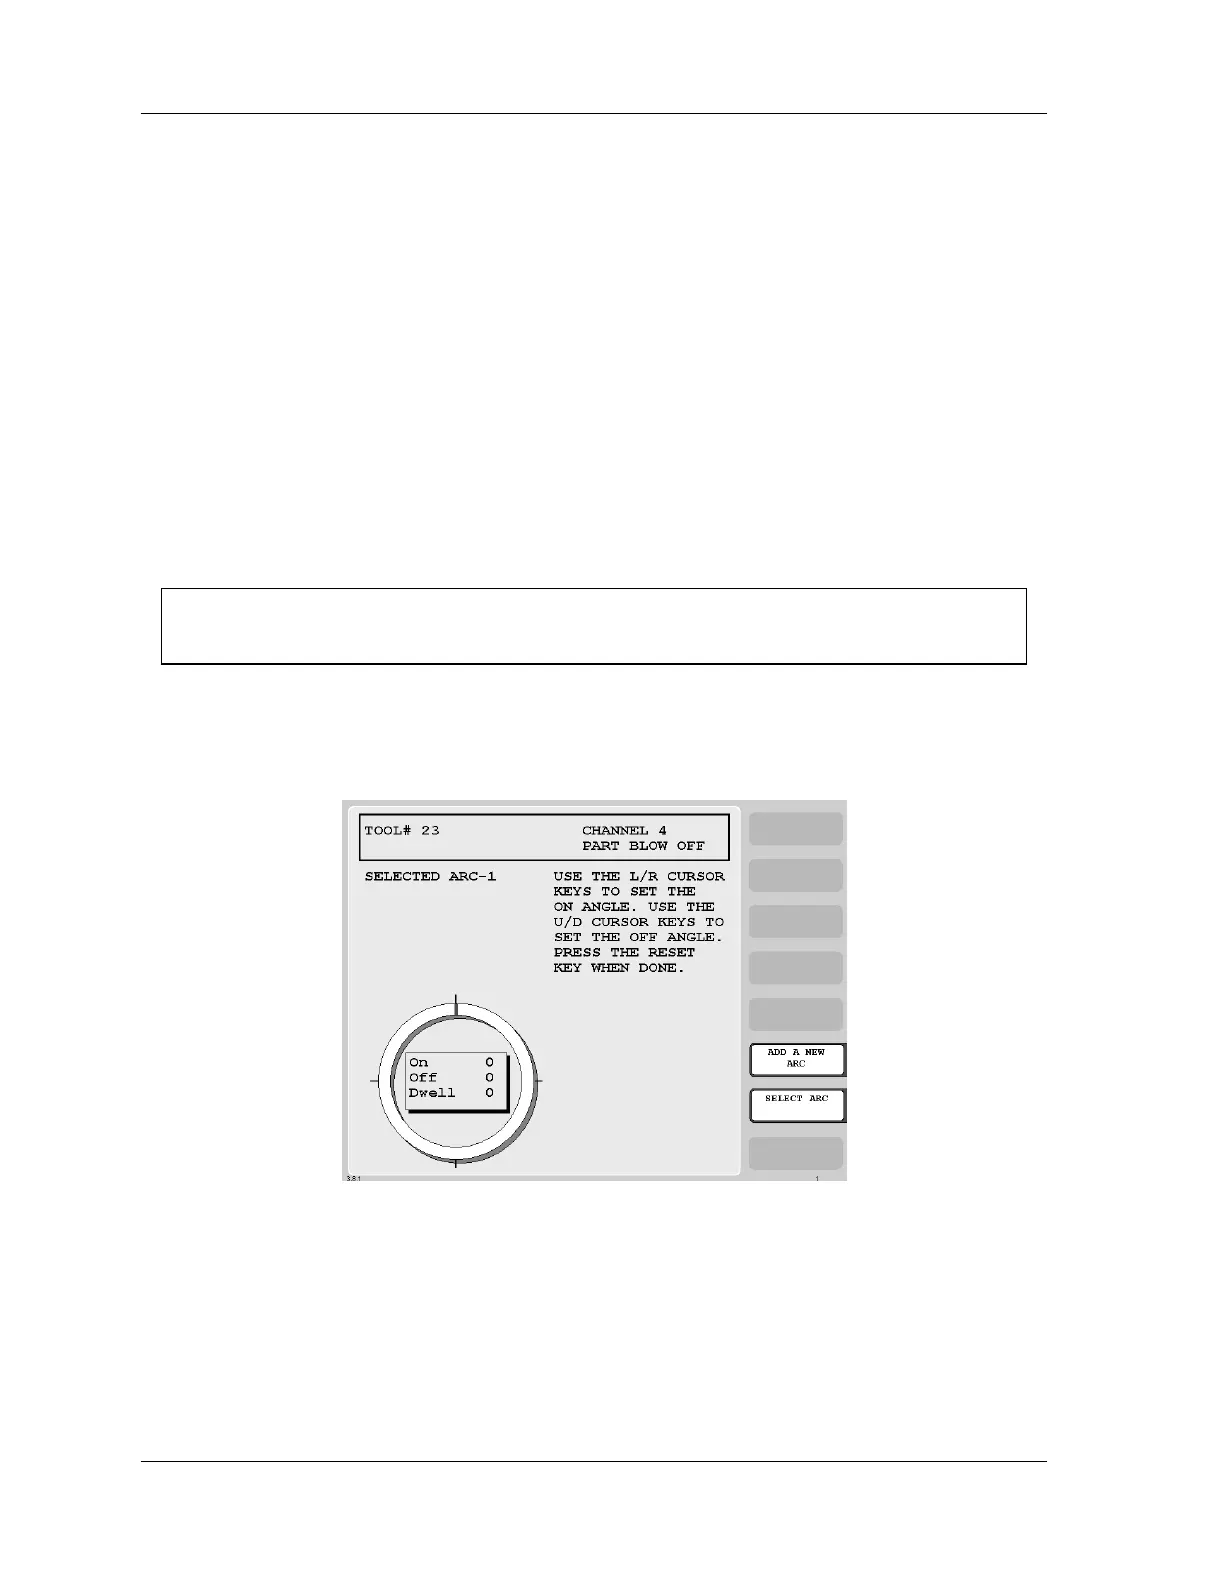
1. The following illustration shows the starting point for setting cam ON/OFF timing. The
box inside the circle diagram shows ON at 0° , OFF at 0° and “dwell” (the number of
degrees the channel is ON) is 0° .
Figure 3 - 24. Setting Cam Timing

 Loading...


