SmartPAC 2 with WPC Integration 1126800
SmartPAC 2 Initialization Mode Chapter 4 page 263
PRESS TYPE
(INITIALIZATION – SETUP NETWORK – PRESS TYPE)
SmartView remote viewing utility (see “Appendix D – SmartView,” page 455) illustrates the
press information summary with a picture of the type of press SmartPAC 2 is installed on,
gap frame or straight side. To set the type of press, highlight the item next to “Press Type.”
Press ENTER to toggle between “Gap Frame” and “Straight Side.” When the appropriate
press type appears, press RESET to exit this screen.
DIAGNOSTICS
(INITIALIZATION – DIAGNOSTICS)
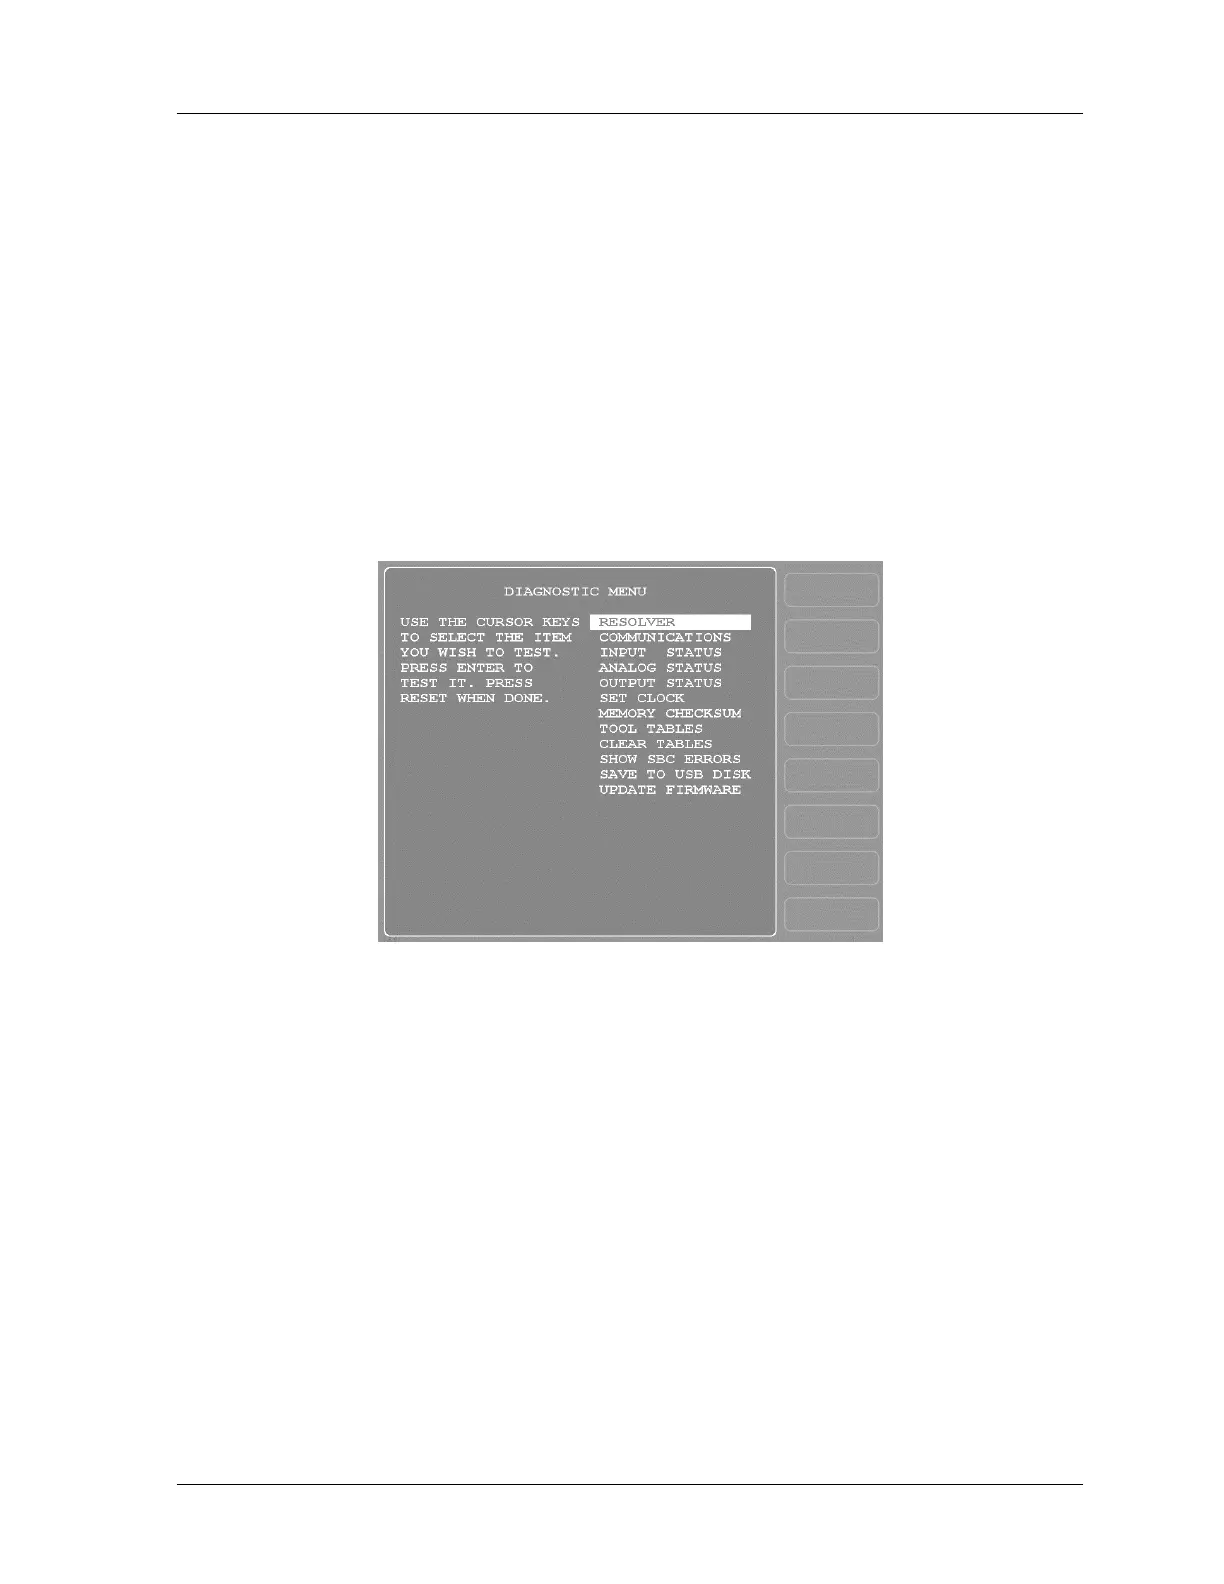
Figure 4 - 42. Diagnostics Menu
This is the screen that appears when you select DIAGNOSTICS in the Initialization main
menu. The only items you are likely to use are:
COMMUNICATIONS: view communications and run a loopback test (see next section)
SET CLOCK: set the SmartPAC 2’s internal clock to local time (see page 266)
SAVE TO USB DISK: copy information from SmartPAC 2 to a USB memory device
(see page 267)
UPDATE FIRMWARE: install revised firmware into SmartPAC 2 (see pages 266 and
453)
The other items are reserved for use when you are working with Wintriss Tech Support for
initial setup or troubleshooting.

 Loading...


