1126800 SmartPAC 2 with WPC Integration
Page 68 Chapter 2 Installing SmartPAC 2 and WPC
5. Run wires from the cam switch through flexible, liquid-tight conduit to WPC. WPC is
rated NEMA 12 (protected against dust and oil). Therefore, you must use conduit rated
NEMA 12 and make proper conduit connections to ensure NEMA 12 protection.
6. Check your wiring. You are done installing the LMCS and magnets.
Mounting and Wiring the Bar Control Enclosure
(Optional)
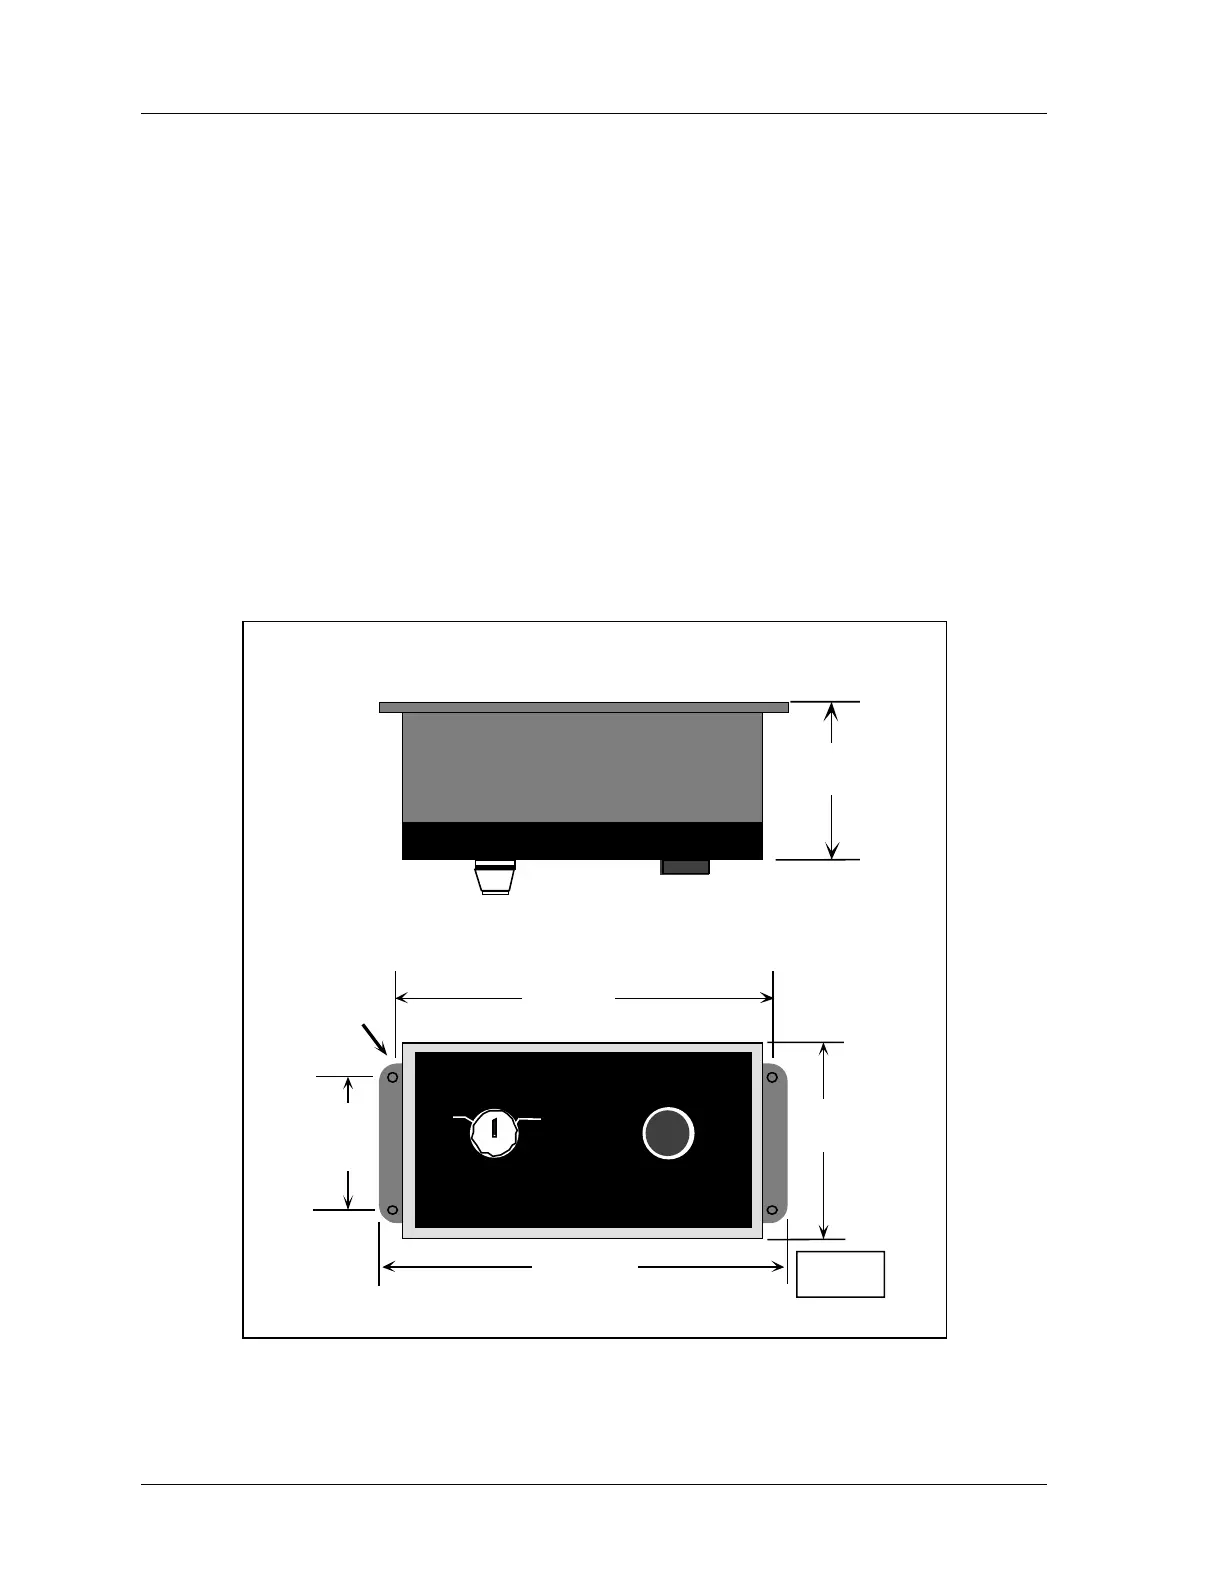
Whenever the press is in Bar mode, you will need to release the machine’s brake. Therefore,
mount the Bar Control enclosure in a place that is convenient to the operator while he is
barring the press. Make sure that the operator will not possibly block a light curtain while
pressing the BAR control operate button.
Refer to Figure 2 - 17 for dimensions. See wiring diagram Figure 3 and Table A at the end of
the manual for pinouts.
6.75
(17.15)
2places
.312
(0.79)
4 places
7.5 (19.05)
4.00
(10.16)
SELECT
ON
OFF
OPERATE
DA TA INSTRUMENTS
100 Discover
Wa
,
CTON, MA 01720 USA
®
BAR CONTROL
2.00
(5.08)
front view
xx.xx in
(xx.xx cm)
3.00
(7.62)
top view
Figure 2 - 17. Bar Control Enclosure Mounting Dimensions
(Top and Front Views)

 Loading...


