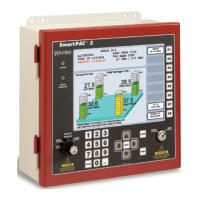
SmartPAC 2 with WPC Integration 1126800
Introduction to SmartPAC 2 Chapter 1 page 9
Settings You Can Make on SmartPAC 2
All settings are made using the keys on the SmartPAC 2 keyboard. Up to sixteen die
protection sensors can be used with SmartPAC 2 along with up to sixteen cam channels for
controlling press equipment and another sixteen sensors for in-die measurement and
monitoring the press. For complete instructions on how to make settings, see Chapter 4,
Programming. Here are settings you can make:
• Assign tool numbers for tools. You assign a tool number to your settings. This is
how you keep track of all settings you make. Every tool can also be assigned a name for
easy identification, and you can store additional reference information about each tool
and its settings. Before programming any tools, select in Initialization mode whether to
use numeric or alpha-numeric tool numbers.
• Load settings by tool number. SmartPAC 2 saves all counter settings, sensor
settings, and cam switch settings (if DiProPAC and ProCamPAC are installed) in its
electronic memory. The settings are stored by tool number. To use the settings for a tool
again, you recall them by selecting the tool number from the Tool Manager display. You
never need to make the same settings for a tool over again. You can save up to 200 tool
numbers. Settings are saved automatically as you make them. You do not have to tell
SmartPAC 2 to save settings by pressing a key or issuing a command. When you load
the stored tool number, SmartPAC 2 loads all the settings for the tool. SmartPAC 2
retains all settings for a tool even with power off.
• Record tool information for each tool number. With this option you can record
up to 30 characters of information for each tool, such as installation notes.
• Protect settings with lockout and optional password security. Using
SmartPAC 2’s Security Access menu in Initialization mode, you can lock many of the
settings in Run mode or, with the password option, require a password in order to change
them. This prevents anyone from changing settings in Run mode without the
Program/Run key, or changing them at any time without the necessary password. To
prevent unauthorized changes to the SmartPAC 2 setup, you can require a special
password in order to access the Initialization menu.
• Set Brake Monitor. You set the brake monitor stop time limit to a certain value (in
milliseconds), that is longer than the actual stopping time. This extra time compensates
for normal brake wear. When the stop time reaches the stop time limit, the brake monitor
disables the press from further usage. This tells you that your brake has been worn to a
point where it needs servicing. The brake monitor also flashes a brake warning light
when the stopping time of the press gets within 10 milliseconds of the stop time limit.
This allows you to schedule maintenance on the brake before the situation gets to the
point where the press will not run.
• Set counters. The stroke counter increments at each press cycle. The good parts
counter counts only "good" parts if the die protection and/or tonnage monitoring option
does not generate a fault. SmartPAC 2 has three batch counters that can be set to either
top-stop the press or signal programmable limit switch (PLS) outputs when their presets
 Loading...


