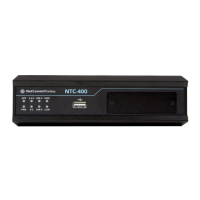
1.3.2.7 Connecting serial devices
The NTC-400 Series Router features one RS-232 serial port with RX and TX signals located on the terminal block as shown
below.
Figure 5 – Serial pins on terminal block
1.3.2.8 Connecting to the network via Ethernet
The NTC-400 Series Router provides three RJ-45 10/100/1000 Mbps Ethernet ports with auto-MDIX. WAN/LAN1 may be used
as either a LAN port or a WAN port. By default, it is configured as a LAN port. See the WAN & Uplink section for details on
configuring a WAN connection.
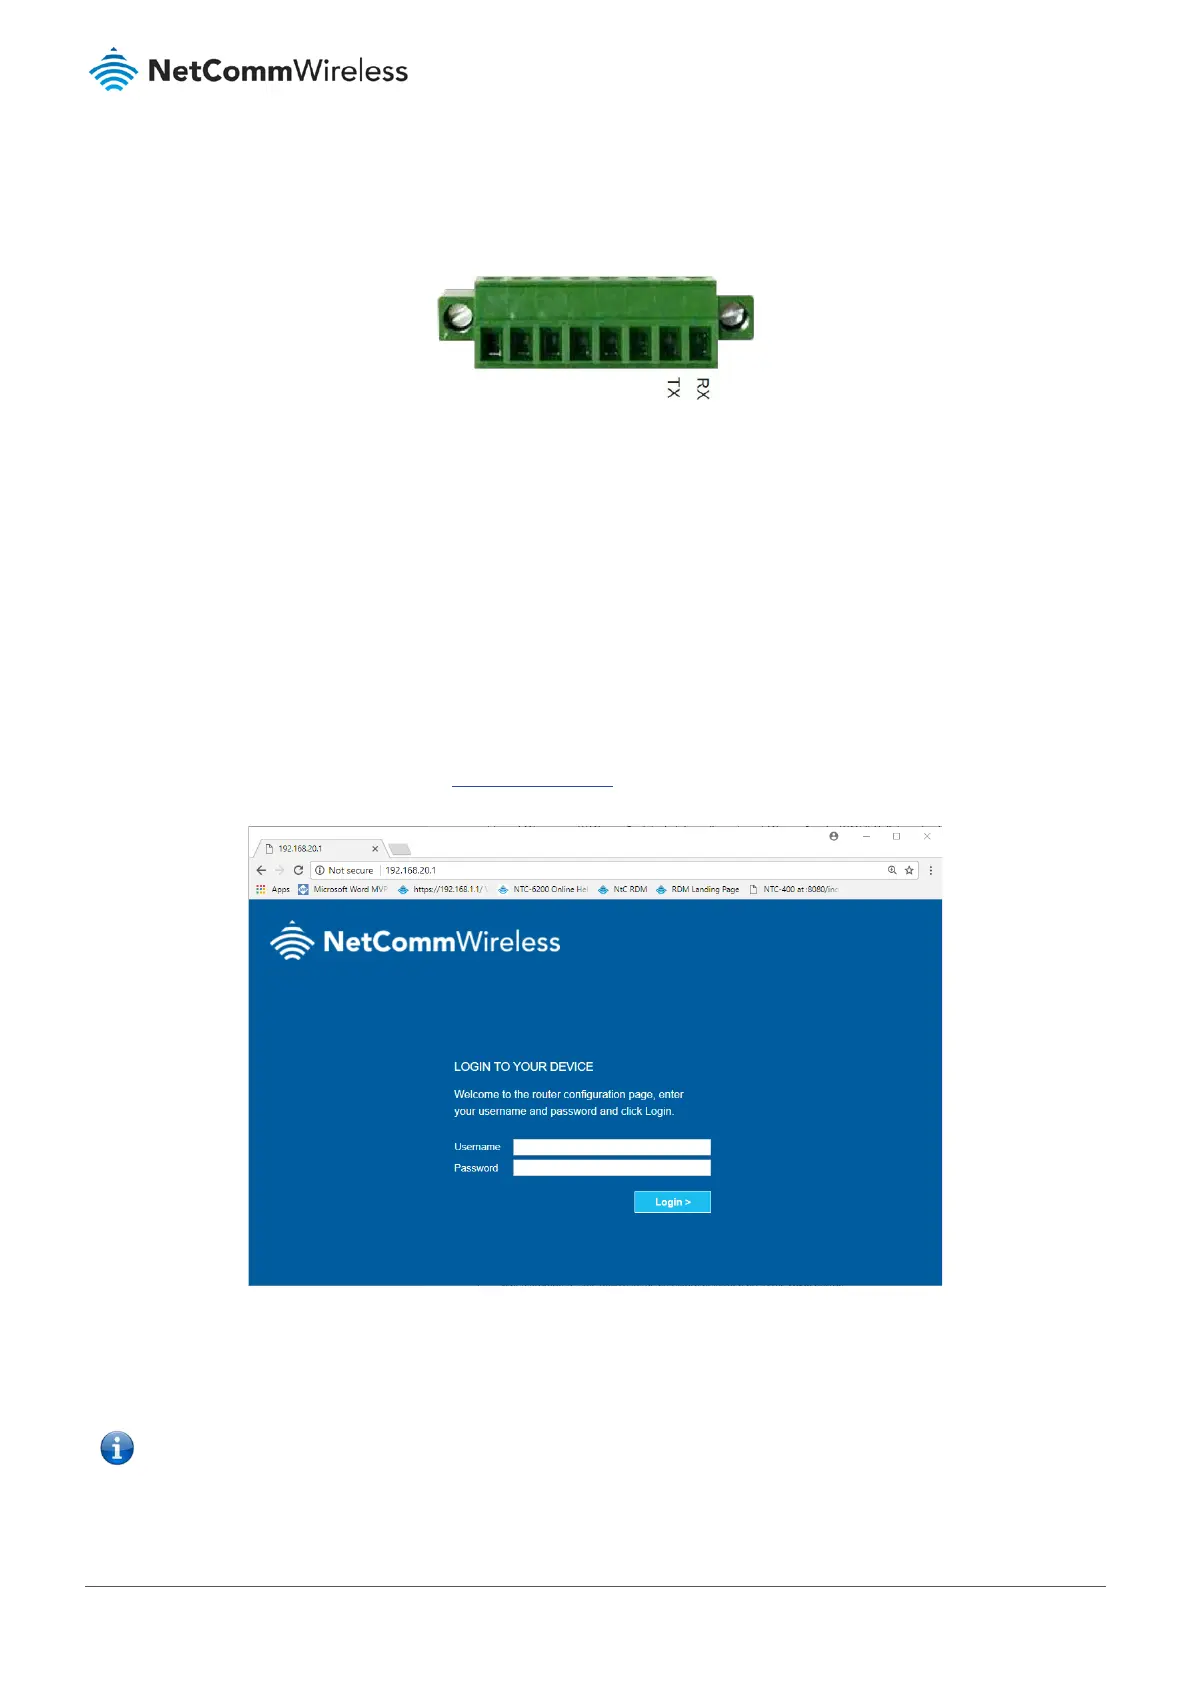
1.4 Logging on to the web interface
When all components have been connected, the unit has been powered up and the client PC is connected either by Ethernet
or WiFi, you can access the web interface for configuration of the NTC-400 Series Router. To access the web interface:
1 Open a web browser and navigate to: http://192.168.20.1
Figure 6 – NTC-400 Series Router Login screen
2 When prompted, type admin in the password field then press the Login button.
The web interface is displayed.
Note – We highly recommend that you secure the WiFi networks upon initial installation and change the password used to access the
web interface.