3 Click GRE Tunnel Enable and set the Maximum number of Concurrent GRE Tunnels
Item Notes Description
GRE Tunnel
Checkbox, disabled by
default.
Check
Enable
to activate the GRE functionality.
Max. Concurrent
GRE Tunnels
32 is the default setting.
32 is the maximum
number.
Specify the maximum number of simultaneous GRE
tunnel connections.
Note
– The maximum number of
supported tunnels may vary depending on
your model.
Save Button
Click
Save
to save the setting.
Undo Button
Click
Undo
to cancel the changes to settings.
Table 166 – Enable GRE Tunnel
6.1.5.2 Create/Edit GRE Tunnel
When
Enable
is selected, the buttons on the GRE Tunnel List section become active.
Click on the Add button to create a new client in the list. You can create up to
the maximum number of concurrent GRE
tunnels that you had set previously in the
Configuration
section, see above
.
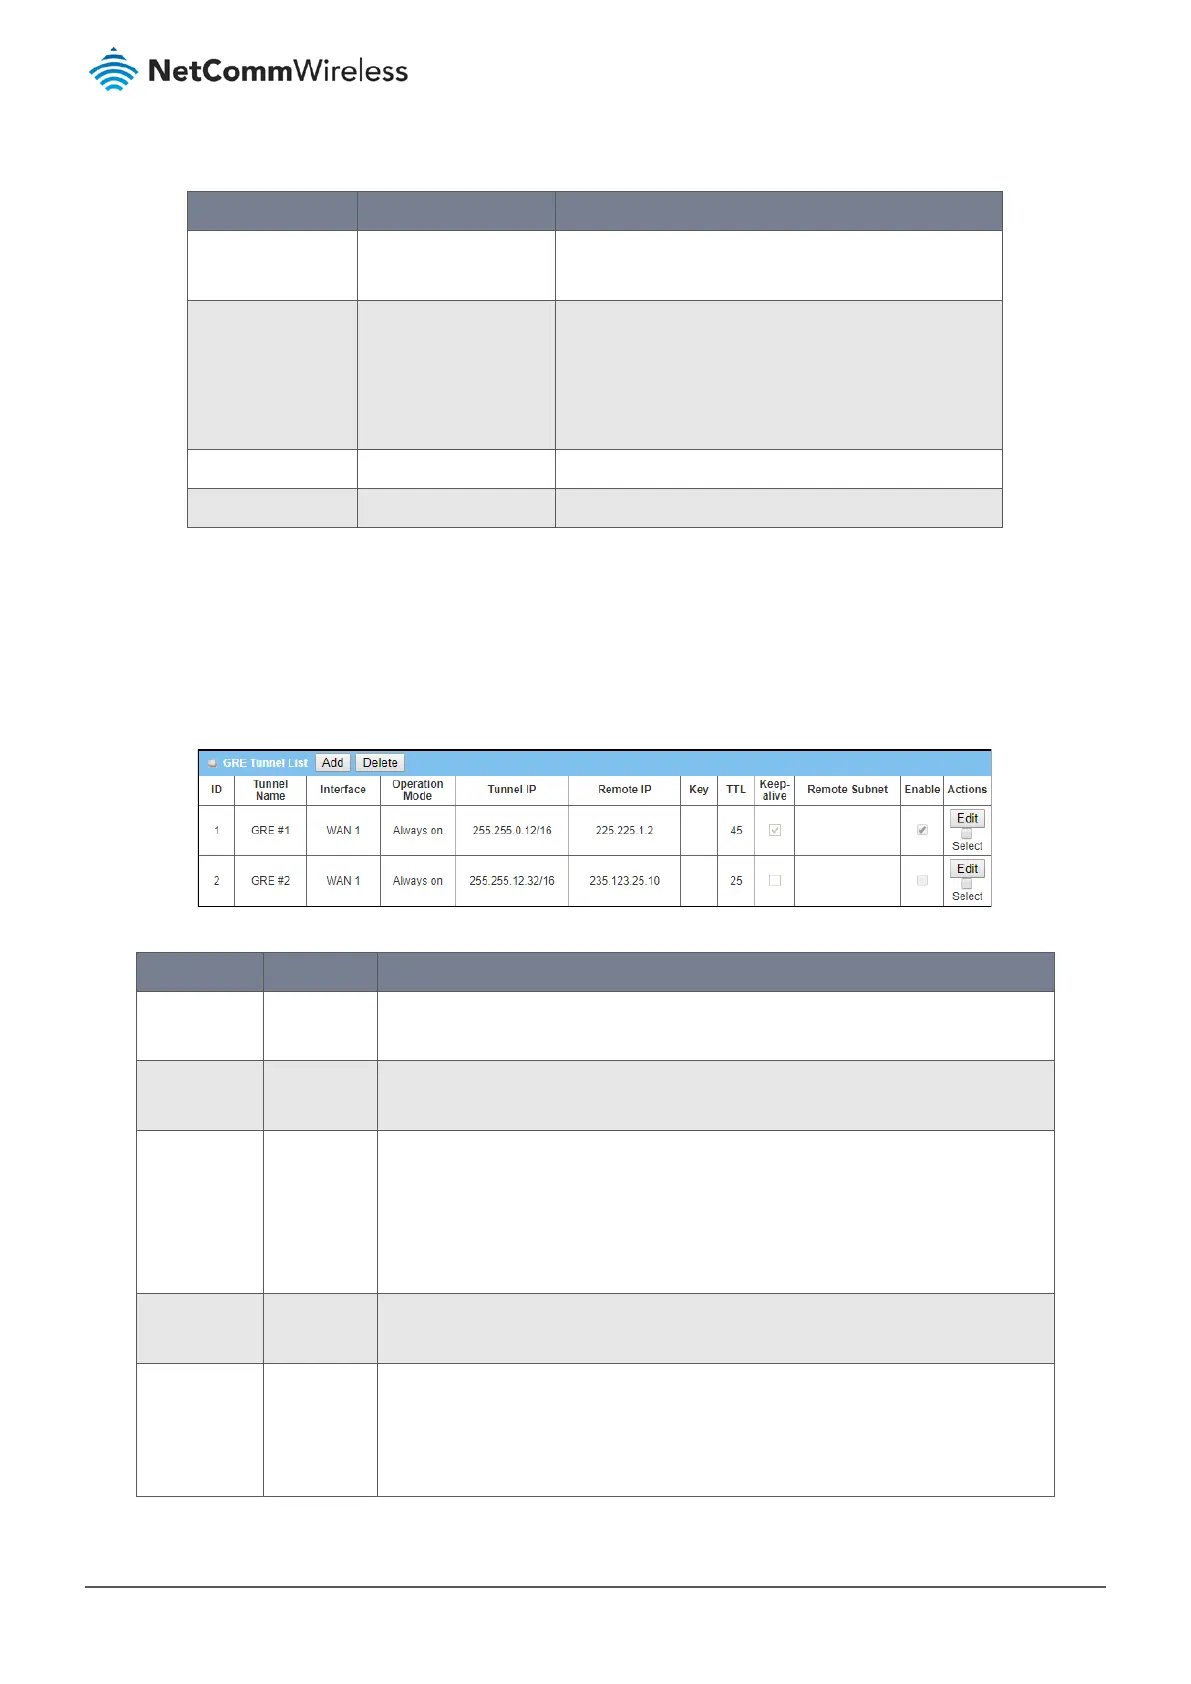
Figure 276 – GRE Tunnel List
Item Notes Description
Add
Button Click the
Add
button in the GRE Tunnel List to open the
GRE Rule Configuration
screen where you can create new GRE Tunnels, see next section.
Delete
Button Click
Select
in the
Actions
column for one or more GRE Tunnel descriptions
and then click the
Delete
button to permanently remove them from the list.
Client details
Fields in
row.
The following details are displayed for each client:
ID number, Tunnel Name,
Interface, Operation Mode, Tunnel IP, Remote IP, Key, TTL, Keep-alive status,
Remote Subnet address
, and
Enable/Disabled status
These are all set in the
GRE Rule Configuration window
. See the next section for
details regarding these settings.
Delete
Button Click
Select
for the GRE Tunnel that you want to permanently delete and then
click the
Delete
button.
Enable
Button Click the
Edit
button to select Tunnel
Enable
in the
GRE Rule Configuration
window
.
Note that you can uncheck
Enable
rather than permanently Delete, this will
allow you to retain the user details while disabling its access to the PPTP client.