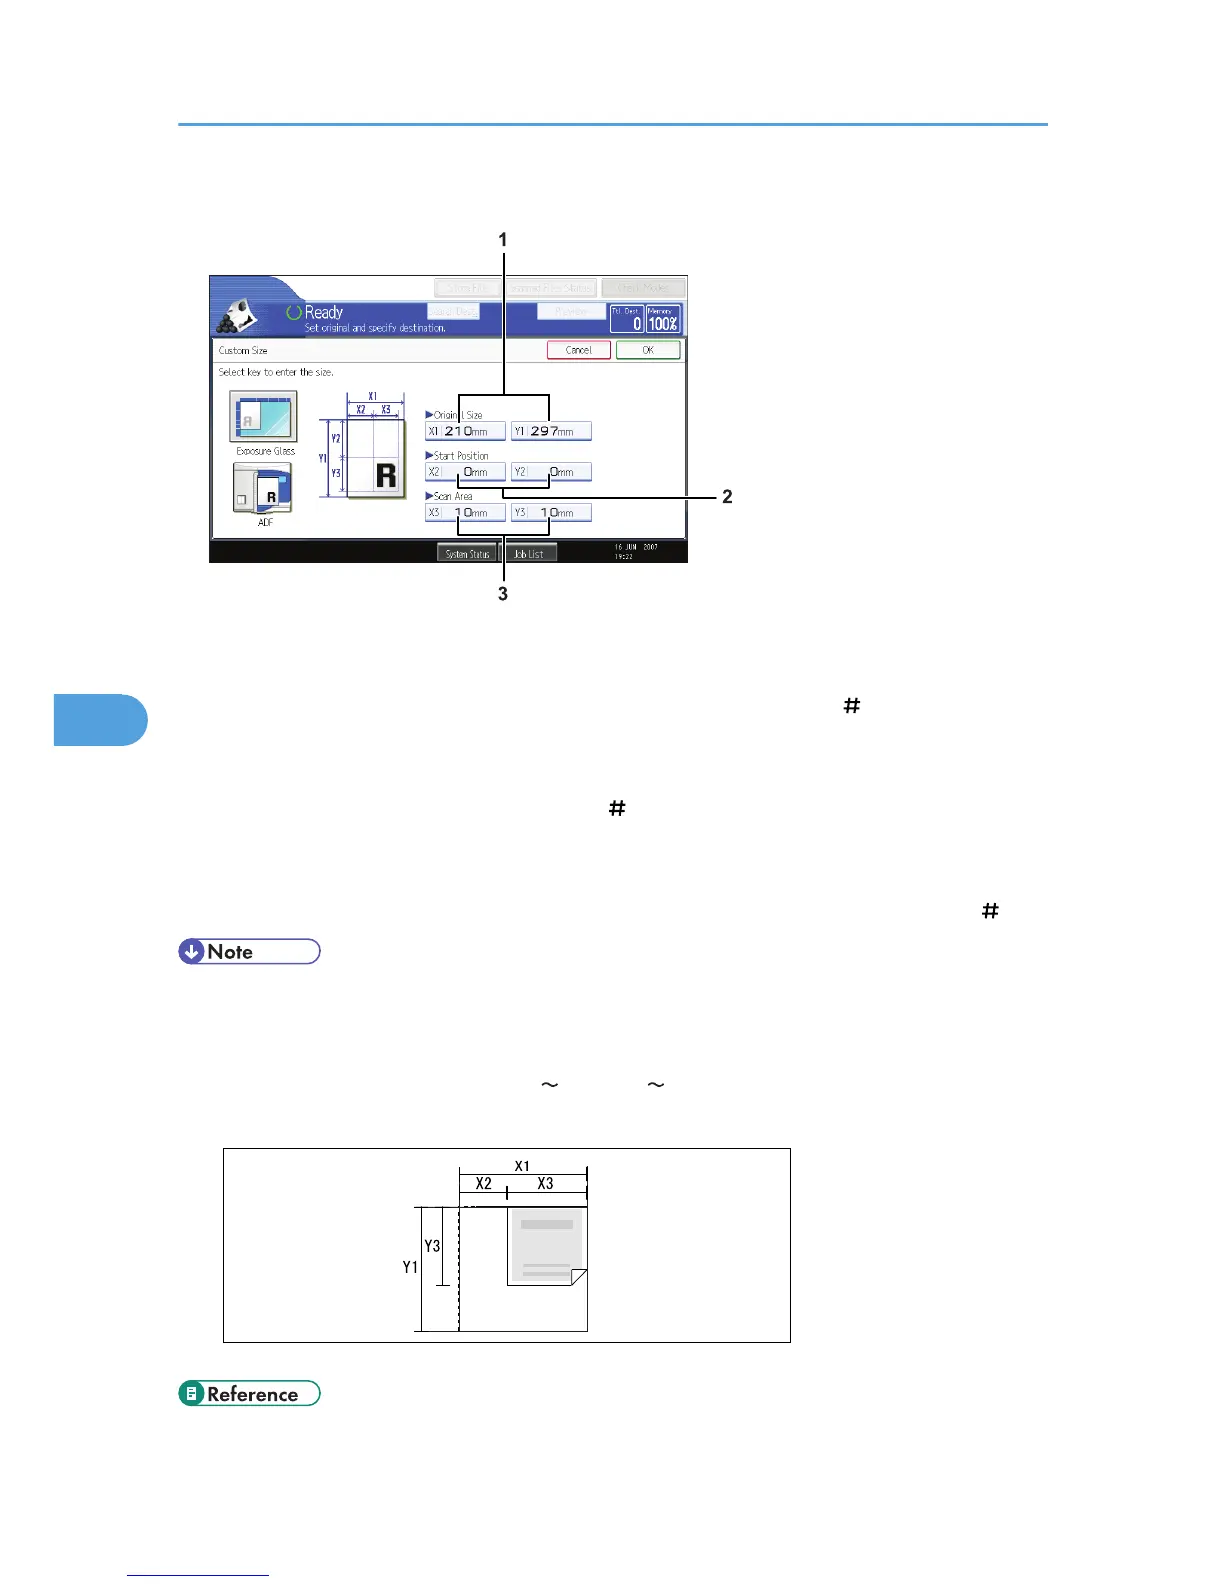
1. Original Size (X1 and Y1)
Specify the length and width of the original.
Enter the actual width and length in [X1] and [Y1] respectively, and then press the [ ] key.
2. Start Position (X2 and Y2)
Set Start Position to 0 mm (0 inch).
Enter "0" in both [X2] and [Y2], and then press the [ ] key.
3. Scan Area (X3 and Y3)
Specify the same values as Original Size (X1, Y1).
Enter the same values in [X3] and [Y3] as Original Size (X1 and Y1 respectively), and then press the [ ] key.
• For X1 and Y1, you can specify 140 mm (5.5 inches) or larger.
• To scan an original that is smaller than 140 mm (5.5 inches), configure the settings as though you
were scanning part of an original that is larger than 140 mm (5.5 inches). For example: to scan a CD
label on the exposure glass, specify X1 X3 and Y1 Y3 based on the chart below. For details about
scanning procedures, see "Setting procedure of a custom size when scanning part of an original".

 Loading...
