4. Select Properties.
5. Select Use the following IPv6 address. The option for "Use the following DNS server
addresses" is automatically selected.
6. Set the IP address. If the IP address and subnet mask fields:
▪ Contain values: Record the IP address, subnet mask, default gateway, and DNS servers to
use in Step 3: Configure the LAN settings of the instrument (on page 8-49).
▪ Are blank: In the IP address field, enter 192.168.1.100. In the subnet mask field, enter
255.255.255.0. These are used to configure the LAN settings of the instrument.
7. Click OK to close the Internet Protocol (TCP/IP) Properties dialog box.
8. Click Close to close the Ethernet Properties dialog box.
9. Close the Network Connections window.
Step 3: Configure the LAN settings of the instrument
These steps assume that you are making all the settings in the order shown here. If you only change
one or a few settings, be aware that you need to apply the settings before they are in effect. To apply
the settings, from the LAN CONFIG menu, select APPLY_SETTINGS > YES, and then press the
ENTER key.
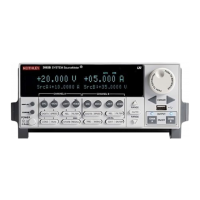
To configure the 2600B using the front panel:
1. Press the MENU key to display the MAIN MENU.
2. Use the navigation wheel to select LAN. The LAN CONFIG menu is displayed.
3. Change the IP address assignment method:
a. Select CONFIG > METHOD > MANUAL, and then press the ENTER key.
b. Press the EXIT (LOCAL) key once to return to the LAN CONFIG menu.
4. Enter the IP address using the LAN CONFIG menu:
a. Select CONFIG > IP-ADDRESS.
b. Refer to the recorded computer's IP address (Step 1: Identify and record the existing IP configuration
(on page 8-47)). A portion of the computer's IP address is used as a base for the instrument's unique ID.
Only the last three numbers (after the last decimal point) of the IP address differ between the computer
and the instrument. If the subnet mask is 255.255.255.0, the last three digits can be any value
from 1 to 255.
For example, the Internet Protocol (TCP/IP) Properties dialog box shows that the computer's IP address
is 192.168.1.100 (see the figure titled "Internet protocol (TCP/IP) Properties dialog box" in Step 2:
Disable DHCP to use the existing computer IP address (on page 8-48)). A unique IP address for the
instrument might be 192.168.001.101.
The IP address of the instrument can have leading zeros, but the IP address of the computer cannot.
 Loading...
