11 System Settings
348
System Settings
11
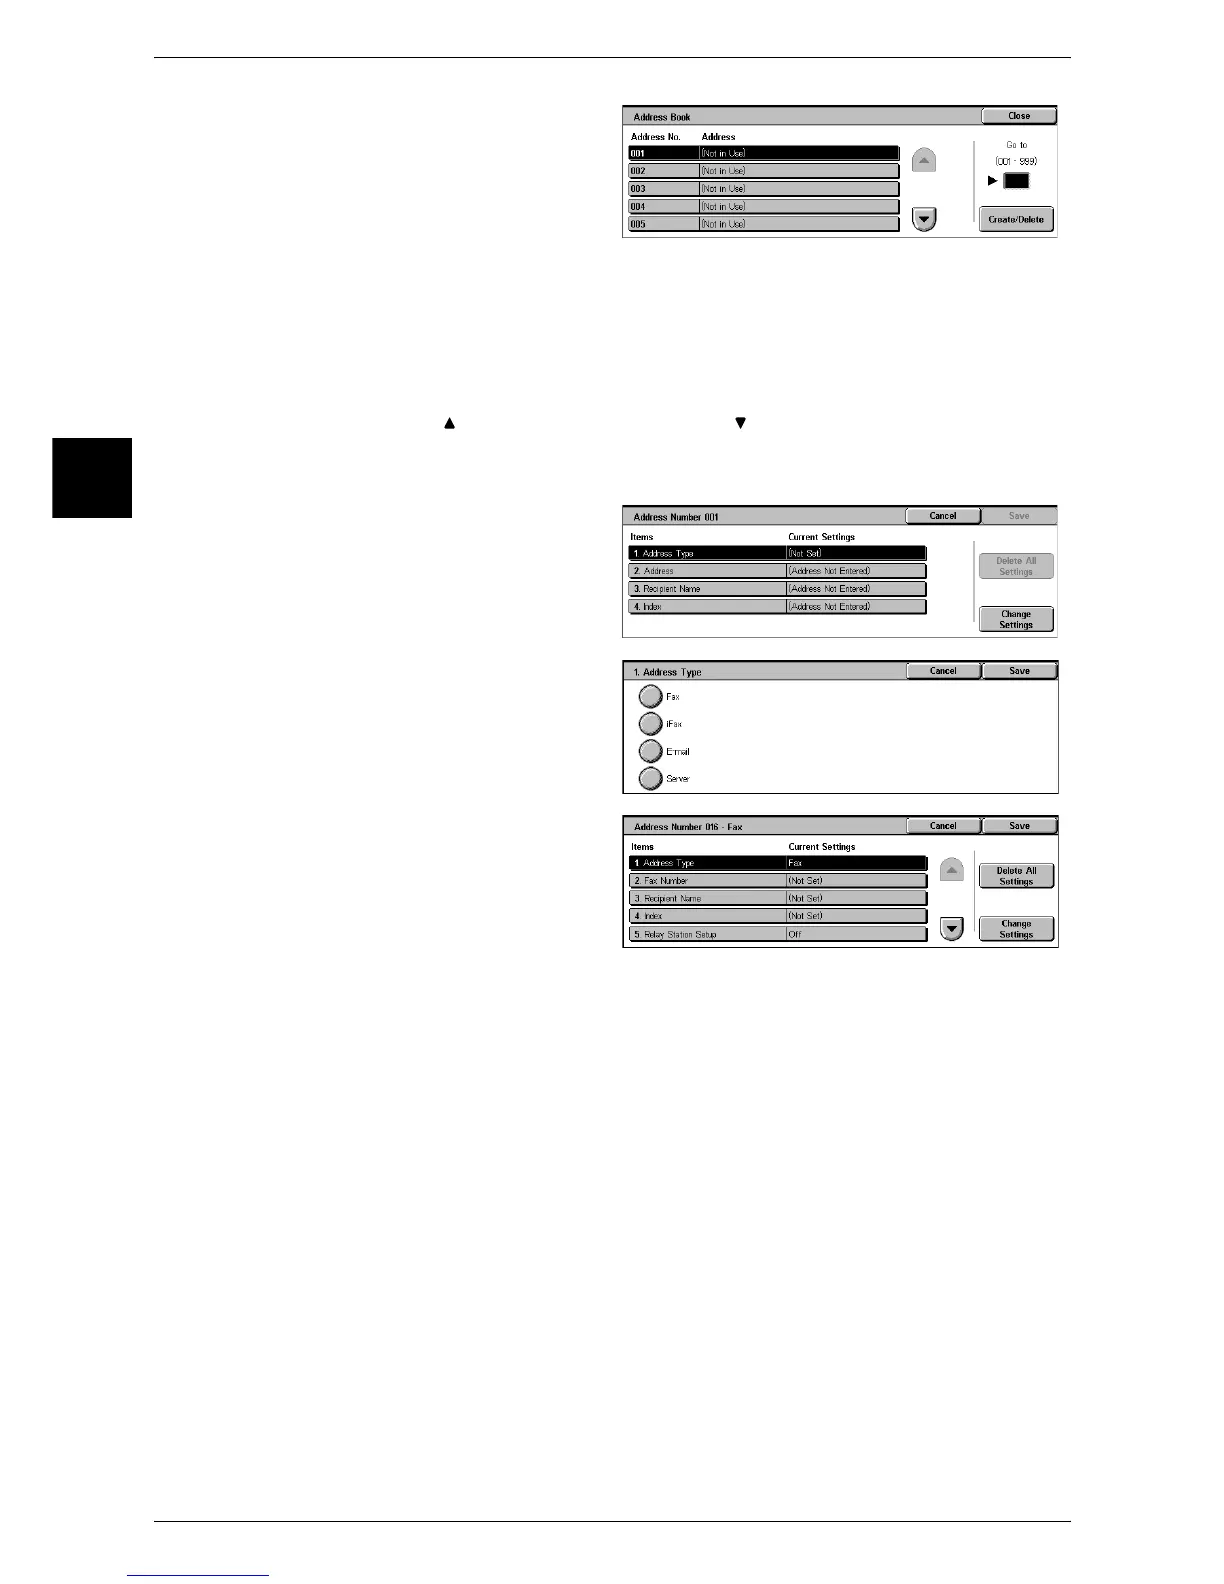
1 Select [Address Book].
Note • To display the [Address Book]
screen, press the <Log In/
Out> button and enter the
user ID, and then select
[System Settings] J [Setup
Menu] J [Address Book]. If
[Setup Menu] appears in the
[All Services] screen, select
[Setup Menu] J [Address
Book].
2 Press the abbreviated number you want to register, and select [Create/Delete].
Note • Select [ ] to return to the previous screen or [ ] to move to the next screen.
• By entering a 3-digit number with the numeric keypad, you can specify the abbreviated
number directly.
3 Select [Address Type], and select
[Change Settings].
4 Select the address type, and select
[Save].
5 Select the item to be set, and
select [Change Settings].
6 When the settings are completed,
select [Save].
When selecting [Fax] as the address type
The following items appear.
z
Address Type
z
Maximum Image Size
z
Fax Number
z
Delayed Start
z
Recipient Name
z
Remote Mailbox
z
Index
z
F Code
z
Relay Station Setup
z
Relay broadcast
z
Communication Mode
z
Billing - Day Time
z
Resolution
z
Billing - Night Time
z
Cover Note
z
Billing - Late Night Time

 Loading...
