EasyManuals Logo

Fujitsu PRIMERGY RX2540 M6 Upgrade And Maintenance Manual

Fujitsu PRIMERGY RX2540 M6
680 pages
To Next Page IconTo Next Page
To Previous Page IconTo Previous Page
Page #219 background imageLoading...
Page #219 background image
â–
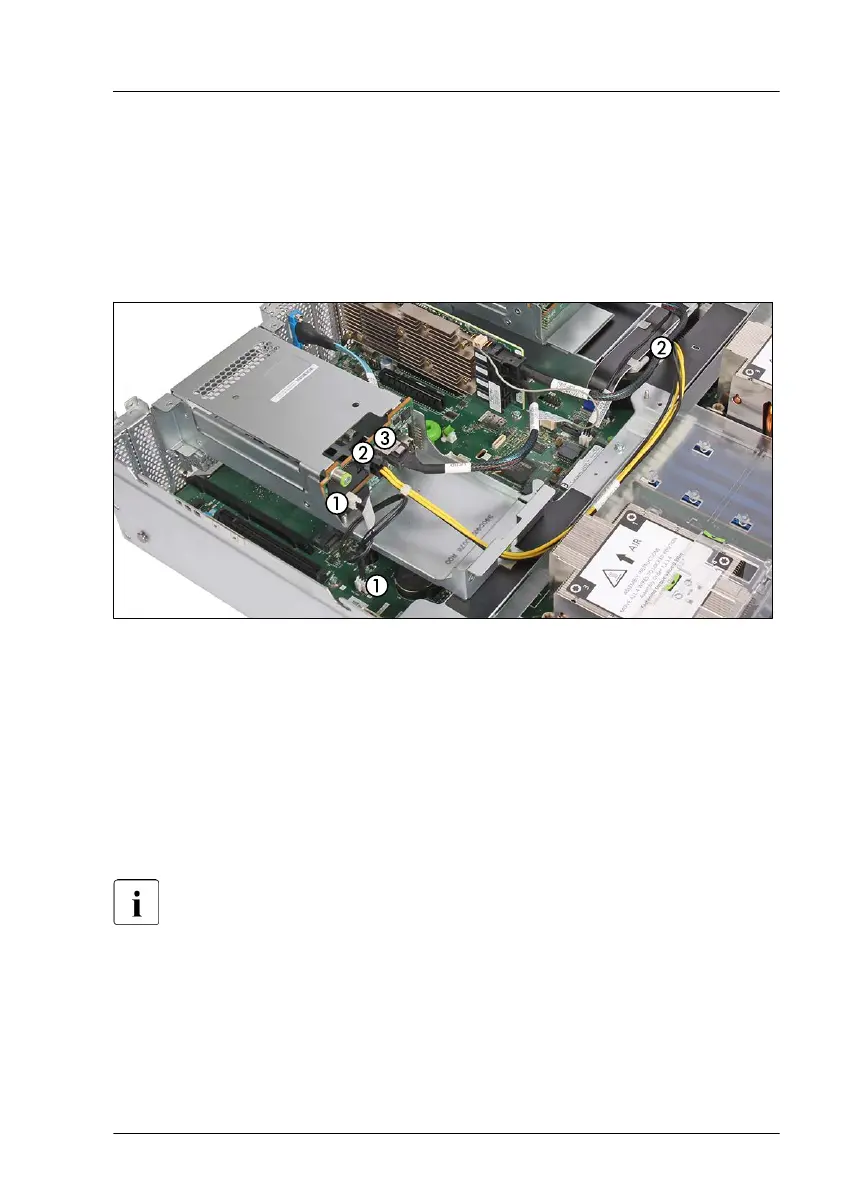
Position the rear HDD cage into the chassis (1).
â–
Push the rear HDD cage in the direction of the arrow (2).
â–
Fasten the screw (3, see circle).
â–
If applicable, install a RAID controller or a retimer card, see "Installing an
expansion card" on page
255
.
Figure 119: Connecting the cables to the rear HDD backplane (example with SATA cable)
â–
Connect the following cables to the rear HDD backplane:
1 OOB cable to HDD backplane and connector "SMB4" on system
board
2 Power cable to HDD backplane and connector "PWR10" on system
board
3 SAS/SATA cable depending on configuration
For the cable plan, see chapter "Appendix B" on page 571.
Hard disk drive (HDD) / solid state disk (SSD)
RX2540 M6 Upgrade and Maintenance Manual 219

Table of Contents

Other manuals for Fujitsu PRIMERGY RX2540 M6

Questions and Answers:

Question and Answer IconNeed help?

Do you have a question about the Fujitsu PRIMERGY RX2540 M6 and is the answer not in the manual?

Fujitsu PRIMERGY RX2540 M6 Specifications

General IconGeneral
Memory Slots32 DIMM slots
Form Factor2U rack server
ProcessorIntel Xeon Scalable Processors (3rd generation)
StorageUp to 24 x 2.5" or 12 x 3.5" drives
RAID SupportRAID 0, 1, 5, 6, 10
Network4 x 1GbE ports (onboard), optional 10/25GbE
Power Supply800 W, 1200 W, 1600 W
Expansion SlotsUp to 8x PCIe Gen4 slots
Operating System SupportWindows Server, Red Hat Enterprise Linux, SUSE Linux Enterprise Server, VMware
ManagementiRMC S5

Related product manuals