SmartPAC 2 with WPC Integration 1126800
Installing SmartPAC 2 and WPC Chapter 2 page 121
Top Stop Angle Between 271°
°°
° and 300°
°°
° : Prepare to Install Overrun Sensor
Magnet
1.
Go to Initialization mode (page 203). Select PRESS CONTROL. Select PRESS
OPTIONS. On the screen that appears, set Switches 1 and 2 as follows:
Switch 1 – OPEN
Switch 2 – CLOSED
To change a switch setting, highlight it and press ENTER to toggle between OPEN and
CLOSED. Press RESET when done.
2. Power down SmartPAC 2 with WPC and power it up again. This makes the new switch
settings take effect.
3. Go to Run mode and turn the Stroke Select key to OFF and then back to Inch to clear the
LOCKOUT message (see page 387).
4. Go to Initialization mode. Select RESOLVER ZERO. On the screen that appears, find
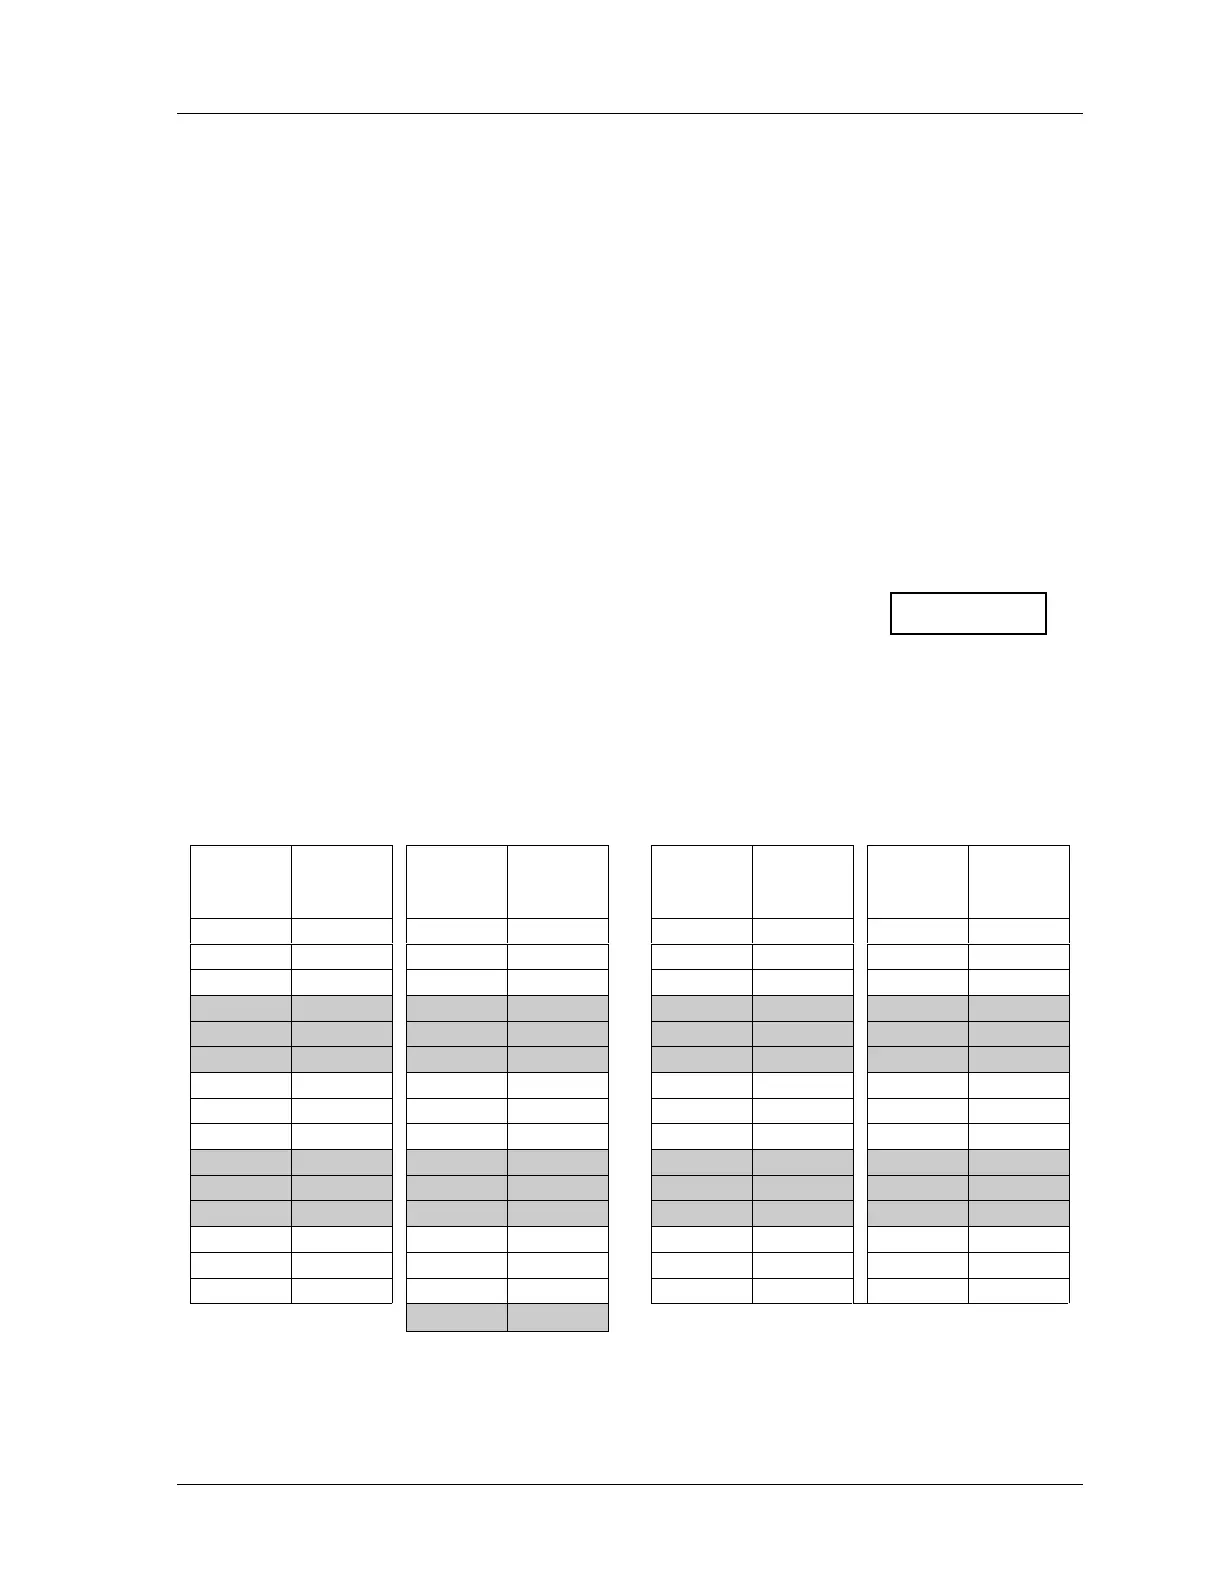
“Current Zero Correction.” Write the Current Zero Correction here: _ ° .
5. Go to Table 2 - 14. Find the Current Zero Correction value in the appropriate column in
the table. Circle the “Crankshaft Angle” next to it.
Table 2 - 14. Top Stop Angle bet. 271°
°°
° and 300°
°°
° : Mounting Overrun Magnet
(Unzeroed Resolver Angle = 330° )
Zero Correction 0°
°°
° - 30°
°°
° Zero Correction 330°
°°
° - 359°
°°
°
Current
Zero
Correction
Crankshaft
Angle on
Display
Current
Zero
Correction
Crankshaft
Angle on
Display
Current
Zero
Correction
Crankshaft
Angle on
Display
Current
Zero
Correction
Crankshaft
Angle on
Display
0
330
15
315
330
0
345
345
1
329
16
314
331
359
346
344
2
328
17
313
332
358
347
343
3
327
18
312
333
357
348
342
4
326
19
311
334
356
349
341
5
325
20
310
335
355
350
340
6
324
21
309
336
354
351
339
7
323
22
308
337
353
352
338
8
322
23
307
338
352
353
337
9
321
24
306
339
351
354
336
10
320
25
305
340
350
355
335
11
319
26
304
341
349
356
334
12
318
27
303
342
348
357
333
13
317
28
302
343
347
358
332
14
316
29
301
344
346
359
331
30
300
6. Go to Run mode. Turn the Stroke Select key to “Inch.” Inch the press until the
SmartPAC 2 display shows the Crankshaft Angle you circled in Table 2 - 14.

 Loading...


