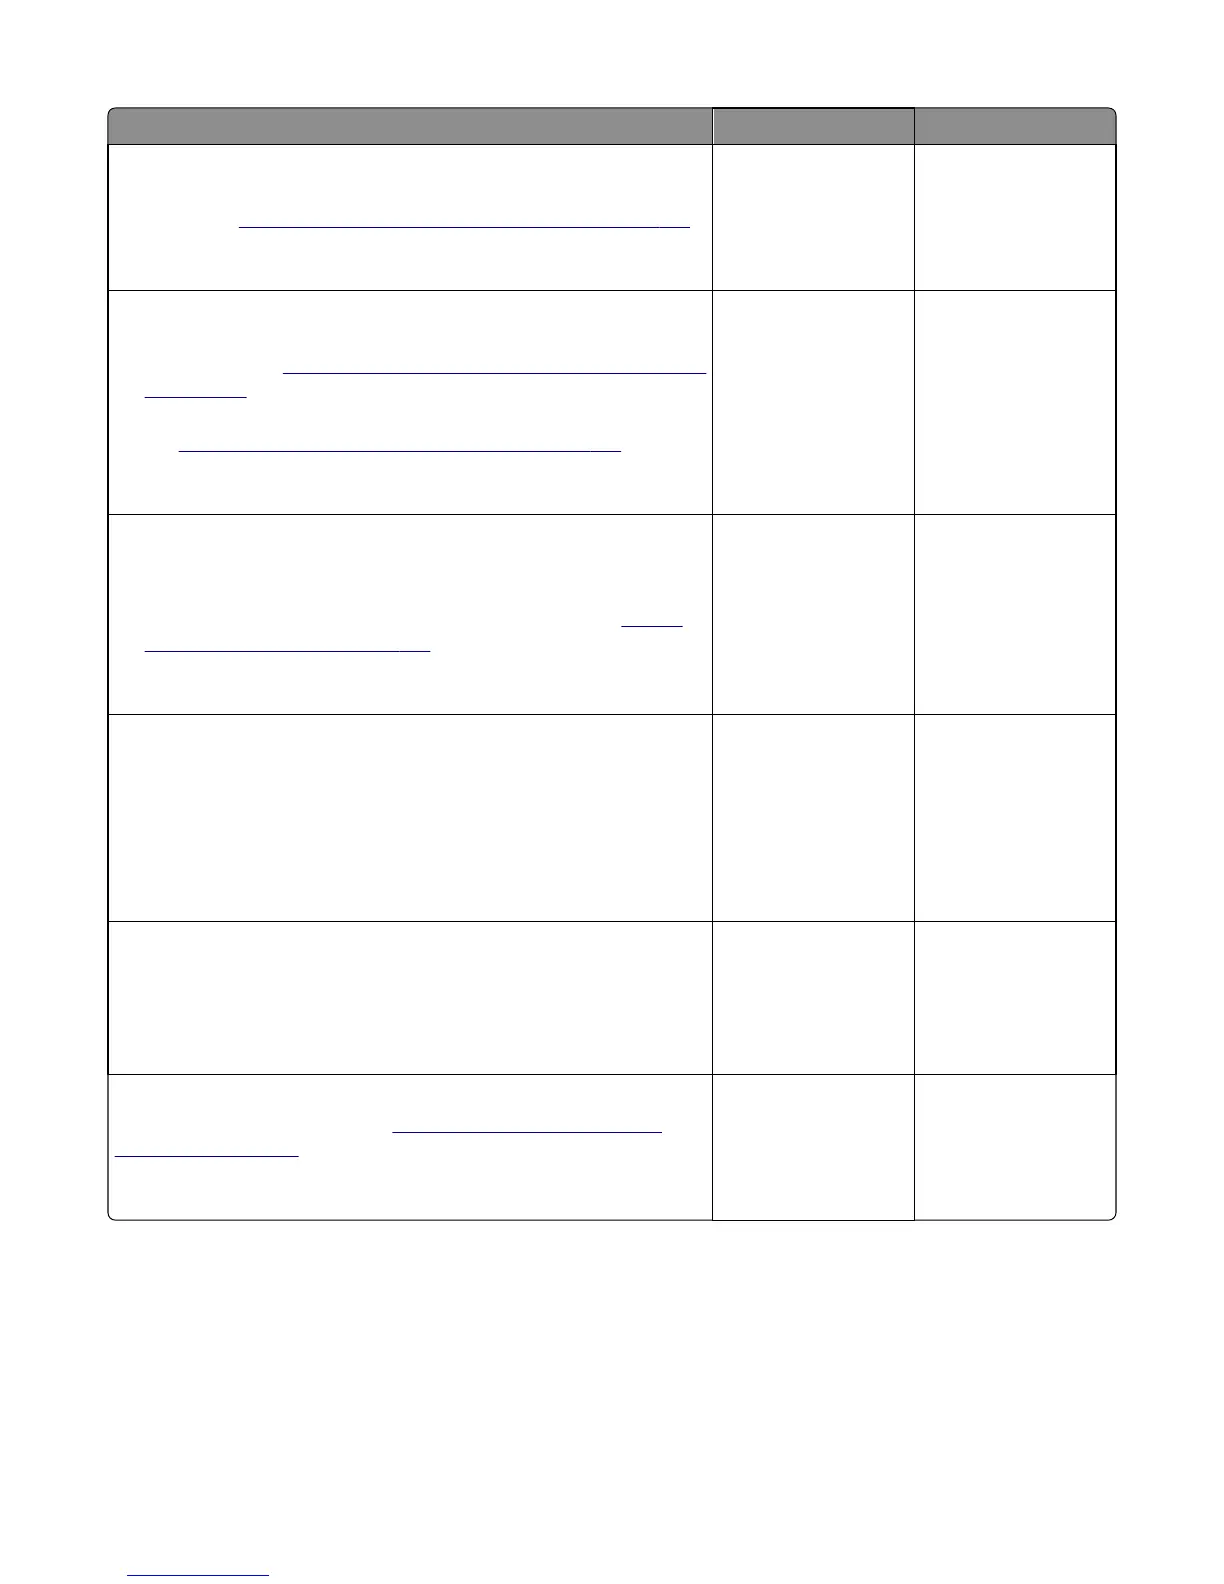
Action Yes No
Step 12
Check the staple finisher interface board for damage, and replace if
necessary. See
“Staple finisher interface board removal” on page 262.
Does the problem remain?
Go to step 13. The problem is solved.
Step 13
a Check the staple unit carriage gears for wear or damage, and replace
if necessary. See
“Staple finisher staple unit carriage gears removal”
on page 264.
b Check the staple unit rail for wear or damage, and replace if necessary.
See
“Staple finisher staple unit rail removal” on page 292.
Does the problem remain?
Go to step 14. The problem is solved.
Step 14
a Reseat the staple finisher FFC on the interface board and controller
board.
b Check the cable for damage, and replace if necessary. See “Staple
finisher FFC removal” on page 267.
Does the problem remain?
Go to step 15. The problem is solved.
Step 15
a Reseat the interface cable on the staple finisher controller board and
printer controller board.
b Reseat the junction connector on the cable.
c Check the cable for damage, and replace if necessary.
Does the problem remain?
Go to step 16. The problem is solved.
Step 16
a Reseat all the cables on the staple finisher controller board.
b Reset the printer.
Does the problem remain?
Go to step 17. The problem is solved.
Step 17
Replace the controller board. See
“Staple finisher controller board
removal” on page 244.
Does the problem remain?
Contact the next level
of support.
The problem is solved.
4021, 7421
Diagnostic information
105