LASER UNIT
A229 5-30 SM
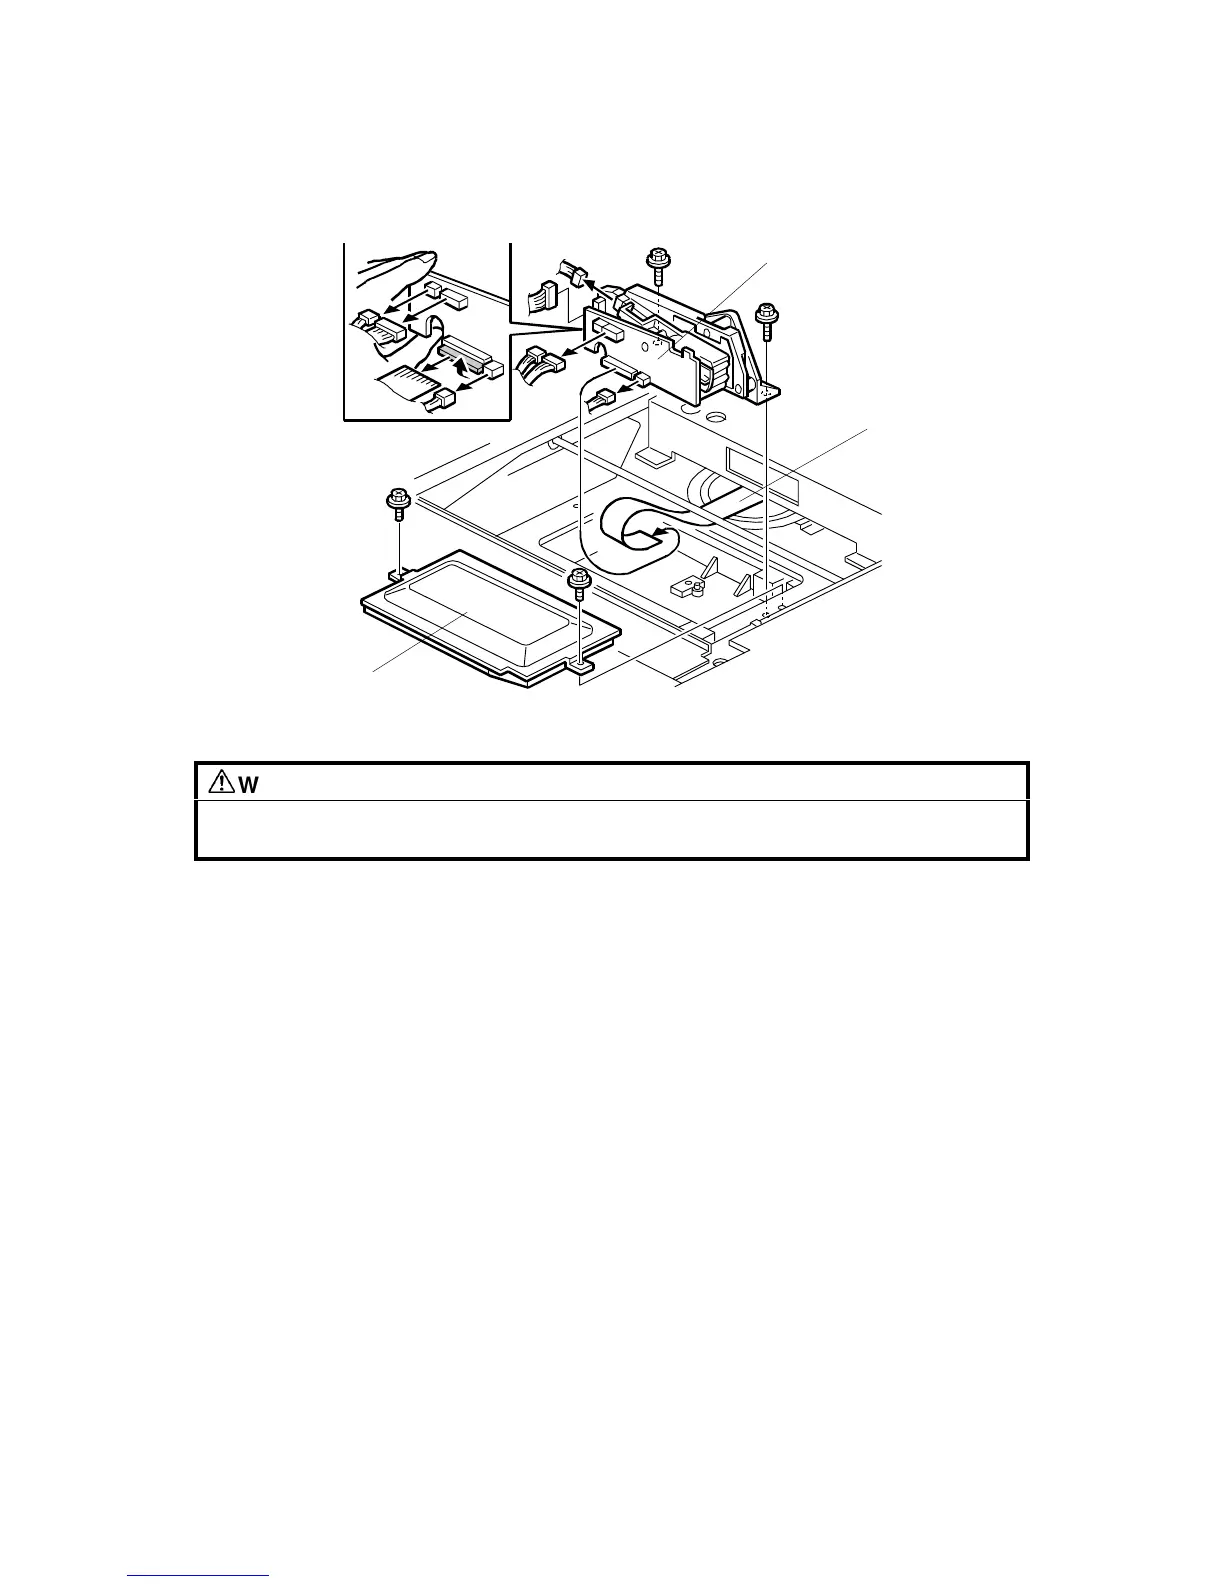
5.4.2 LD UNIT REPLACEMENT
WARNING
Turn off the main power switch and unplug the machine before attempting
this procedure. Laser beams can seriously damage your eyes.
1. Remove the exposure glass. (See Exposure Glass Removal.)
2. Remove the LD cover [A] (2 screws).
3. Replace the LD unit [B] (2 screws and 6 connectors).
NOTE:
When disconnecting the cables, hold the LD unit.
4. When reinstalling, make sure that the flat cable [C] is mounted above the LD
unit, and that the rotation of the unit is not interrupted.
5. After replacing the LD unit, check the laser beam pitch adjustment and readjust
it if necessary (see the following procedure).
6. Do SP 2-962 (process control initialization).
NOTE:
Be sure that the cable does not block LD unit rotation after replacing
the LD unit. If the LD unit cannot rotate smoothly to change the
resolution, SC329 (LD unit home position error) may occur.
A229R500.WMF
[A]
[B]
[C]