COPY IMAGE ADJUSTMENTS: PRINTING/SCANNING
A229 5-106 SM
5.12.2 PARALLELOGRAM IMAGE ADJUSTMENT
Do the following procedure if a parallelogram type image is printed while using a
trimming area pattern to adjust the printing registration or the printing margin.
NOTE:
1) The following procedure should be done after adjusting the side-to-side
registration for each paper tray.
2) This adjustment is only effective for a parallelogram image caused by
the printer. It should not be applied if the skew is caused by the scanner.
1. Check whether a parallelogram image appears as shown on the next page
when printing a trimming area pattern (SP2-902-3, No. 10). If it appears, do the
following.
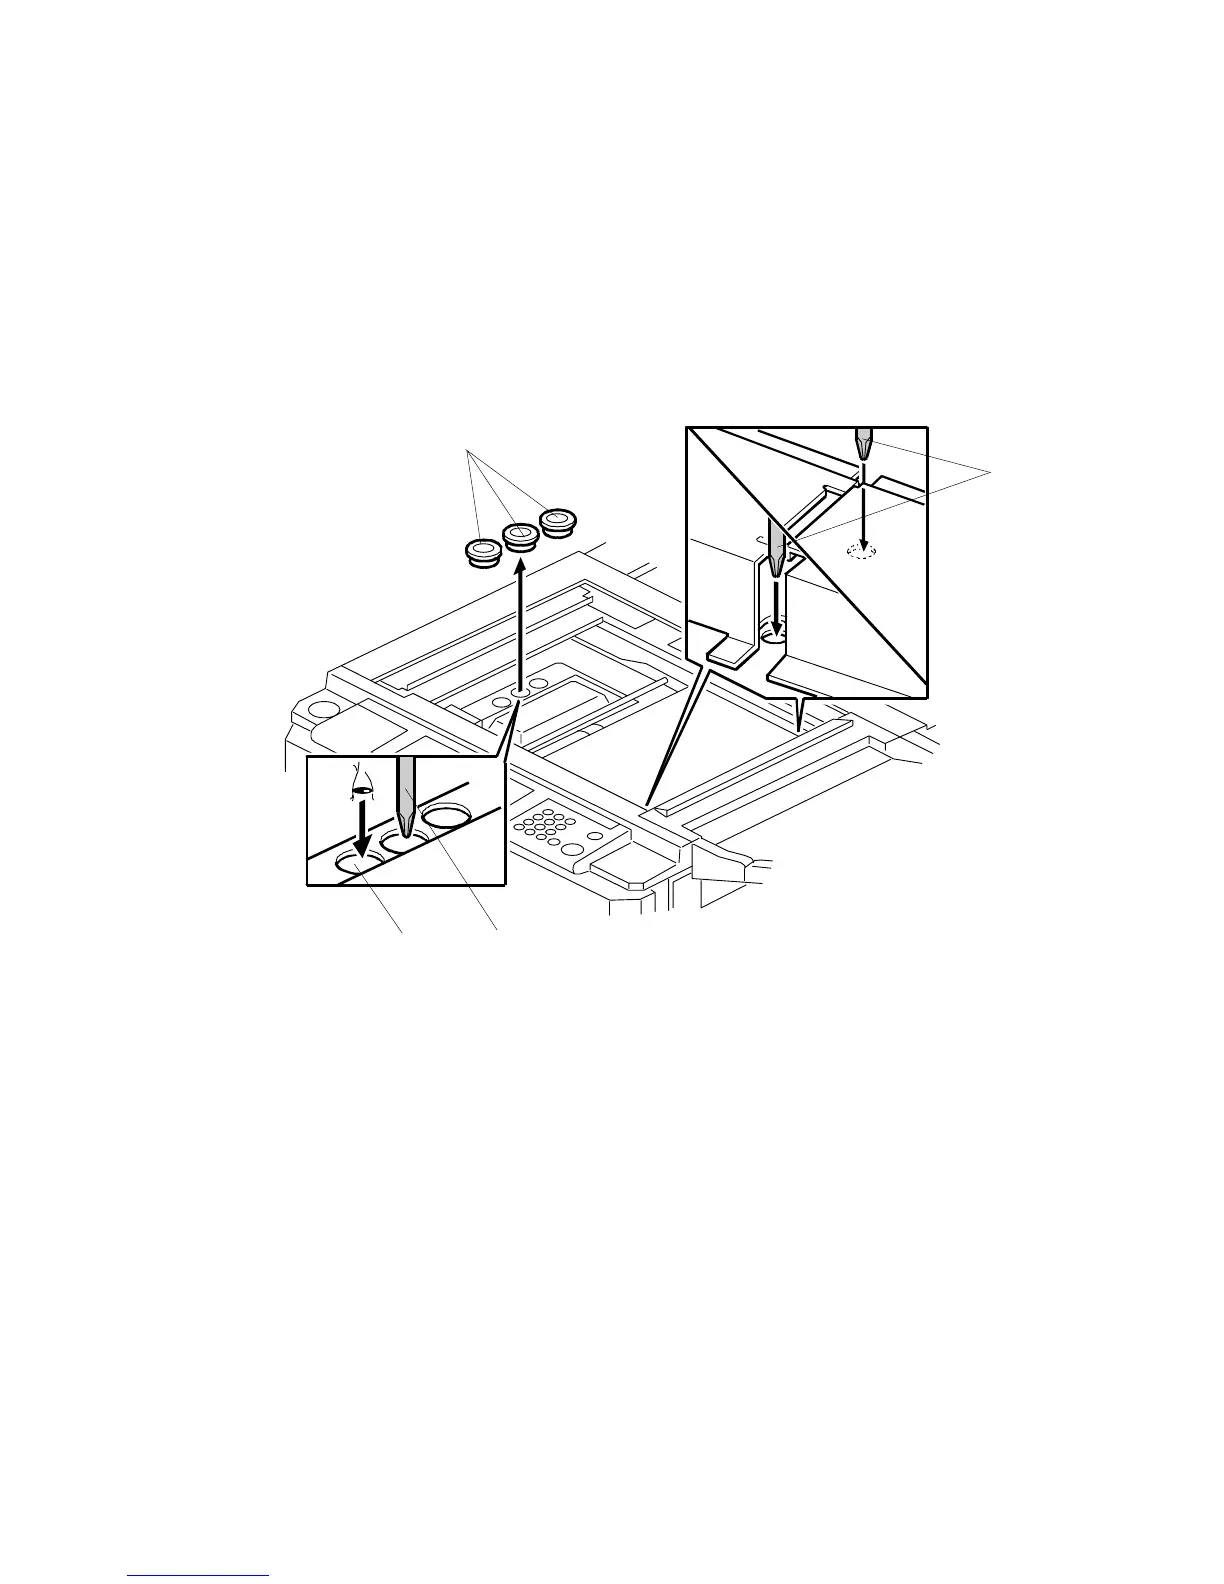
2. Remove the exposure glass (see Replacement and Adjustment – Exposure
Glass Removal).
3. Remove the three caps [A].
4. Make a note of the position of the laser unit using the scale through the hole
[B].
5. Loosen the three screws [C] that hold the laser unit.
A229R534.WMF
[A]
[B]
[C]
[C]