LASER UNIT
SM 5-31 A229
Replacement
and
Adjustmen
t
5.4.3 LASER BEAM PITCH ADJUSTMENT
There are two laser beam pitch adjustment procedures: one for 400 dpi, and one
for 600 dpi. These adjustments use the following SP modes.
•
SP2-109-1: Laser Beam Pitch Adjustment – 400 dpi
•
SP2-109-2: Laser Beam Pitch Adjustment – 600 dpi
•
SP2-109-3: Laser Beam Pitch Initial Setting – 400 dpi
•
SP2-109-4: Laser Beam Pitch Initial Setting – 600 dpi
•
SP2-902-2, no.12: IPU Test Pattern – Cross Stitch – 400 dpi
•
SP2-902-2, no.13: IPU Test Pattern – Cross Stitch – 600 dpi
1. Perform SP2-109-8 (Beam Pitch Data Reset).
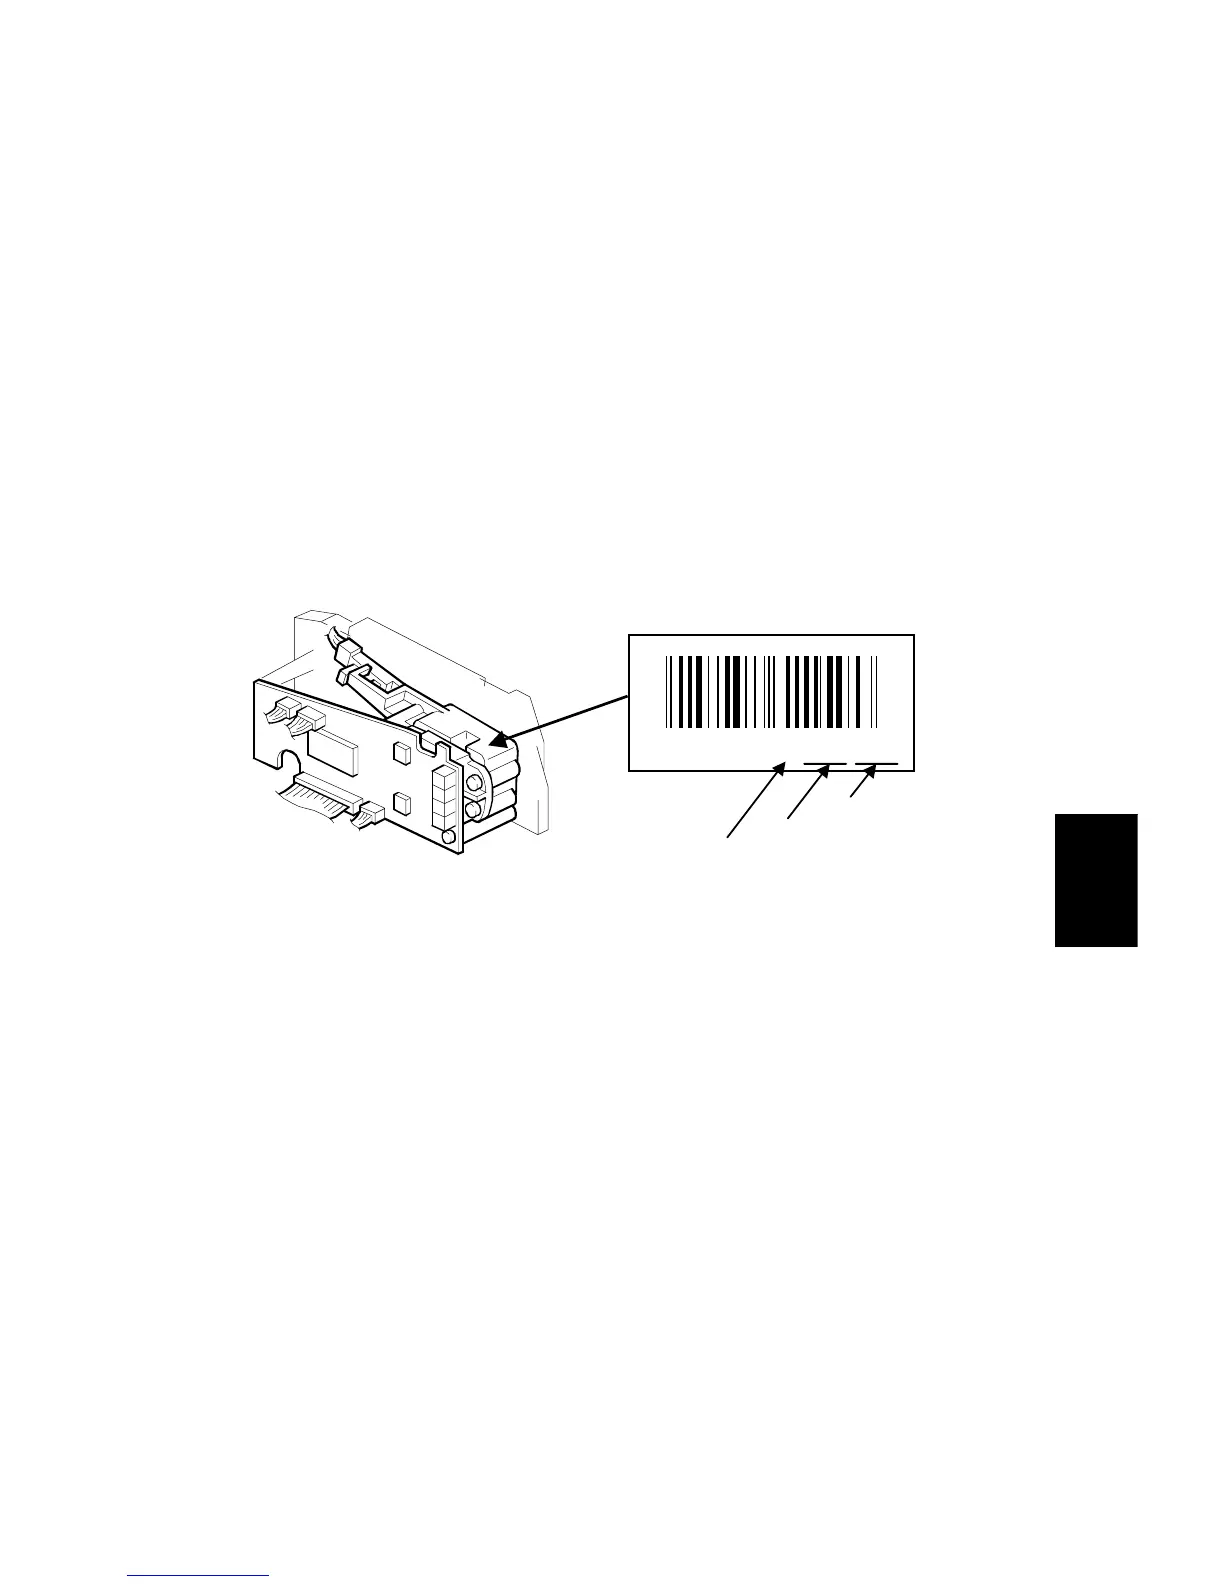
2. Input the value for 400 dpi that is printed on the LD unit into SP2-109-1.
Use the value printed after “P” on the new LD unit as shown below.
NOTE:
Do not use values printed after a “V”.
3. Press the “Enter” key.
4. Perform SP2-109-3.
5. Print the 400-dpi test pattern onto A3 (11”x17”) paper using SP2-902-2 no.12
(cross stitch). (See Service Tables - Test Pattern Printing).
6. Write the value of SP2-109-1 on the test pattern which was input at step 2.
7. Change the value of SP2-109-1 and print another test pattern, repeating steps
2 to 5. Print about 5 patterns with different values for SP2-109-1 (e.g. “48”, “96”,
“192”, “240”).
8. Check this test pattern. If the laser beam pitch is not correct, the image looks
like a black vertical stripe pattern.
NOTE:
If the laser beam pitch is correct, the vertical stripe is not so noticeable.
If the value is not correct, the vertical stripe pattern is darker.
15980300151P: 120, 172
"P": Pitch
400 dpi
600 dpi
A229R573.WMF
A229R572.WMF
Example