MAILBOX (G909)
A229 10-12 SM
3.1.3 INSTALLATION PROCEDURE
CAUTION
Unplug the main machines power cord before starting the following
procedure.
NOTE: 1) When the finisher (A697) is installed on the machine, the bridge unit for
the mailbox (G912) must be installed.
2) The bridge unit for the mailbox must be installed before installing the
Mailbox on the main machine.
1. Unpack the finisher and carefully remove all the shipping tapes.
- A230, A231, and A232 machines -
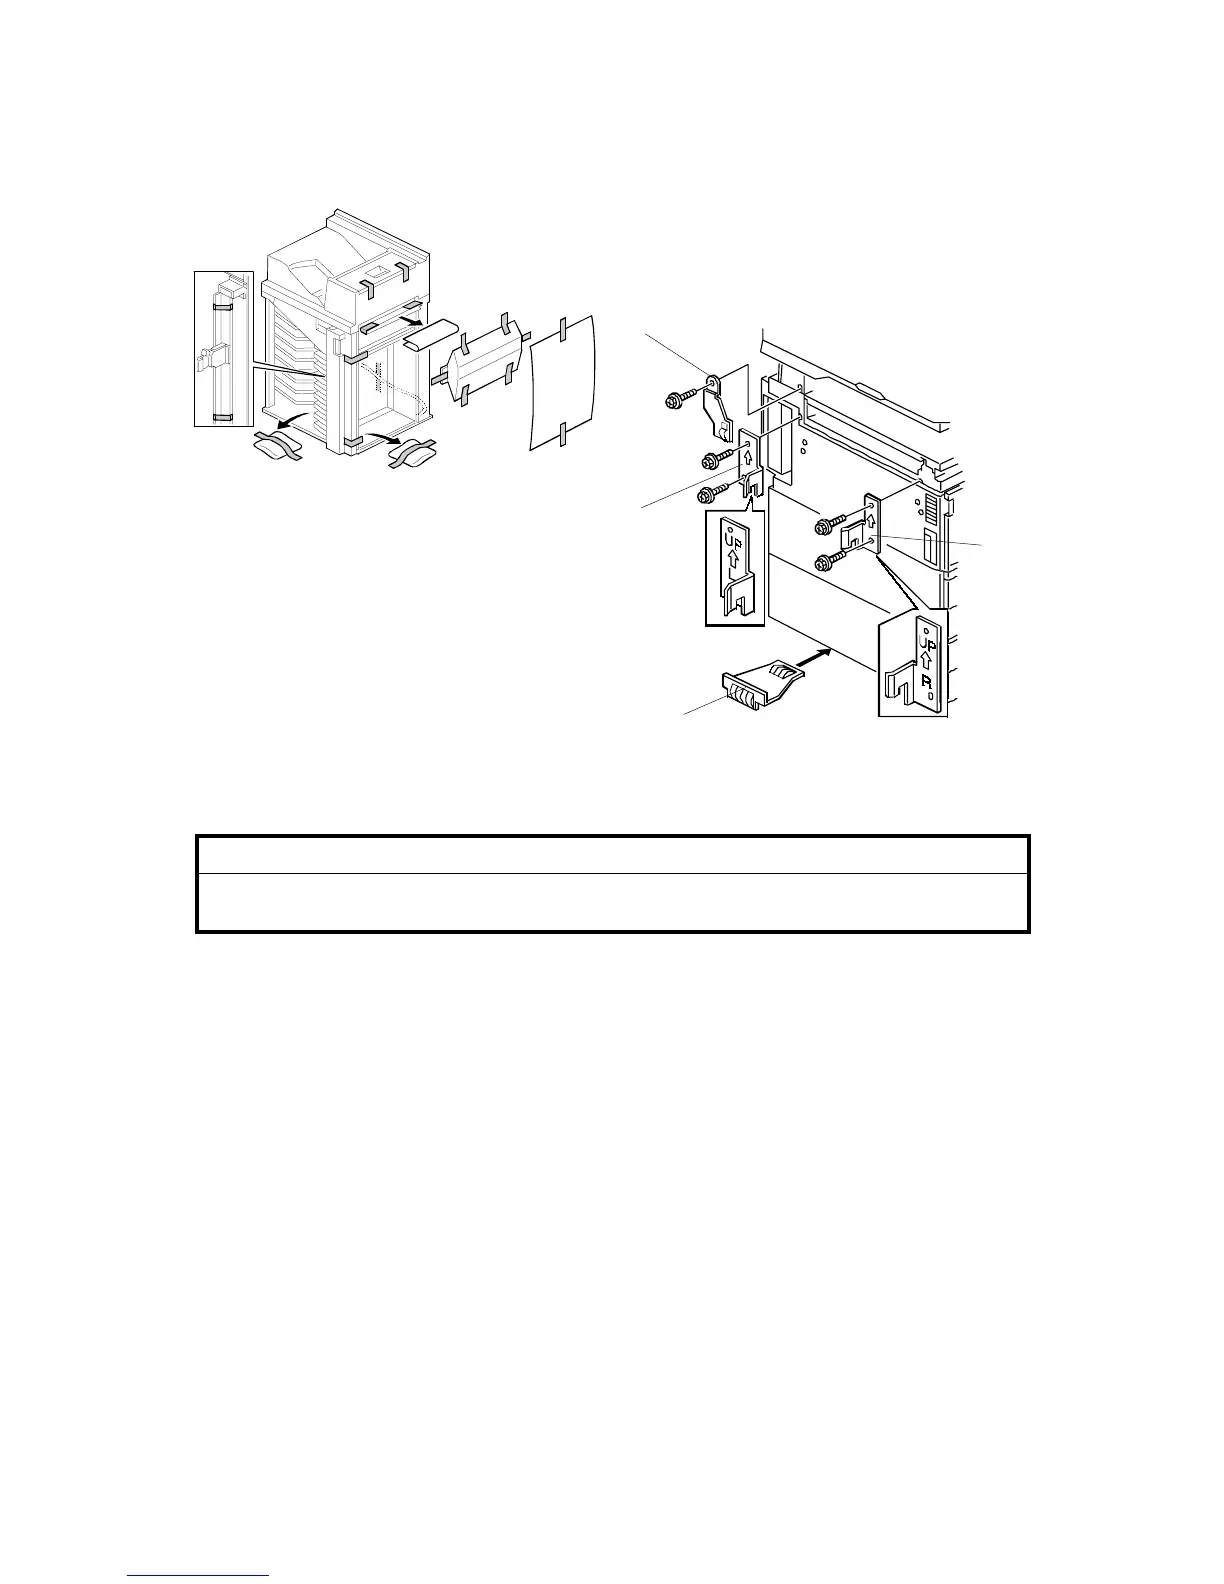
2. Attach the front joint bracket [A] and rear joint bracket [B] to the main machine
(2 screws each).
3. Attach the upper grounding plate [C] (1 screw).
4. Peel off the backing of the double sided tape that is attached to the lower
grounding plate [D].
5. Attach one lower grounding plate to the center of the bottom edge of the paper
tray unit as shown.
Go to step 7.
G909I500.WMF
G909I509.WMF
- A230, A231 and A232 machines -
[A]
[B]
[C]
[D]
 Loading...