MailBox &
Bridge Unit
G909/G912
MAILBOX (G909)
SM 10-13 A229
- A229 machines -
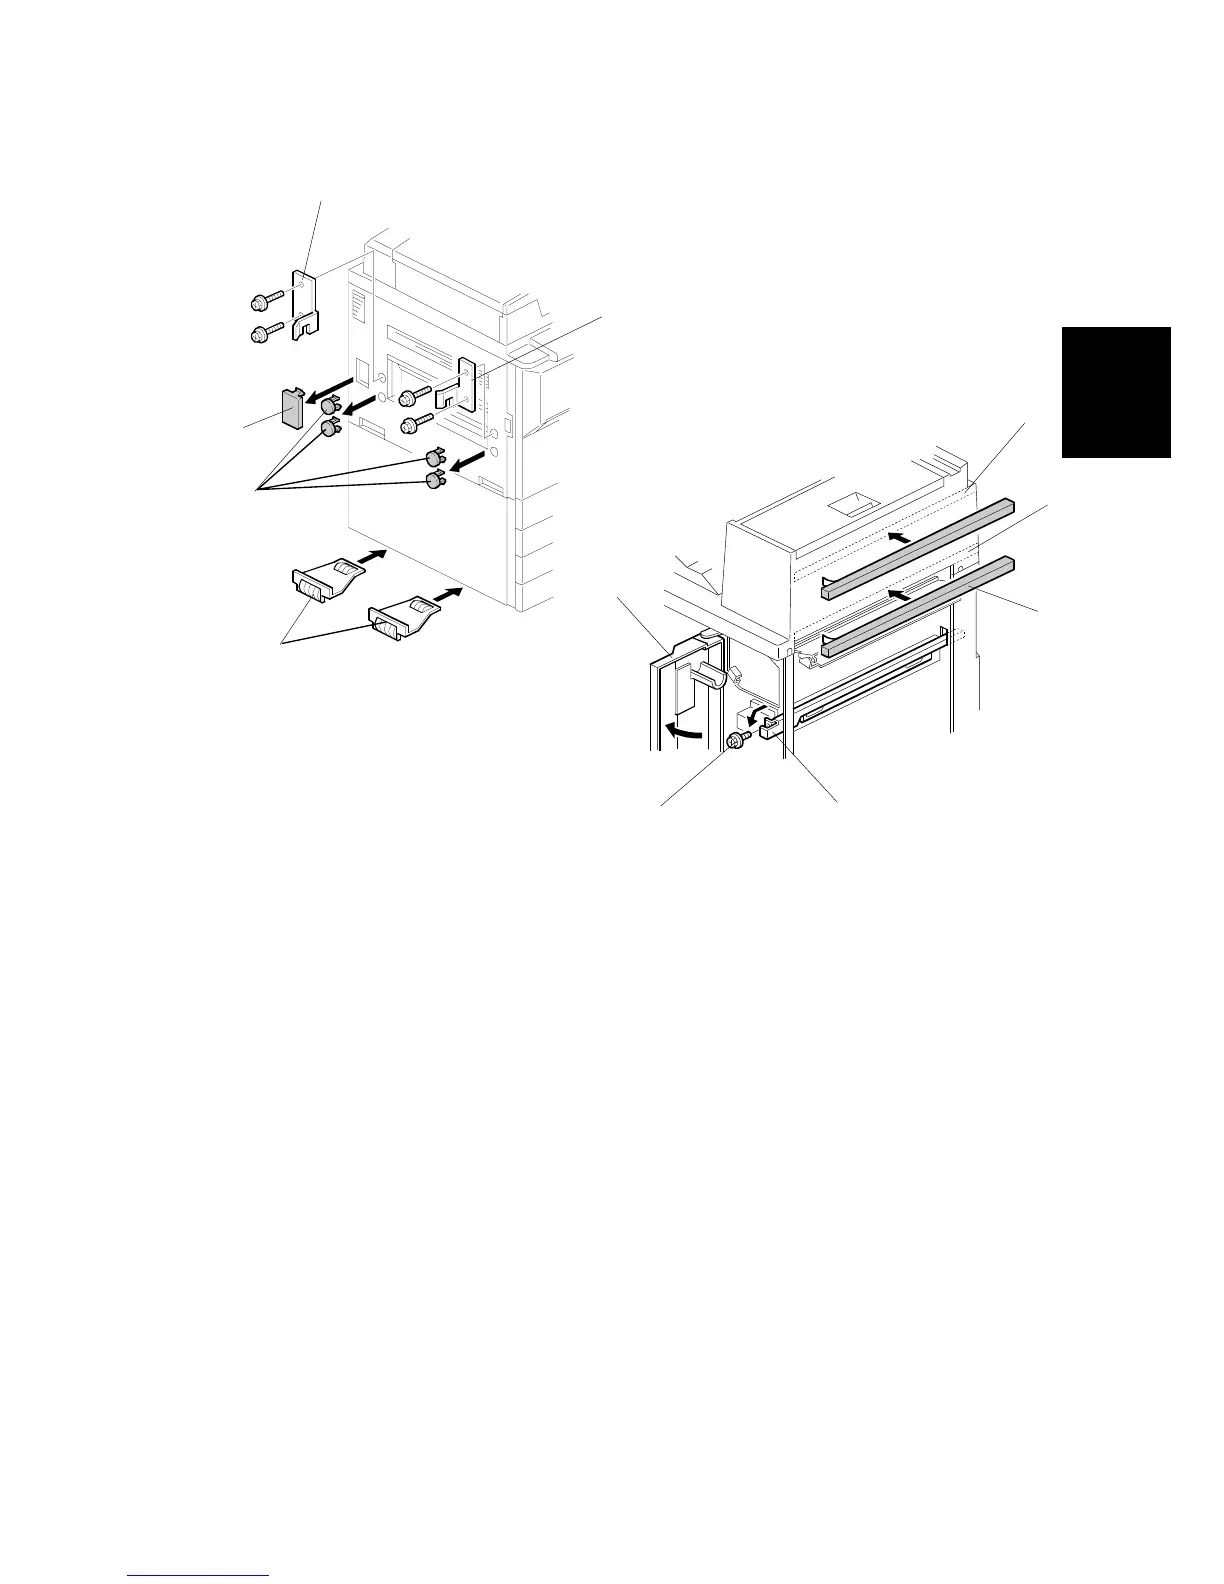
2. Remove the four plastic caps [A] from the copier’s left cover.
3. Remove the connector cover [B].
4. Attach the front joint bracket [C] and rear joint bracket [D] to the main machine
(2 screws each).
5. Peel off the backing of the double-sided tape that is attached to the lower
grounding plate [E].
6. Attach two lower grounding plates to the bottom edge of the paper tray unit as
shown.
- All machines -
7. The position of the cushion [F] depends on which main machine the mailbox is
installed to. Attach the cushion to the plate as follows:
•
Position [G] for A230, A231, and A232 machines.
•
Position [H] for A229 machines.
NOTE:
When attaching the cushion to position [H], cut about 40 mm (1.6
inches) off one edge of the cushion.
8. Open the front cover [I] of the mailbox, and remove the screw [J] that secures
the locking lever [K]. Then pull the locking lever.
G909I506.WMF
G909I510.WMF
[F]
[G]
[H]
[I]
[J]
[K]
[A]
[B]
[C]
[D]
[E]
- A229 machine -
 Loading...