MailBox &
Bridge Unit
G909/G912
PROOF TRAY UNIT
SM 10-21 A229
4. REPLACEMENT AND ADJUSTMENT
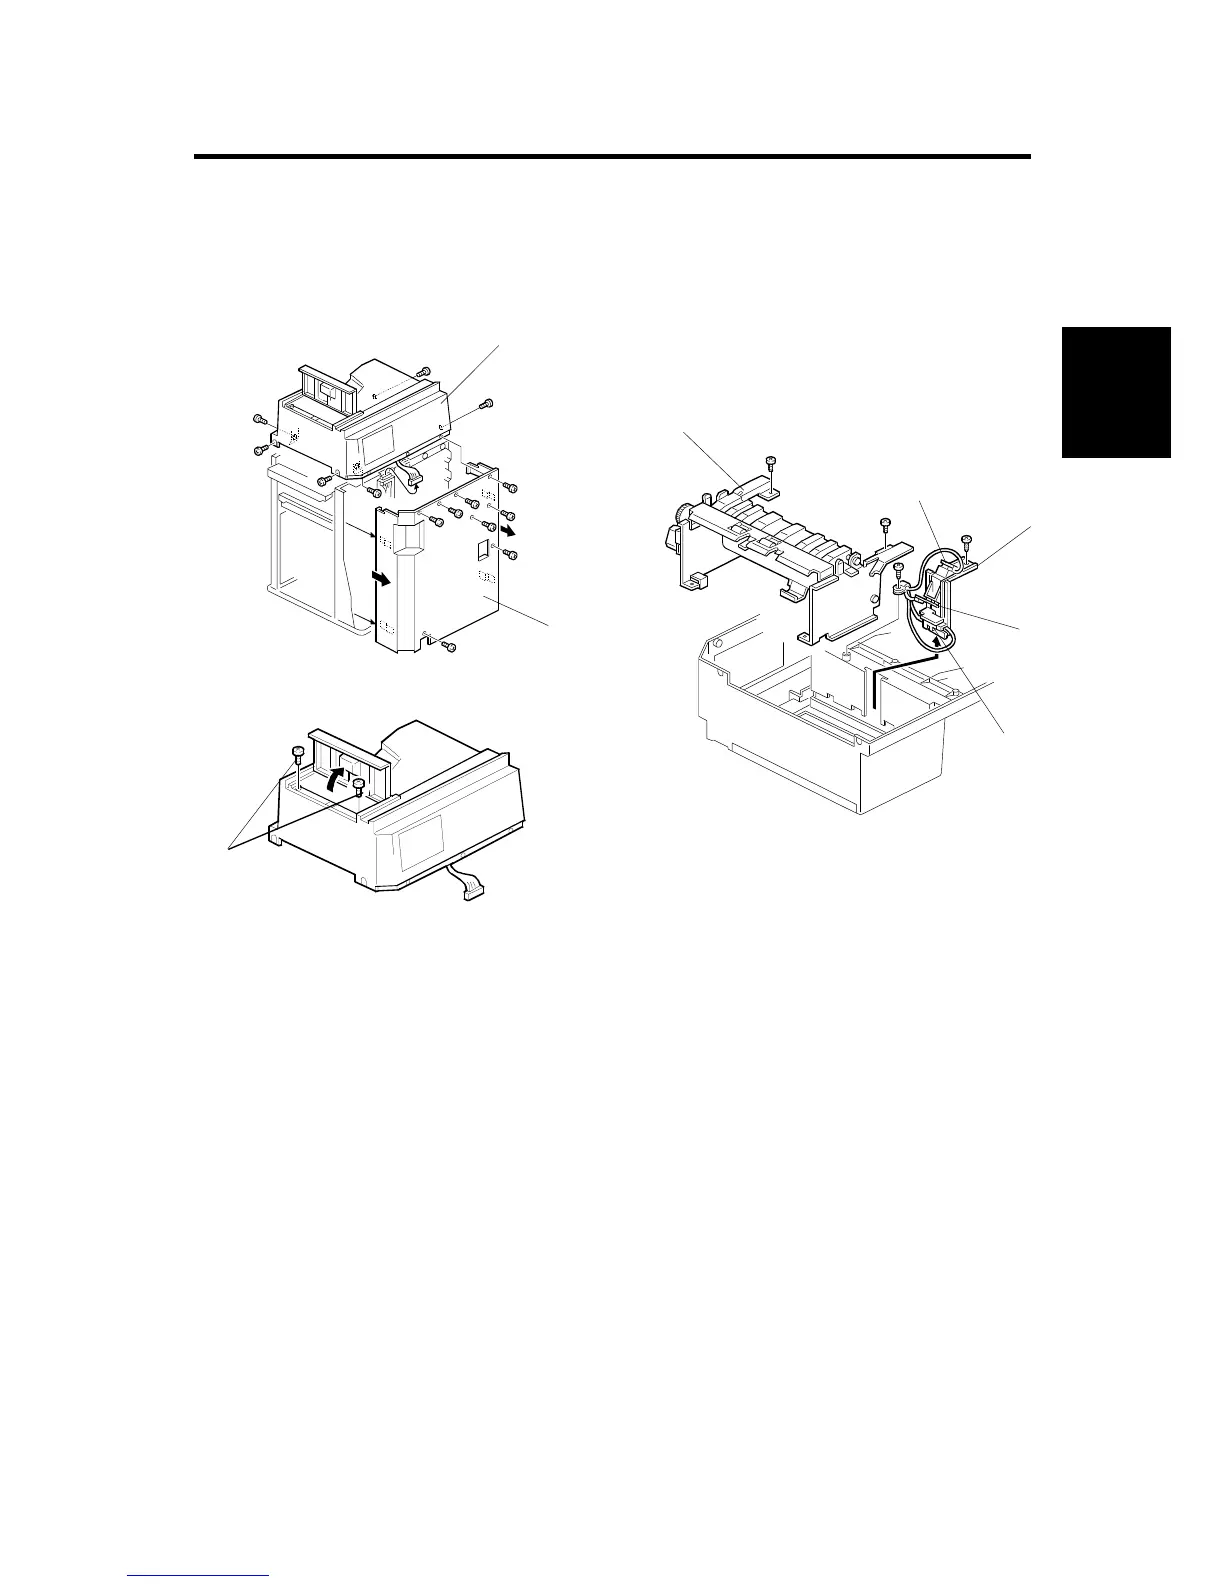
4.1 PROOF TRAY UNIT
4.1.1 PROOF TRAY SENSOR AND PAPER OVERFLOW SENSORS
1. Remove the rear cover [A] (8 screws).
2. Remove the proof tray unit [B] (6 screws).
3. Remove two screws [C], then turn over the proof tray unit.
4. Remove the sensor bracket [D] (2 screws, 1 clamp).
5. Remove the proof tray paper sensor [E] (1 screw each).
6. Remove the proof tray paper overflow sensor [F].
4.1.2 PROOF TRANSPORT UNIT
1. Remove the proof tray unit [B] and remove two screws [C].
2. Carefully turn over the proof tray unit and remove the proof transport unit [G]
(2 screws).
G909R501.WMF
G909R502.WMF
G909R500.WMF
[A]
[B]
[C]
[D]
[E]
[F]
[G]
[E]