Vacuum Robot Manual
4000-0315 Rev 1
18
Verifying Connections
CAUTION: Do not plug or unplug cables between the robot and the
controller while the controller is plugged in. Damage to components or
injury to personnel can result.
When any cable between the robot and the controller or any cable within
the controller is disconnected, the I/O board registers the broken
connection(s) on its Port G. After making the connection, check the status
of Port G with the command:
INPUT G
The INPUT command reads the value of the specified port and sends the
results over the RS-232 line. If you send the command from the Teach
Pendant, the results are displayed on the LCD screen. If you send the
command from EQT 32, the results are displayed on the command line.
A result of all zeroes indicates a good condition. If any 1s are returned,
refer to the bit descriptions for Port G to identify the problem.
Alternatively, you can read a specific bit rather than all eight bits. For
example, to read Bit 2 of Port G, enter:
INPUT 10
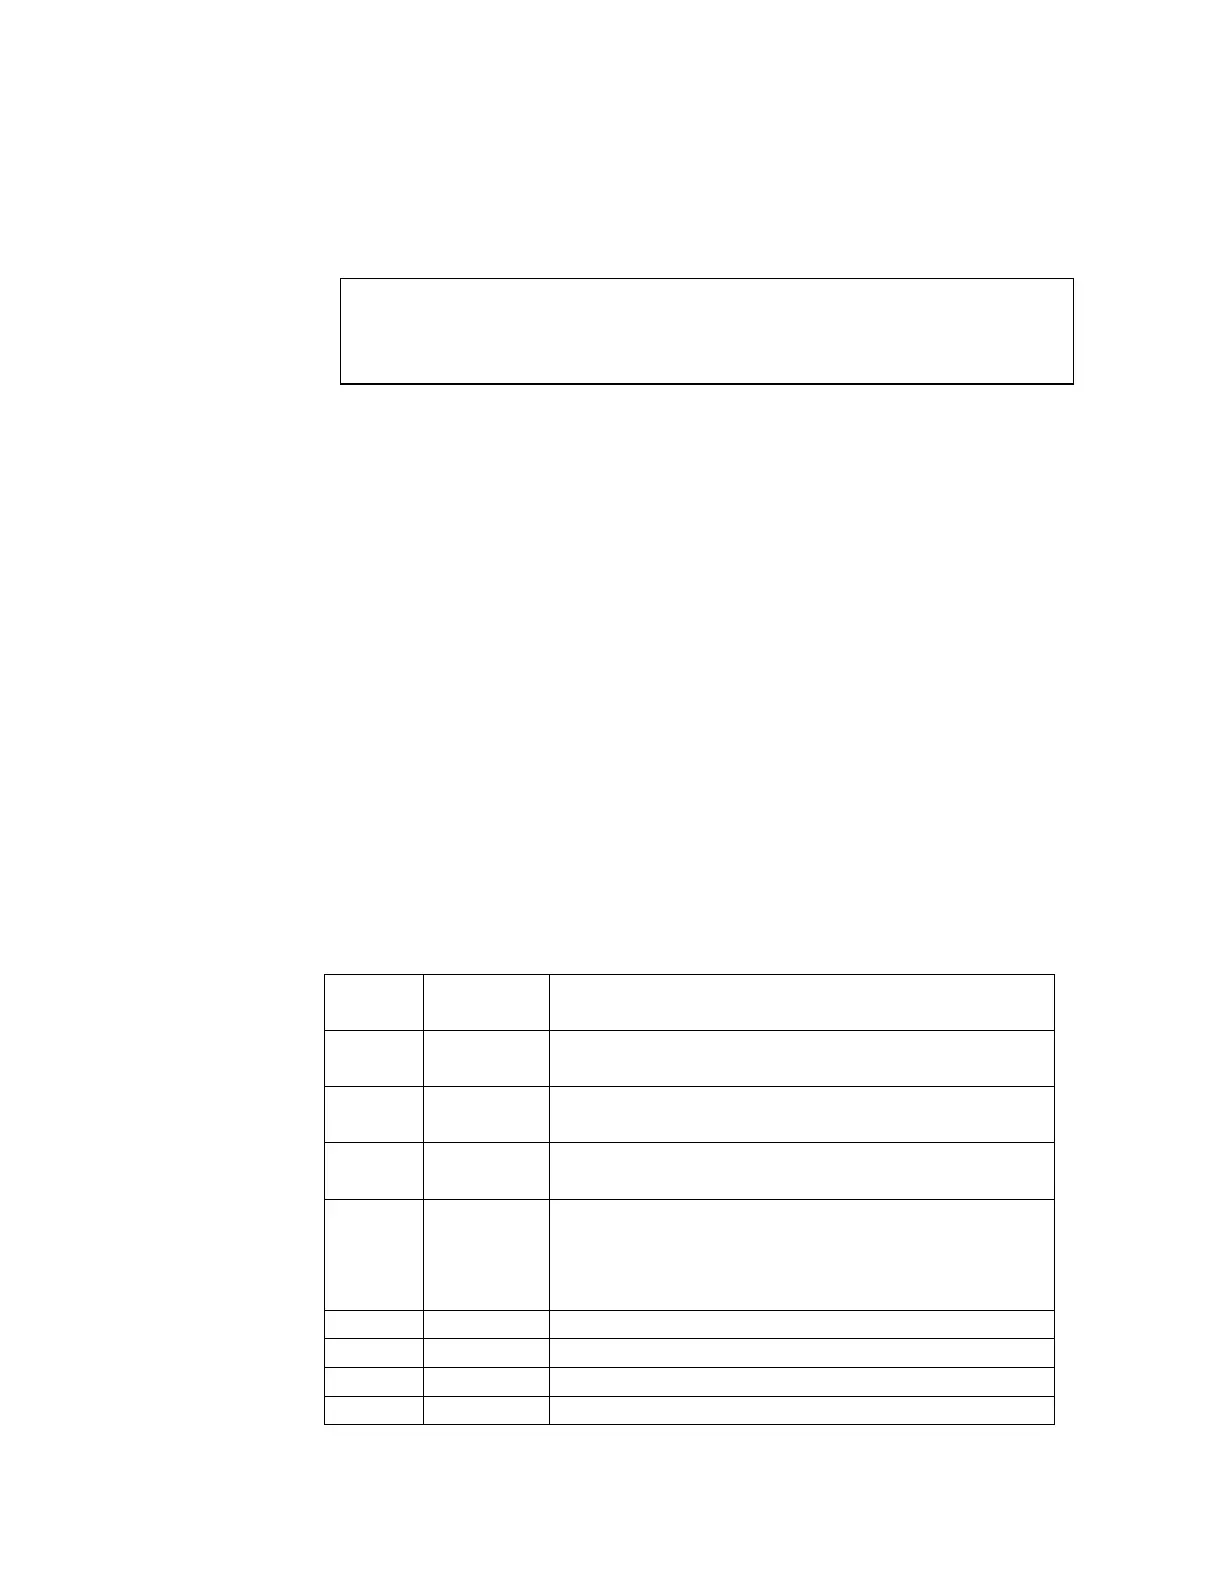
In the following table, Bits 0 through 2 indicate cable connections between
the robot and the controller or an I/O connection. Bits 3 through 7
indicate cable connections within the controller.
Bit on
Port G
INPUT
command
Description
0 INPUT 8 Amplifier internal connection and signal cable
closed loop.
1 INPUT 9 MOFF or interlock input from customer I/O
connector on the robot I/O card.
2 INPUT 10 Stop input from the customer I/O connector on
the robot I/O card.
3 INPUT 11 Amplifier board under power. 0 indicates
amplifier power supply is working correctly. 1
indicates the amplifier board is not receiving
enough voltage from the linear power supply.
4 INPUT 12 Motor power supply indicator.
5 INPUT 13 Robot interface board power supply.
6 INPUT 14 Switching power supply indicator.
7 INPUT 15 Bus power supply.