Atmospheric Pre-aligner Manual
4000-0015 Rev 1
44
4. If the Distance to Index is bad, you are prompted to move the axis to a
GOOD position. This is the position where you can release the belt
directly attached to the z-axis motor or r-axis limit switch flag. Press
ESC to start over or Enter to continue.
5. You are prompted to lock the axis so it cannot move. Release the belt
or limit switch flag. When you are finished, press ESC to start over or
Enter to continue.
6. While the motor is moving to position, the display reads MAKING
CORRECTION…
7. When the correction is done, you are prompted to replace the belt or
tighten the limit switch flag. After the belt is replaced, press Enter.
r & z Home Offset
This test is for the z axis of three-axis pre-aligners only. Ignore the r
Home Offset test. The r-axis diagnostic is no longer used.
The z-axis diagnostic performs standard HOMing on the z axis with the
pin high.
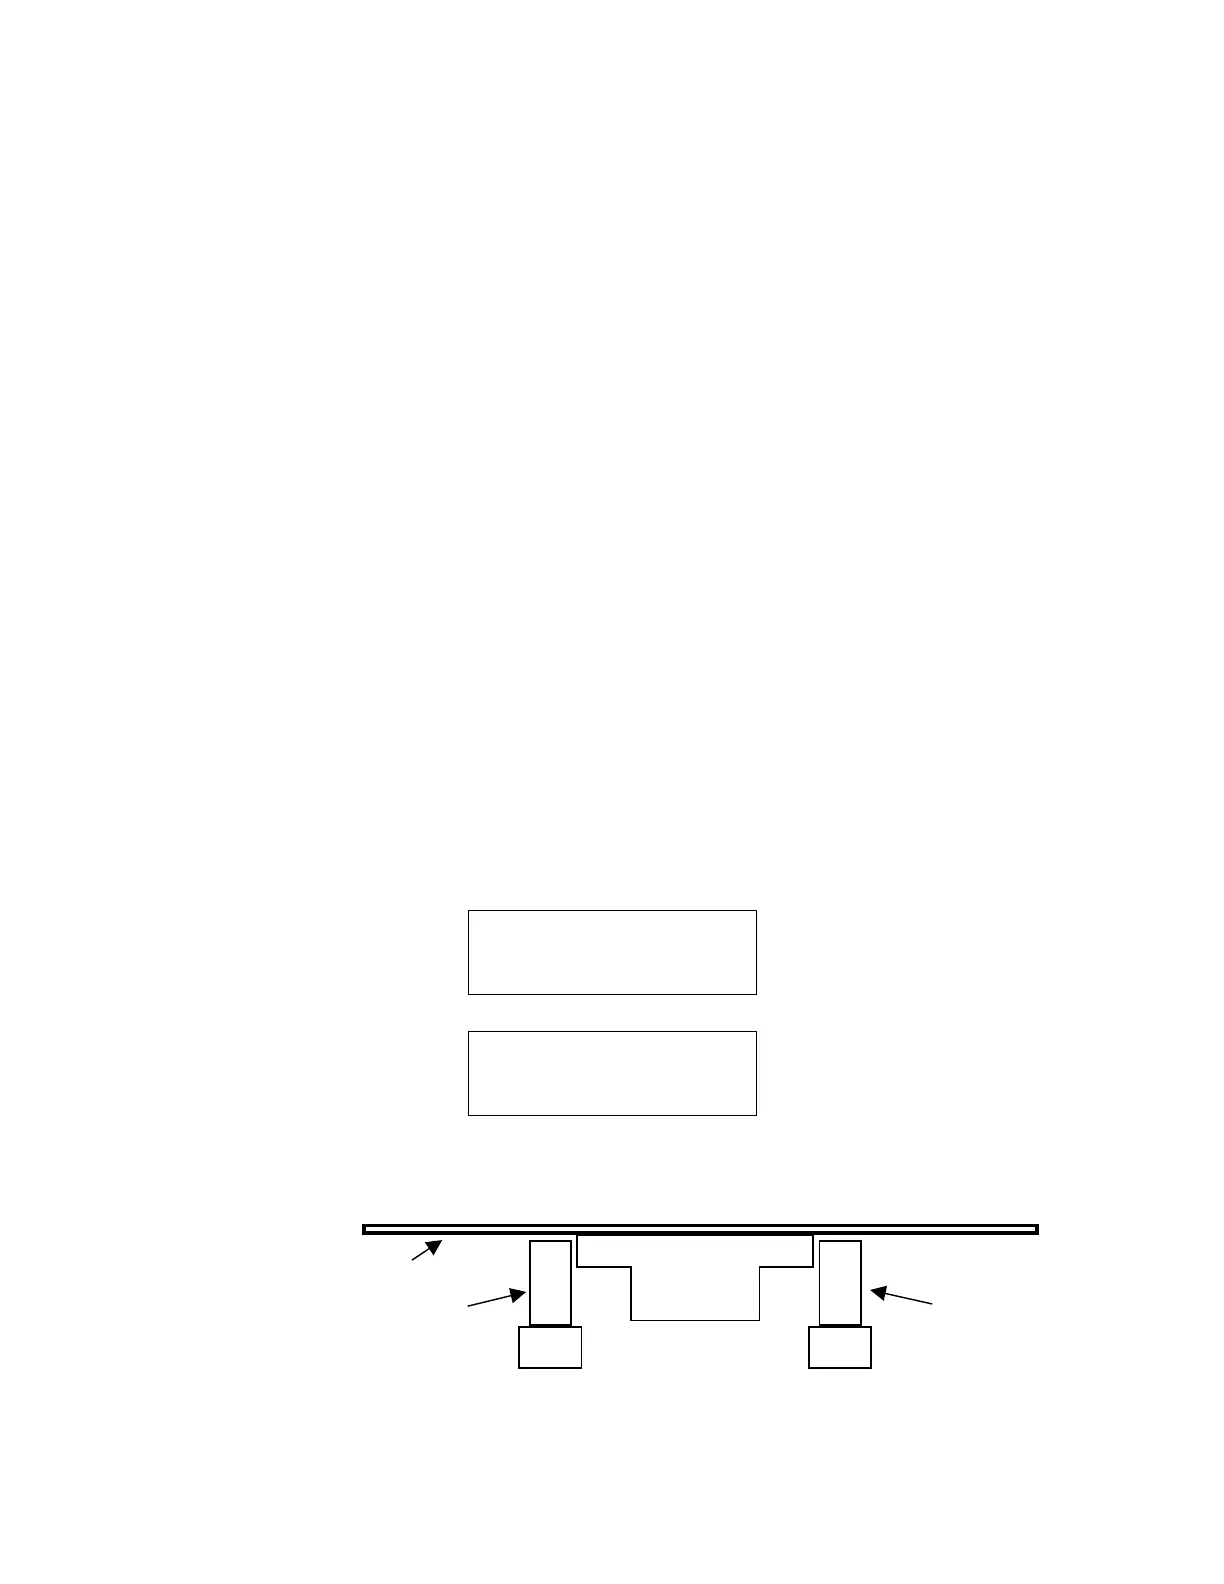
Use this step to calibrate the Pin Chuck Position, or z-axis Home Offset,
of the z-axis pins. The correct Pin Chuck Position (PINC) is 0.04 in (1
mm) below the underside of the wafer when the wafer is on the wafer
chuck.
1. The first screen prompts you to select r or z. Press the <Z, On/Off>
key to select the z axis.
PRESS R TOGGLE
OR
PRESS Z TOGGLE
2. After the z axis moves to its calibrated position, the screen displays:
HOMING Z AXIS
OFFSET CORRECT ?
Y-YES N-NO
3. The correct offset for pins is about 0.40 in (1 mm) below the underside
of the wafer, as shown in this drawing:
4. If the position is correct, press Y and Enter to return to the main menu.
If the position is incorrect and you have a PRE-200 or PRE-201 pre-
Pin
Chuck
Pin
Wafer