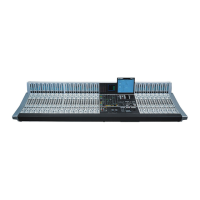
D950/Vista Digital Mixing System
4-116 GC Operation SW V3.3 Date printed: 05.08.03
panel(s) with LED displays, once the Monitor Configuration file is ap-
plied. Please note that only the first eight characters can be displayed on
the control surface panel(s).
Speaker/Source Selection entry boxes: These fields are used to connect a digital audio source (such as a direct
output) to a specific loudspeaker feed (such as left, right, center, etc.). This
is accomplished by highlighting a source from the Source Selection list
and assigning it to the desired loudspeaker feed using the appropriate dou-
ble-arrow button (<<). When such an assignment is made, the source name
will appear in the selected loudspeaker field. Selections may be cleared
using the X buttons.
Clear Selection button: This button will clear all Speaker/Source selections made for that Monitor
Source Selector key.
Source Type Selection box: This box provides a pop-up menu used to select the type of digital source
for assignment (such as a mono master direct output or an AES interface).
Once an item has been selected, all the sources of that type will be dis-
played in the Sources list below.
Source Selection box: This box displays a list of digital sources of a specific type that are avail-
able for assignment to loudspeaker feeds.
Load button: This button brings up a familiar Windows box from which an existing
Monitor Configuration file can be loaded.
Apply button: This button applies the current Monitor Configuration file to the
D950/Vista. This is handy when testing a recently edited file or recalling a
previously stored file.
Save and Save As... buttons: The Save button allows a previously stored Monitor Configuration file to
be updated after editing. The Save As... button allows a new file to be
named and created.
OK and Cancel buttons: The OK button accepts the current Monitor setup and closes the window.
Clicking OK does not apply or save the Monitor Configuration file. The
Cancel button exits the Monitor Setup screen.
Monitor File Name entry box: This field is used to enter a name for a new Monitor Configuration.
Application Progress indicator: This meter displays the progress of the loading of the Monitor Configura-
tion file when it is applied to the console.
Applied and Saved Status boxes: These boxes display the status of the current Monitor Configuration file. If
checked, the current file is applied to the console and/or saved.
To create a new Monitor Configuration file:
• First open the Monitoring Setup utility from the Monitor section of
the SysAdmin menu.
• Select the desired Assignable Source Selector panel and key, using the
lists on the left.
• Select a source type and source from the lists on the right.
• Highlight the selected source and click on the double-arrow (<<) but-
ton next to the desired loudspeaker feed in the Selection boxes. The
source name will appear in the selected location. Once a key is se-
lected, its name may be changed using the Display Name field.
• Repeat these steps to complete the necessary assignments. Once fin-
ished, the new file can be saved and applied to the console.