2 Product Overview
44
Product Overview
2
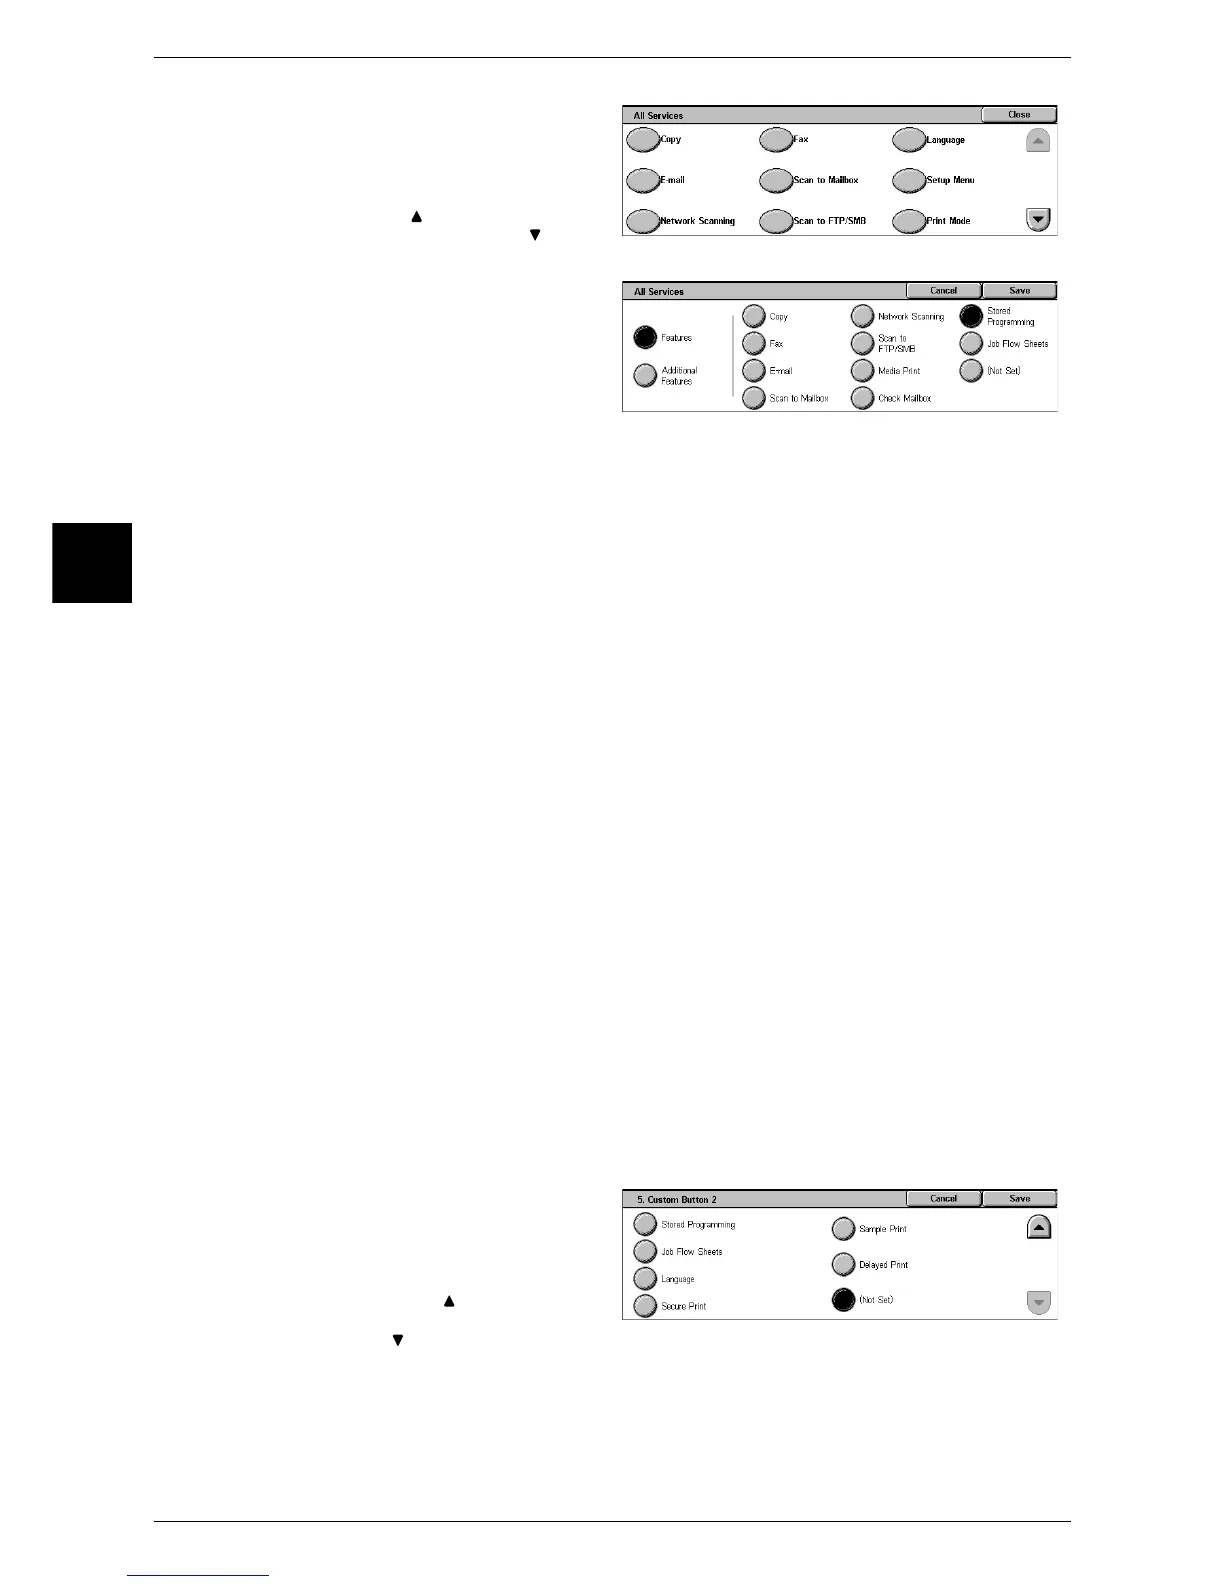
1 Select [All Services], and select
[Change Settings.
2 Select [Language].
Note • Select [ ]to return to the previous
screen and select [ ] to
move to the next screen.
3 Select [Features]
4 Select [Stored Programming].
Note • The layout of buttons shown
on this screen shows the
layout of buttons on the [All
Services] screen.
• You cannot assign the same
feature to more than one
button.
Features
You can select a feature button. The feature buttons are the oval buttons in the [All
Services] screen.
If you select [Not Set], the selected button position will remain empty.
Additional Features
You can select an auxiliary feature button. The auxiliary features appear in the [All
Services] screen as rectangular buttons.
If you select [Not Set], the selected button position will remain empty
Assigning Features to <Custom> Buttons
Features can be assigned to the <Copy>, <Custom 2>, and <Custom 3> buttons.
By assigning features to the <Custom> buttons, you can switch to the features without
returning to the [All Service] screen. When no feature is assigned to the button, select
[(Not Set)].
As the factory defaults, [Copy] is assigned to the <Copy> button. No feature is assigned
to the <Custom 2>, and <Custom 3> buttons. The features assigned to the buttons are
selected from the features displayed on the [All Service] screen and [Language].
Attach the labels included in this product when you have changed the assignment. If
you have used a feature for which no label is provided, use a blank label and write down
the feature using a permanent marker, and then attach the label to the appropriate
button.
The following is the procedure to assign [Check Mailbox] to the <Custom 2> button, as
an example. The same procedure can be applied to the <Custom 3> button.
1 Select the [Custom Button 2] and
select [Change Settings].
2 Select [Check Mailbox].
Note • Select [ ] to return to the
previous screen and select
[ ] to move to the next
screen.

 Loading...
