3B-40 - FUEL SYSTEMS 90-824052R3 JUNE 2002
THROTTLE SHAFT COMPONENT REMOVAL
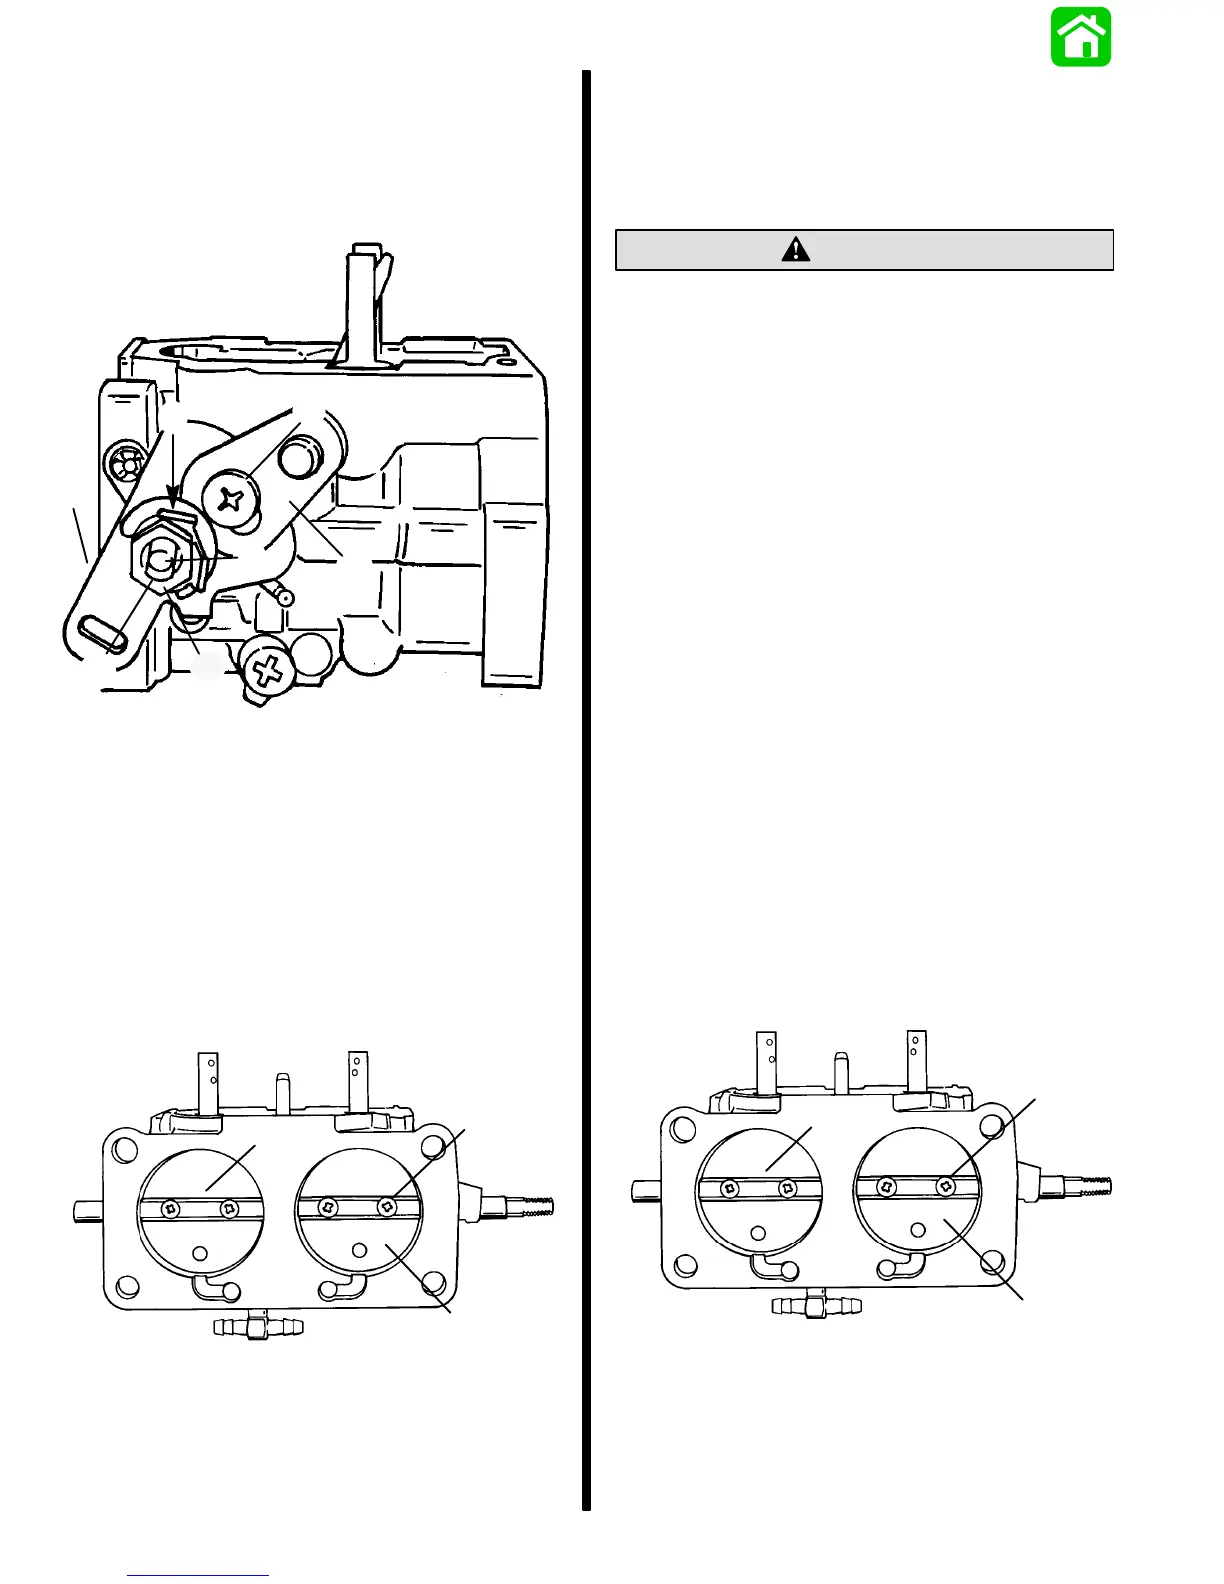
1. Bend tab washer away from nut. Remove nut, tab
washer, spacer, throttle lever and spring from
throttle shaft.
2. Remove screw and throttle link.
51863
d
a
f
g
b
e
c
a - Tab Washer
b - Nut
c - Spacer
d - Throttle Spacer
e - Throttle Shaft
f - Screw
g - Throttle Link
3. If necessary, remove four screws which secure
two throttle shutter plates to throttle shaft.
Remove throttle shutter plates from throttle shaft,
then pull throttle shaft out of carburetor.
51860
c
a
b
a - Throttle Shaft
b - Throttle Shutter Plate
c - Screws
Carburetor Cleaning and Inspection
1. Place carburetor body, fuel bowl and metal parts
in carburetor cleaning solution for a short period
of time to remove all dirt, gum and varnish which
has accumulated.
CAUTION
DO NOT place floats, inlet needles, idle screw
adjusting caps, any rubber or plastic parts into
carburetor cleaning solution. If adjusting caps
must be removed and reinstalled, refer to ‘‘Idle
Circuit Adjustments” preceding.
2. After soaking carburetor parts, rinse thoroughly
with water, then solvent. Blow parts dry with
compressed air. Be sure to blow thru all
passages, orifices and nozzles.
3. Check for float deterioration (saturation).
4. Examine inlet needle and seat for wear. If worn,
replace with new inlet needle and seat assembly.
Carburetor Reassembly
IMPORTANT: Make certain that all parts are kept
clean during reassembly of carburetor.
Throttle Shaft Component
Installation
1. Install throttle shaft into carburetor body. Install
throttle shutter plates to throttle shaft. Apply
Loctite 271 to threads of screws and secure
throttle shutters to throttle shaft.
51860
a
c
b
a - Throttle Shaft
b - Throttle Shutter Plate
c - Screws (use Loctite 271)

 Loading...