ELECTRICAL - 2B-17
90-824052R3 JUNE 2002
STARTER REASSEMBLY
1. If brushes were removed, replace as follows:
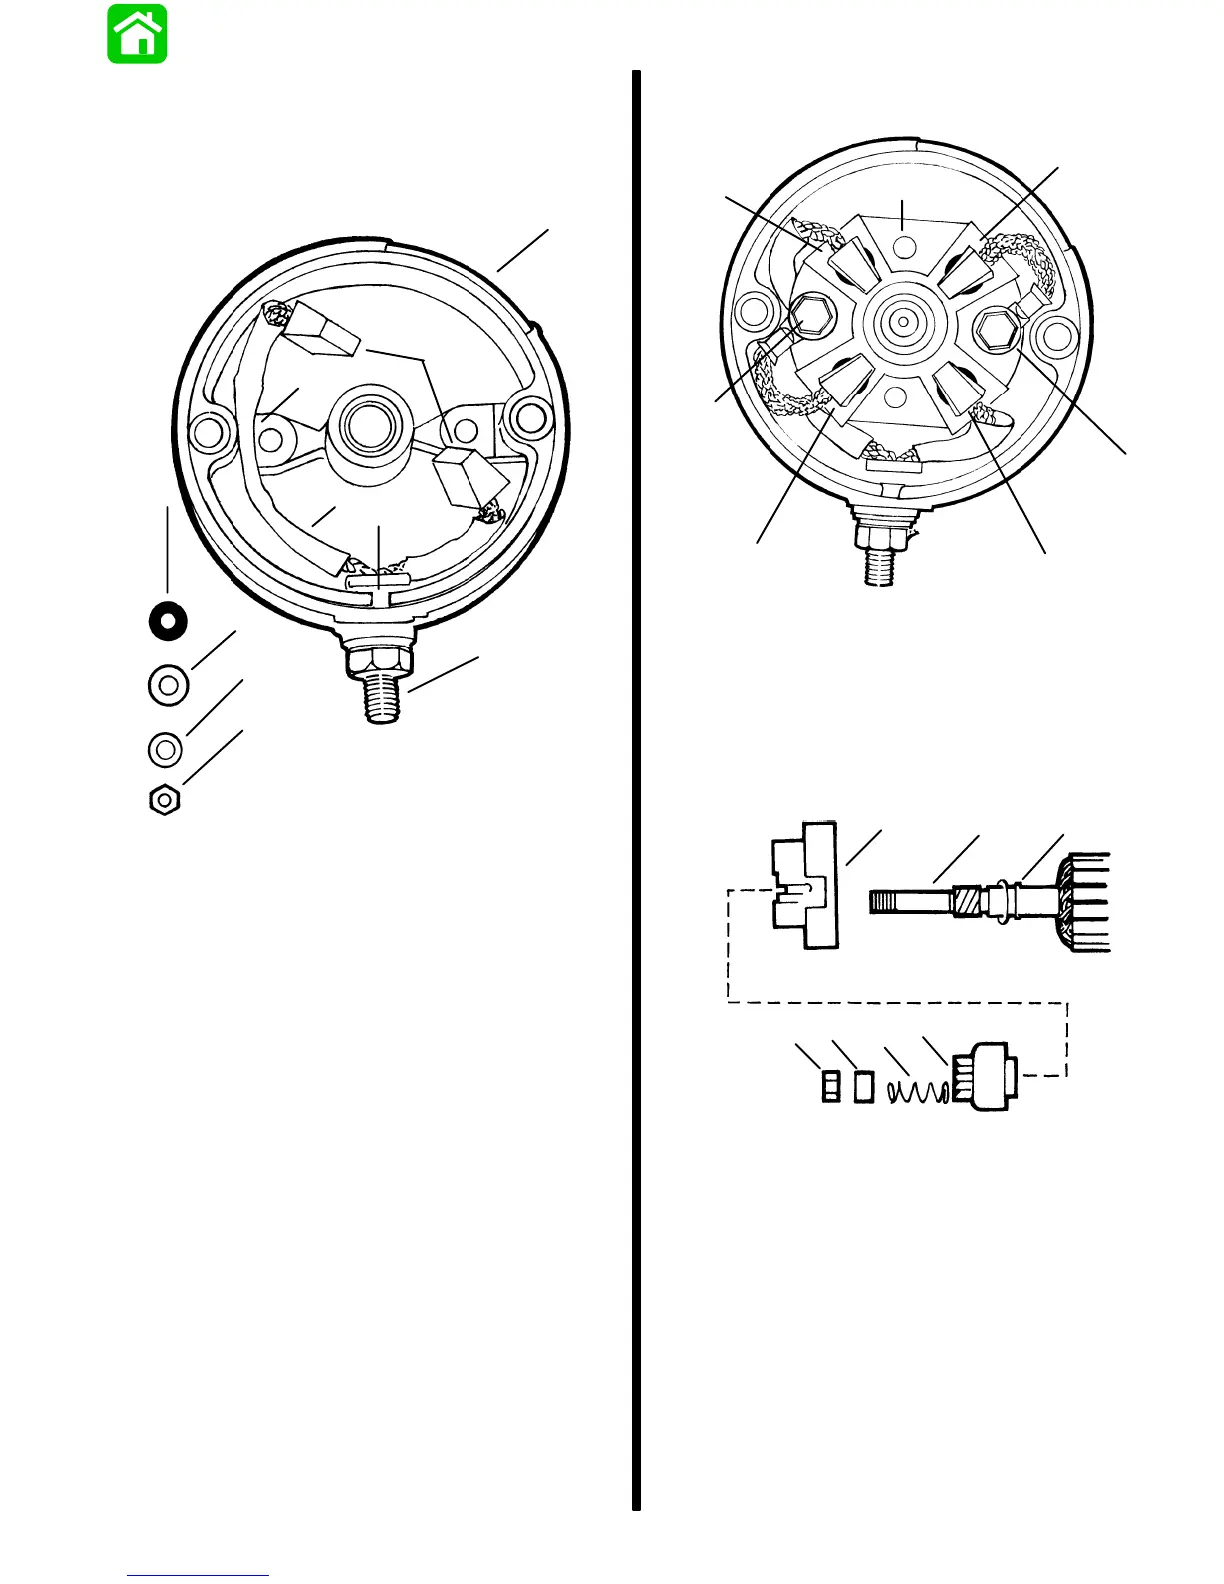
a. Install POSITIVE brushes (along with POSI-
TIVE terminal) into commutator end cap.
11660
a
c
b
i
h
d
d
e
f
g
a - End Cap
b - POSITIVE Brushes
c - POSITIVE Terminal
d - Insulating Bushing
e - Washer
f - Split Washer
g - Hex Nut
h - Long Brush Lead
i - Push Lead into Slot
b. Install NEGATIVE brushes (along with brush
holder).
11656
a
c
b
d
a
b
d
a - POSITIVE (+)Brushes
b - NEGATIVE (-) Brushes
c - Brush Holder
d - Bolts (Fasten NEGATIVE Brushes and Holder)
2. If removed, reinstall parts on armature shaft. Use
a new locknut and tighten securely on end of
shaft.
11658
e
f
g
a
b
c
d
a - Locknut
b - Spacer
c - Spring
d - Drive Assembly
e - Drive End Cap
f - Armature Shaft
g - Washer
3. Lubricate helix threads on armature shaft with a
drop of SAE 10W oil.
4. Lubricate bushing in drive end plate with a drop
of SAE 10W oil.

 Loading...