90-824052R3 JUNE 2002 LOWER UNIT - 6A-35
DISASSEMBLY (HI-PERFORMANCE GEAR
CASES)
IMPORTANT: Keep a record of shim amounts and
location during disassembly of clutch actuator
rod to aid in reassembly.
1. Push locating pin out of clutch actuator rod.
2. After locating pin is removed, compression
springs and shim(s) are free to fall out of clutch
actuator rod.
d
a
c
b
51864
a - Locating Pin
b - Shim Washer(s)
c - Compression Springs
d - Clutch Actuator Rod
3. Refer to Step 6 in “Clutch Actuator Rod
lnspection” for spring length requirements.
Pinion Gear and Drive Shaft
REMOVAL
1. Remove bearing retainer using Bearing Retainer
Tool (91-43506).
51865
a
b
a - Bearing Retainer
b - Bearing Retainer Tool (91-43506)
2. Place Driveshaft Holding Tool (91-34377A1) over
drive shaft splines.
3. Use a socket and flex handle to hold pinion nut.
(Pad area of gear housing where flex handle will
make contact to prevent damage to gear
housing.)
4. Use a socket and flex handle on Driveshaft
Holding Tool to loosen pinion nut. Remove pinion
nut and Drive Shaft Holding Tool.
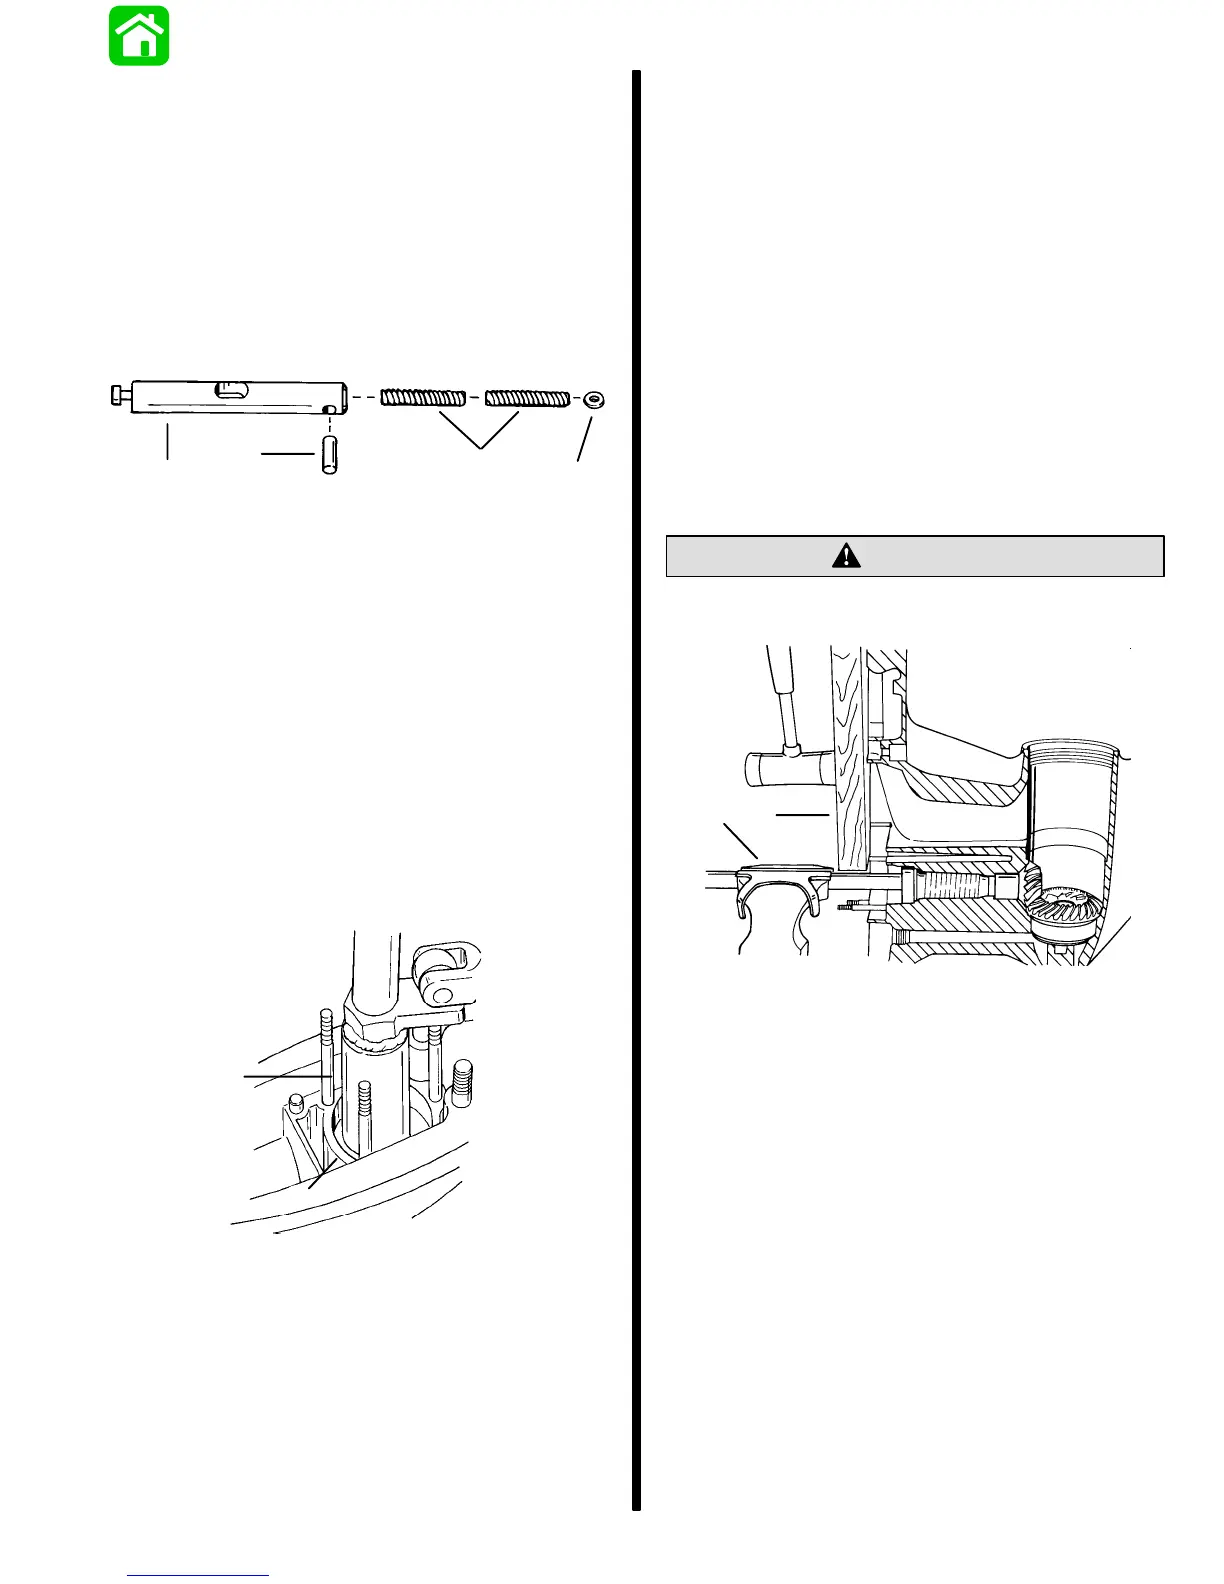
5. Remove gear housing from vise and re-position
it as shown. Be sure to use soft jaw vise covers
and clamp as close as possible to water pump
studs.
6. Place a block of wood on gear housing mating
surface. Use a mallet and carefully tap gear
housing away from drive shaft.
CAUTION
DO NOT strike gear housing hard with the mallet
or allow gear housing to fall.
b
a
51870
a - Wooden Block
b - Soft Jaw Vise Covers
7. Reach into gear housing and remove pinion gear
and forward gear assembly.
8. After driveshaft is removed from gear case,
remove and retain shim(s) that were located
under upper tapered drive shaft bearing.
NOTE: Gear housings above serial number
OD154836 have a larger oil passage way and do not
have a lubrication sleeve installed. Sportmaster gear
cases also do not use the lubrication sleeve.

 Loading...