90-824052R3 JUNE 2002 LOWER UNIT - 6D-27
Driveshaft and Pinion Gear
REASSEMBLY/INSTALLATION
1. Apply a light coat of Quicksilver Super Duty Gear
Lubricant on l.D. of driveshaft tapered bearing.
2. Thread a used pinion nut onto end of driveshaft.
Leave approximately 1/16″ (2mm) of nut threads
exposed. Driveshaft threads MUST NOT extend
beyond nut or thread damage could result while
pressing.
3. Place bearing over driveshaft.
4. Using an old driveshaft bearing inner race or
other suitable mandrel (which applies pressing
force on center bearing race only), press bearing
onto shaft until seated.
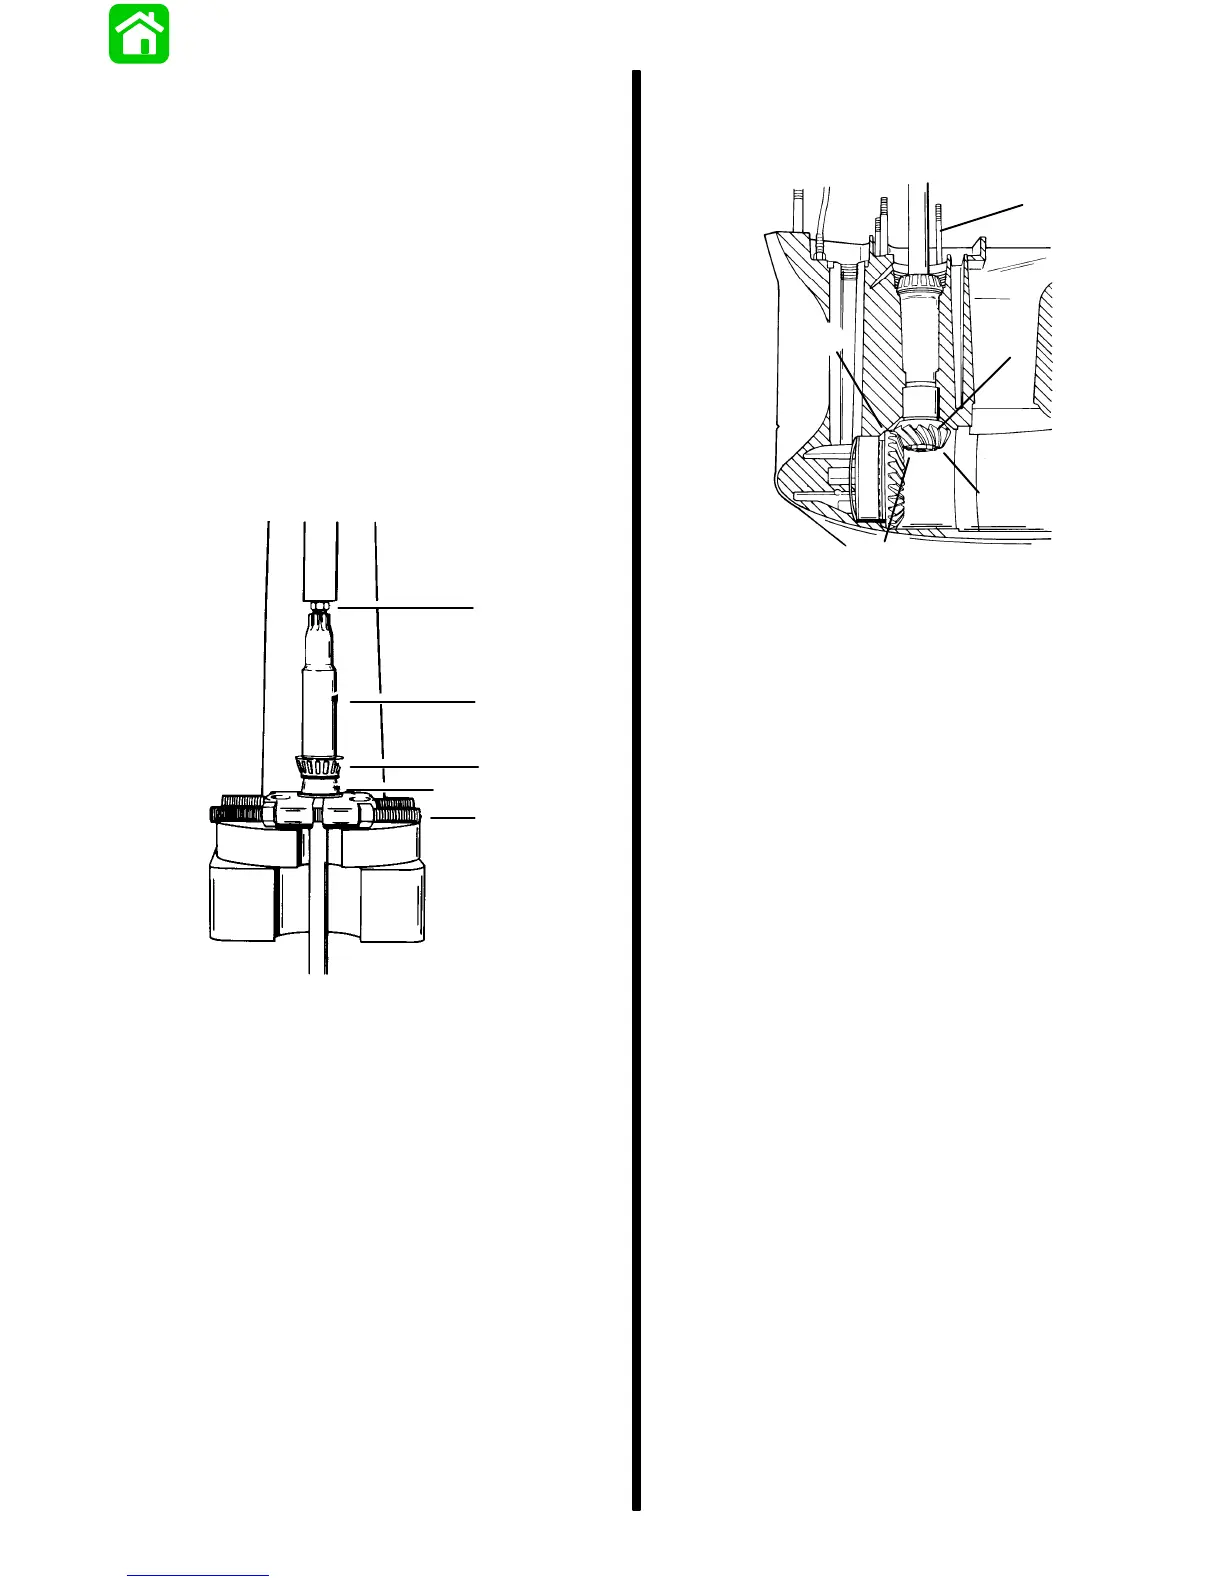
a
b
c
d
e
a - Used Pinion Nut
b - Driveshaft
c - Tapered Bearing
d - Old Bearing Inner Race
e - Universal Puller Plate
5. Position pinion gear in gear housing below drive-
shaft bore with teeth of pinion gear meshed with
teeth of forward gear.
6. Insert driveshaft into driveshaft bore while
holding pinion gear. Rotate driveshaft to align
and engage driveshaft splines with pinion gear
splines. Continue to insert driveshaft into gear
housing until driveshaft tapered bearing is
against bearing race.
NOTE: It is recommended that after final pinion depth
is obtained, a new pinion nut be installed. Clean
pinion nut threads with Loctite Primer N (92-59327-1)
before applying Loctite 271.
7. Place a small amount of Loctite 271 onto threads
of pinion gear nut and install flat washer and nut
on driveshaft with flat side of nut away from pinion
gear. Hand tighten pinion nut.
a
c
d
e
b
51867
a - Driveshaft (rotate to engage splines with pinion gear)
b - Forward Gear Assembly
c - Pinion Gear
d - Washer (located above pinion nut)
e - Pinion Nut (apply Loctite 271 on threads and install with
flat side away from pinion gear.)

 Loading...