90-824052R3 JUNE 2002 LOWER UNIT - 6A-55
CAUTION
A visual inspection of impeller drive key MUST
BE made to determine that drive key is on flat of
driveshaft after impeller is installed. If key has
moved off flat of driveshaft, repeat Steps 6 and 7.
7. Slide impeller down driveshaft to impeller drive
key. Align drive key with keyway in the center hub
of impeller, and slide impeller over drive key.
8. If removed, install new water pump insert into
pump cover as follows:
a. Apply Perfect Seal to water pump insert area
of pump cover.
b. Install water pump insert into pump cover.
Verify that tab on insert enters recess in pump
cover.
c. Wipe any excess Perfect Seal from insert and
cover.
NOTE: If 2 holes were drilled in top of water pump
cover to aid in removal of insert, fill holes with RTV
Sealer or equivalent. Allow to cure, 24 hours prior to
operating engine.
9. Install water tube seal into pump cover, being
sure that plastic side of seal goes into cover first.
10. Reinstall water tube guide into water pump cover.
11. Apply a light coat of Quicksilver 2-4-C w/Teflon
Marine Lubricant inside of water pump insert.
12. Position assembled water pump cover over
driveshaft and lower over water pump studs.
Rotate driveshaft in a clockwise direction (viewed
from top), while pushing down on pump cover to
ease impeller entry into cover.
13. Install water pump cover retainer washers, nuts
and bolt.
CAUTION
DO NOT over-torque nuts and bolt, as this could
cause cover to crack during operation.
14. Torque water pump nuts to 50 Ib. in. (5.5 N·m),
and water pump bolt to 35 Ib. in. (4.0 N·m).
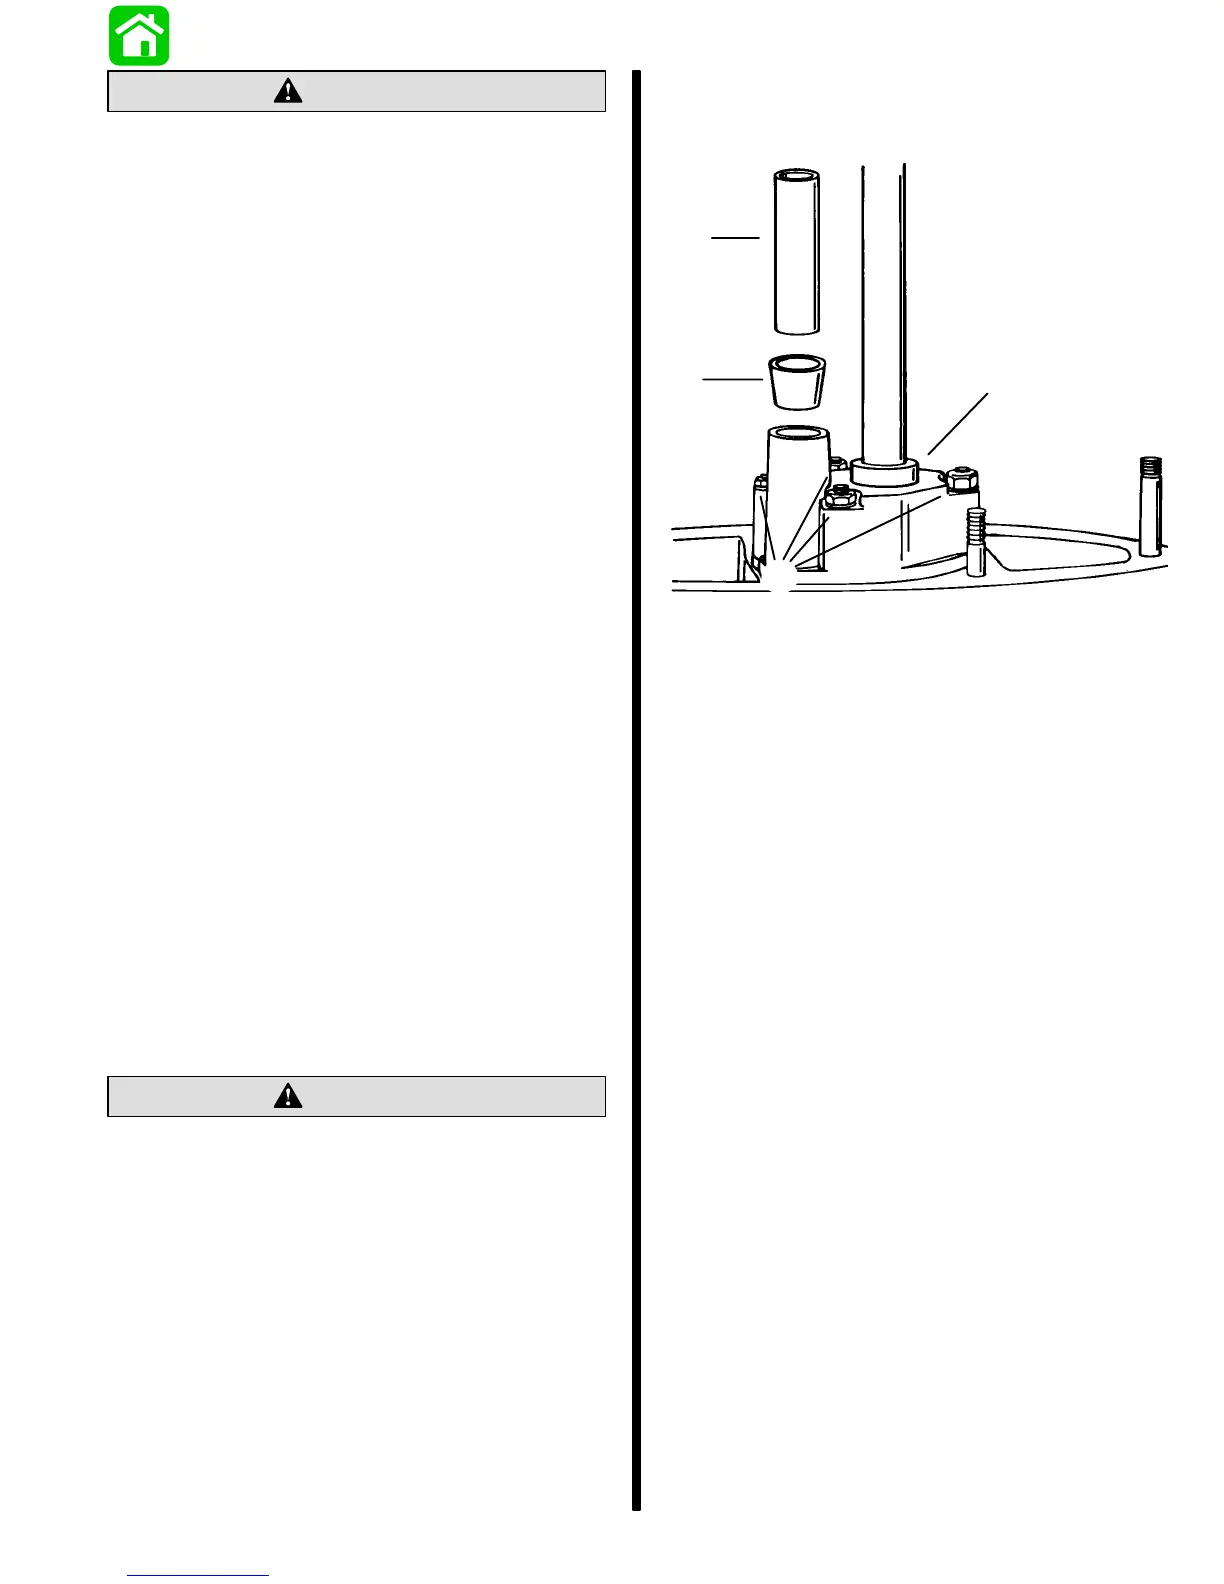
15. Install centrifugal slinger over drive shaft and
down against pump cover.
b
c
a
d
51874
a - Centrifugal Slinger (if equipped)
b - Water Tube Guide
c - Water Tube Seal
d - Nuts, Bolts and Washers
Gear Lubricant Filling Instructions
1. Remove any gasket material from “Fill” and
“Vent” screws and gear housing.
2. Install new gaskets on “Fill” and “Vent” screws.
IMPORTANT: Never apply lubricant to gear
housing without first removing “Vent” screw, or
gear housing cannot be filled because of trapped
air. Fill gear housing ONLY when housing is in a
vertical position.
IMPORTANT: All CLE, Sport Master and Torque
Master gear cases should use Quicksilver Hi-
Performance Gear Lube (92-816026A4).
3. Slowly fill housing thru “Fill” hole with Quicksilver
Super Duty Lower Unit Lubricant until lubricant
flows out of “Vent” hole and no air bubbles are
visible.
4. Install “Vent” screw into “Vent” hole.
IMPORTANT: DO NOT lose more than one fluid
ounce (30cc) of gear lubricant while reinstalling
“Fill” screw.
5. Remove grease tube (or hose) from “Fill” hole
and quickly install “Fill” screw into “Fill” hole.

 Loading...