6C-20 - LOWER UNIT 90-824052R3 JUNE 2002
REMOVAL OF DRIVESHAFT NEEDLE BEARING
- LATE MODEL
1. If inspection of driveshaft needle bearing surface
(refer to “CLEANING and INSPECTION,”
following) determines that replacement of needle
bearing is required, remove bearing from gear
housing, following.
2. Remove forward gear from gear housing.
3. Verify 18 loose needle bearings are in place in
bearing race to provide a surface for mandrel to
drive against.
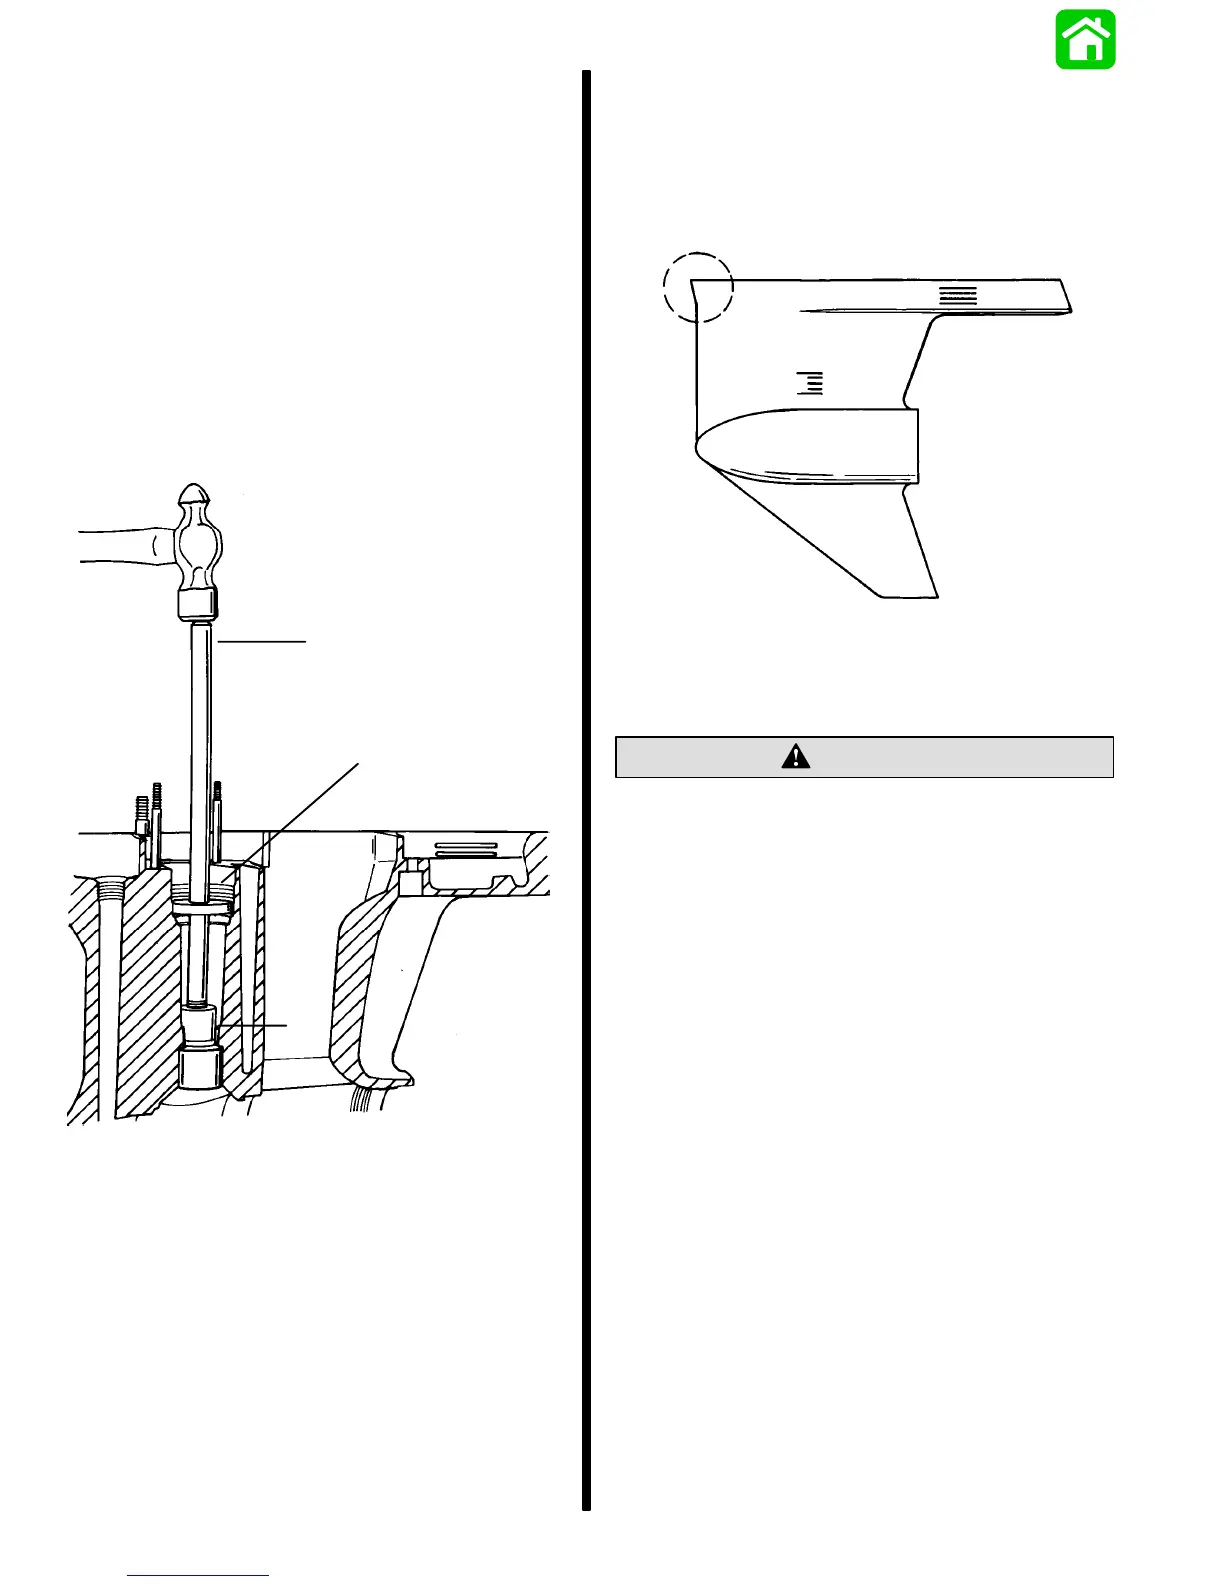
4. Using MANDREL (91-37263), PILOT
(91-36571), and DRIVER ROD (91-37323),
remove race from gear housing.
b
a
51869
c
a - Mandrel (91-37263)
b - Pilot* (91-36571)
c - Driver Rod* (91-37323)
*From Bearing Removal and Installation Kit (91-31229A5)
IMPORTANT: Discard driveshaft needle bearing
after removal (bearing cannot be reused).
IMPORTANT: If DRIVESHAFT NEEDLE BEARING
RACE has spun in bore in gear housing, gear
housing MUST BE REPLACED as reinstalling
new bearing in old housing will result in repeat
bearing failure.
Reassembly and Installation
Driveshaft Needle Bearing
INSTALLATION - EARLY MODEL
50737
EARLY MODEL
NOTE: New gear housings have a driveshaft needle
bearing already installed.
CAUTION
If driveshaft needle bearing failure has occurred,
and original bearing race has turned in the gear
housing, gear housing must be replaced. Loose
fitting needle bearing will move out of position
and cause repeated failure.
1. Position driveshaft needle bearing over driver
head (from Bearing Removal and Installation Kit
91-31229A1) with numbered side of bearing
toward shoulder of driver head.
2. Thread driver rod from kit into driver head.
3. Lubricate needle bearing area of driveshaft
cavity with a thin coat of Quicksilver 2-4-C
w/Teflon Marine Lubricant.
4. Position rod, driver head and bearing into gear
housing driveshaft cavity.
5. Place pilot washer (from kit) over driver rod and
slide it down into driveshaft bearing cavity.

 Loading...