6D-28 - LOWER UNIT 90-824052R3 JUNE 2002
8. Place shim(s) (retained from disassembly) into
gear housing. If shim(s) were lost or are not
reusable (damaged), start with approximately
0.010″ (0.254mm).
9. Install bearing race and bearing retainer.
d
b
a
c
51880
a - Shim(s)
b - Bearing Race
c - Bearing Retainer (Word “OFF” must be visible)
Torque to 100 lb. ft. (135.5 N·m)
d - Bearing Retainer Tool (91-43506)
10. Use a socket and flex handle to hold pinion nut
(pad area where flex handle will contact gear
housing while torquing nut).
11. Place Driveshaft Holding Tool (91-34377A1) over
crankshaft end of driveshaft. Torque pinion nut to
75 lb. ft. (101.5 N·m).
a
ba
c
c
d
a - Driveshaft Holding Tool (91-34377A1)
b - Torque Wrench; Torque Nut to 75 lb. ft. (101.5 N·m)
c - Socket
d - Breaker Bar
IMPORTANT: Wipe any excess Loctite from
pinion nut and pinion gear.
Pinion Gear Depth/Forward Gear
Backlash/Reverse Gear Backlash
DETERMINING PINION GEAR DEPTH
NOTE: Read entire procedure before attempting any
change in shim thickness.
IMPORTANT: Forward gear assembly must be
installed in gear housing when checking pinion
gear depth or an inaccurate measurement will be
obtained.
1. Clean the gear housing bearing carrier shoulder.
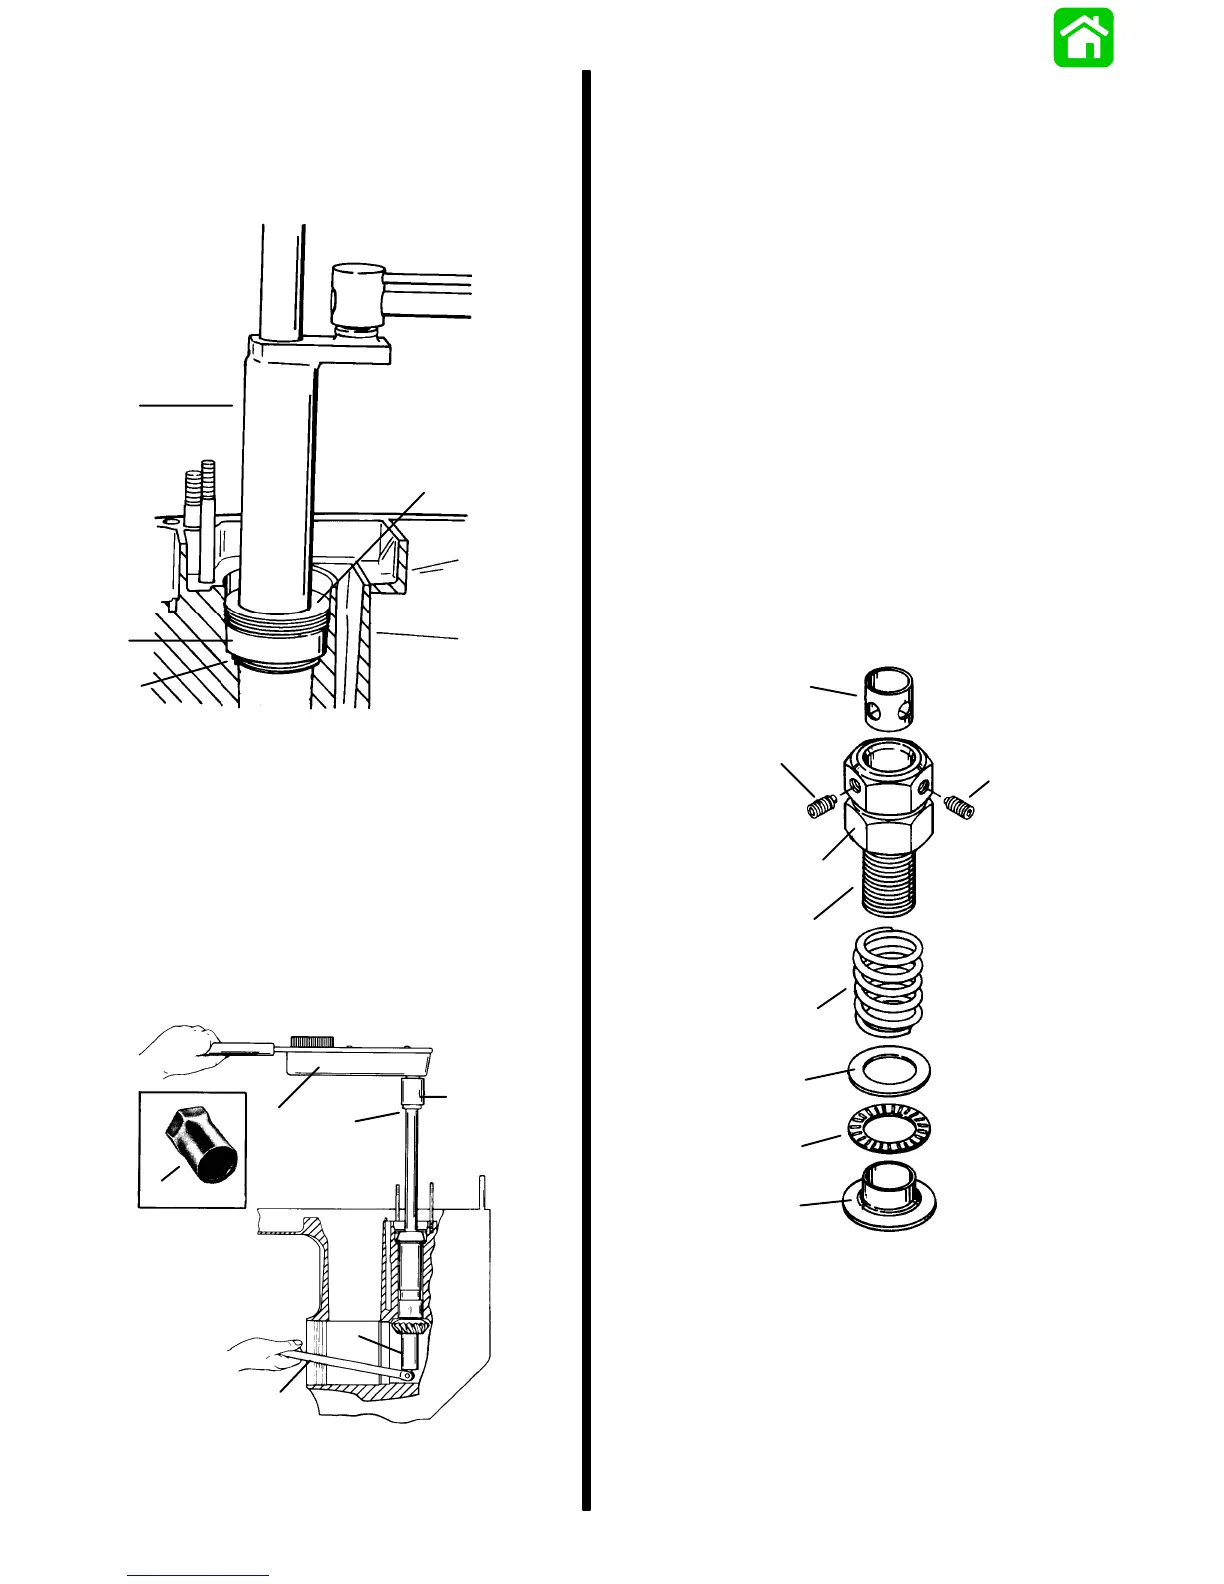
2. Install Bearing Preload Tool (91-14311A1) over
driveshaft in sequence shown.
NOTE: Bearing Preload Tool (91-44307A1) may also
be used. Follow instructions provided with tool for
proper installation.
h
g
g
e
f
d
c
b
a
a - Adaptor
b - Bearing
c - Washer
d - Spring
e - Nut; Thread Nut ALL-the-Way Onto Bolt
f - Bolt
g - Set Screw
h - Sleeve; Holes in Sleeve Must Align with Set Screw
3. Align adaptor on driveshaft bearing pocket ledge.

 Loading...