90-824052R3 JUNE 2002 LOWER UNIT - 6C-11
Water Pump
REMOVAL AND DISASSEMBLY
IMPORTANT: It is recommended that all seals and
gaskets be replaced (as a normal repair proce-
dure) to assure effective repair.
1. Slide rubber centrifugal slinger up and off
driveshaft (if equipped).
2. Remove water tube guide and seal from water
pump cover. (Retain guide for reassembly and
discard seaI).
3. Remove (and retain) 3 nuts, one bolt and all
washers which secure water pump cover to gear
housing.
b
c
a
51874
d
a - Centrifugal Slinger (If equipped)
b - Water Tube Guide
c - Water Tube Seal
d - Nuts, Bolt and Washers to be Removed
4. Using 2 pry bars, positioned as shown, lift water
pump cover up and off driveshaft.
5. Inspect water pump cover and insert, as outlined
in “Cleaning and Inspection”, following.
51874
6. If inspection of water pump insert determines that
replacement is required, follow Step “a” or “b”
(immediately following) to remove insert from
water pump cover.
NOTE: Try Step “a” first. If insert cannot be removed
with Step “a”, use Step “b”.
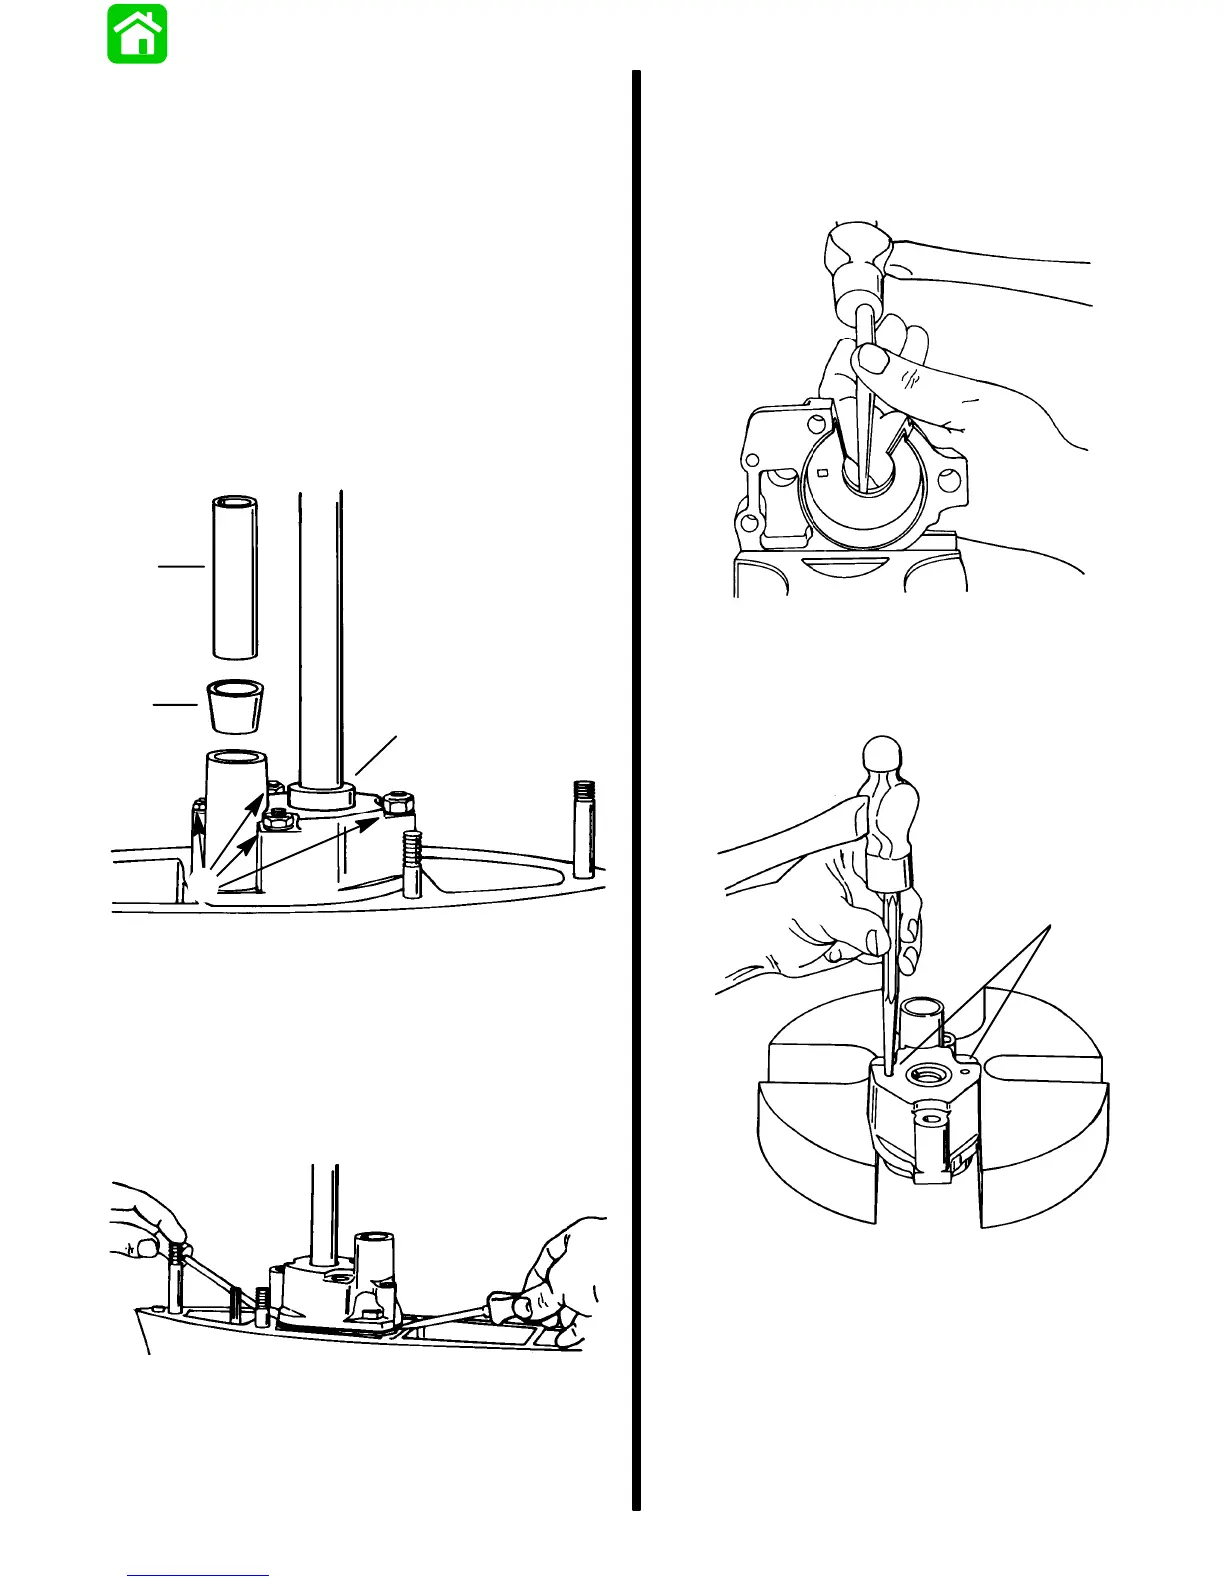
a. Drive water pump insert out of water pump
cover with a punch and hammer, as shown.
51874
b. Drill two 3/16″ (4.8mm) diameter holes thru
the top of water pump cover (but not thru
insert) at locations shown. Drive insert out of
cover with a punch and hammer.
a
51873
a - Drill 2 Holes at These Locations
7. Remove impeller from driveshaft. (It may be
necessary to use a punch and hammer to drive
impeller upward on driveshaft. In extreme cases,
it may be necessary to split hub of impeller with
a hammer and chisel.)
8. Once impeller is removed, remove impeller drive
pin from driveshaft.

 Loading...