90-824052R3 JUNE 2002 LOWER UNIT - 6C-21
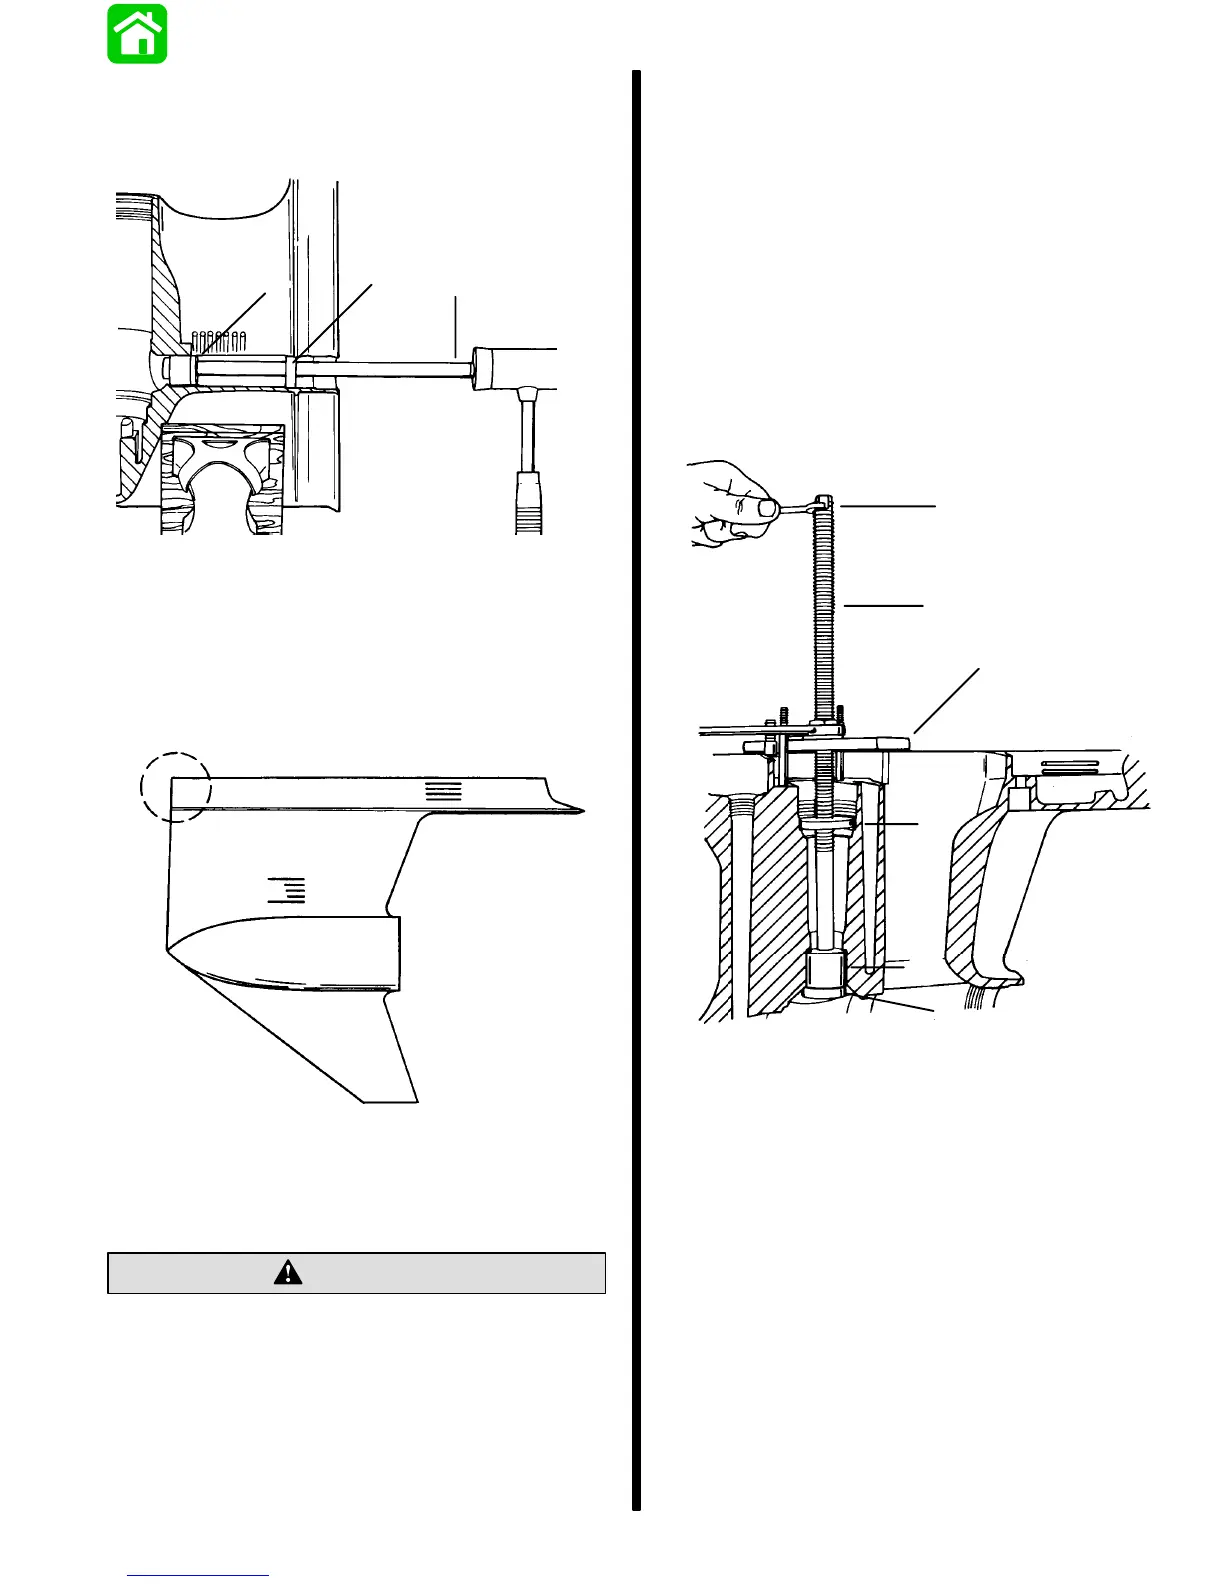
6. Use a mallet to drive needle bearing downward
until it is approximately 1/16″ (1 .6mm) above
bottom end of driveshaft cavity. Remove driver
rod, mandrel and pilot washer.
a
b
c
51882
a - Mandrel (91-37263)
b - Pilot Washer (91-36571)
c - Driver Rod (91-37323)
Driveshaft Needle Bearing
INSTALLATION - LATE MODEL
50737
LATE MODEL
NOTE: New gear housings have a driveshaft needle
bearing already installed.
CAUTION
If driveshaft needle bearing failure has occurred,
and original bearing race has turned in the gear
housing, gear housing must be replaced. Loose
fitting needle bearing will move out of position
and cause repeated failures.
1. Apply a thin coat of Quicksilver 2-4-C w/Teflon
Marine Lubricant to driveshaft needle bearing
bore in gear housing.
2. By way of propeller shaft cavity, place needle
bearing in driveshaft bore with numbered side of
bearing facing up driveshaft bore.
3. Install and seat needle bearing with the following
tools: Puller Rod* (91-31229), Nut* (91-24156),
Pilot* (91-36571), Plate* (91-29310), and
Mandrel (91-38628).
Pull bearing up into bore until it bottoms on gear
housing shoulder. (DO NOT use excessive force.)
*From Bearing Removal and Installation Kit (91-31229A5)
51869
f
e
d
c
a
b
a - Mandrel (91-38628)
b - Bearing
c - Pilot (91-36571)
d - Plate (91-29310)
e - Puller Rod (91-31229)
f - Hold

 Loading...