5B-30 - MID-SECTION 90-824052R3 JUNE 2002
CLEANING AND INSPECTION
Inspect O-rings and replace if necessary. Carefully inspect power cord for cuts or tears which will allow water
to enter motor. Replace cord if cut or torn. Clean, inspect, and test motor components. Refer to “Brush
Replacement”, “Armature Test”, and “Field Tests” for inspection and test procedures.
53779
a
b
c
d
e
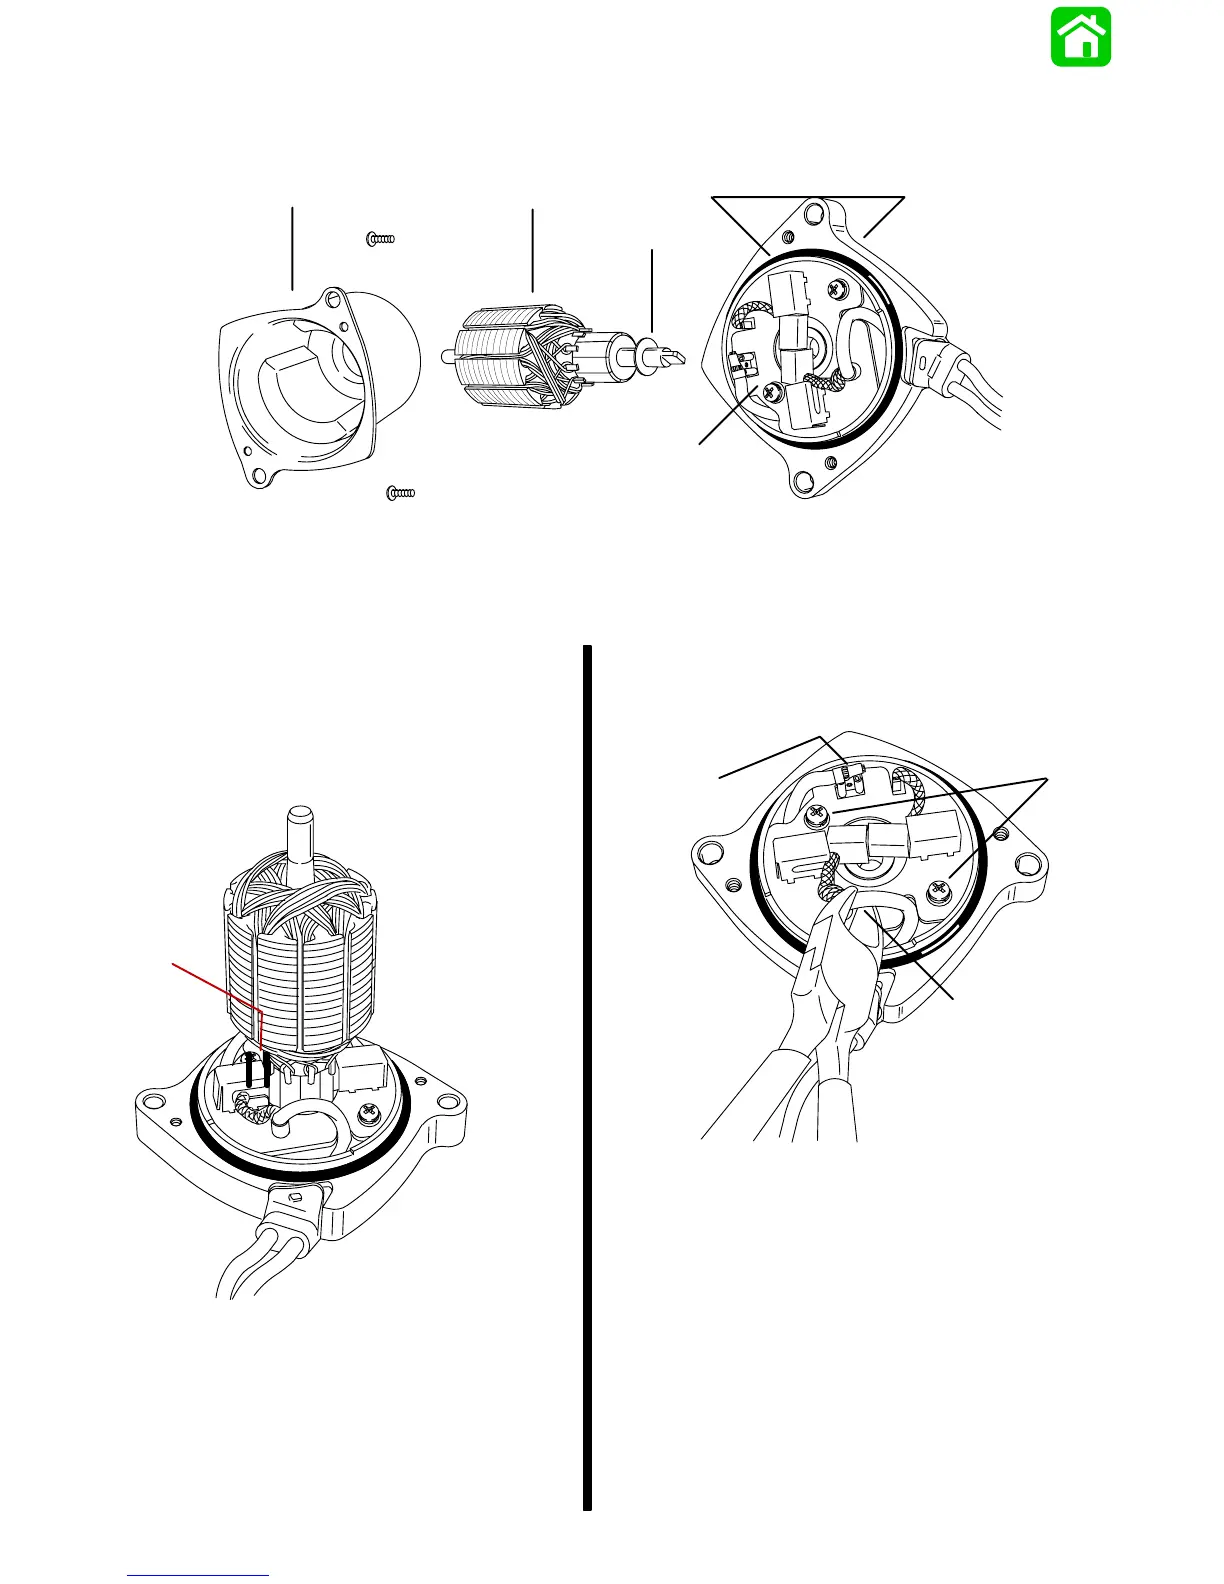
a - Frame
b - Armature
c - Shim
d - Brush Card Assembly
e - O-rings
BRUSH REPLACEMENT
1. Brush replacement is required if brushes are
pitted, chipped, or if distance (a) between the
brush pigtail and end of brush holder slot is 1/16
in. (1.6 mm) or less. Check distance with
armature installed.
53784
a
a - 1/16 in. (1.6 mm)
2. To replace brush card, disconnect spade
terminal.
3. Cut crimped brush lead.
4. Remove 2 screws securing brush card to end
cap.
a
b
c
a - Spade Terminal
b - Crimped Brush Lead
c - Screws
5. Install new brush card (BRUSH and SEAL KIT
828714A1).
6. Crimp metal connector onto motor lead and new
brush lead.
7. Connect spade connector motor lead to brush
card connector.

 Loading...