6A-48 - LOWER UNIT 90-824052R3 JUNE 2002
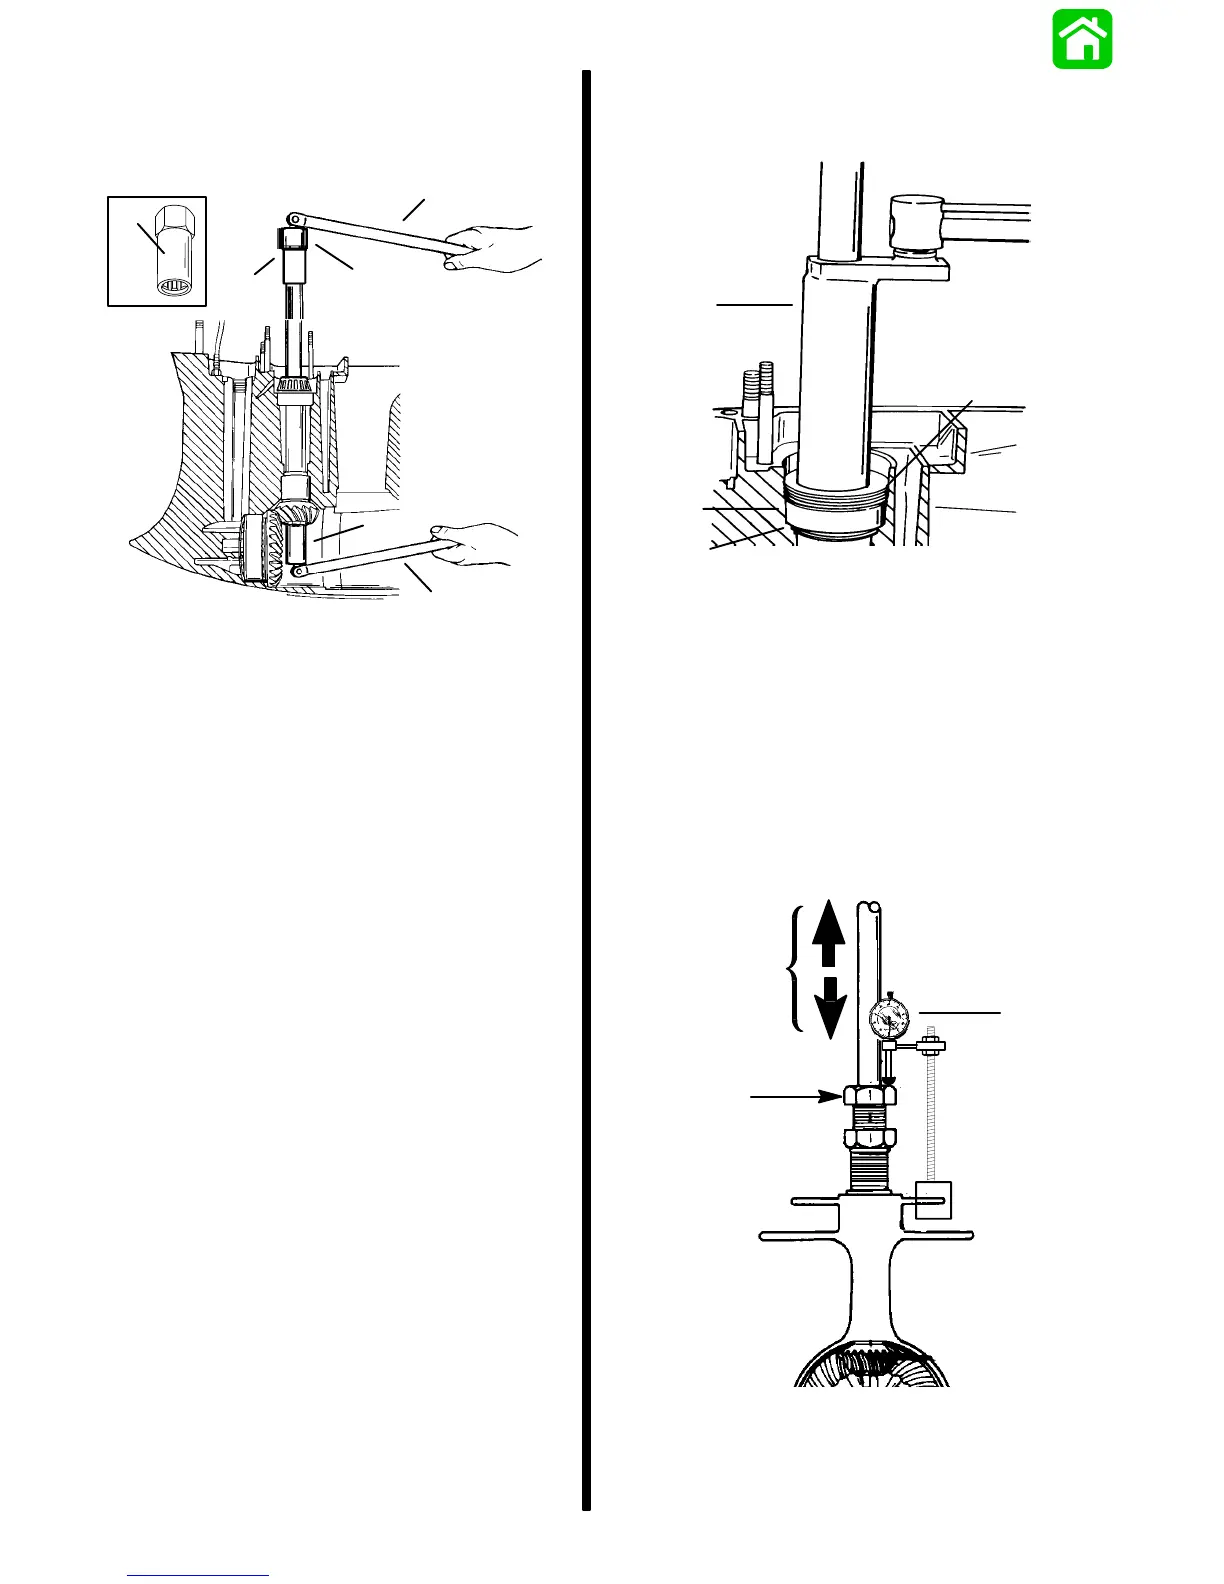
3. Place Driveshaft Holding Tool (91-34377A1) over
crankshaft end of drive shaft. Use a socket and
breaker bar to hold pinion nut and remove the
pinion nut, washer, pinion gear and driveshaft.
a
a
c
b
c
b
a - Driveshaft Holding Tool (91-34377A1)
b - Breaker Bar
c - Socket
NOTE: Do not install any shims below lower bearing
cup at initial installation.
4. Apply High Pressure Grease (such as Chicago
Manufacturing and Distributing Lube #3) to the
O.D. of the driveshaft lower bearing cup and
install cup into the gear case.
5. Reinstall driveshaft assembly into gear case. It is
not necessary to reinstall the pinion gear for this
procedure.
6. Install the upper drive shaft bearing cup and
install and torque the upper bearing retainer to
100 lb. ft. (135.5 N·m).
51880
c
d
b
a
a - Pinion Height Adjusting Shim(s)
b - Upper Bearing Race
c - Bearing Retainer (Word “OFF” must be visible)
Torque to 100 lb. ft. (135.5 N·m)
d - Bearing Retainer Tool (91-43506)
7. Install the adjustable nut part of the pre-load tool
(with the set screws) onto the driveshaft to use as
a surface for checking driveshaft end play. Tight-
en set screws and position a dial indicator so that
dial indicator arm touches the top surface of the
upper nut.
a
c
b
a - Dial Indicator Touching Top of Preload Tool
b - Nut Portion of Preload Tool
c - Move Drive Shaft UP and DOWN to Determine End Play

 Loading...