Kinetic Testing
Humphrey Field Analyzer II-
i
series User Manual 2660021145640 A
13-10
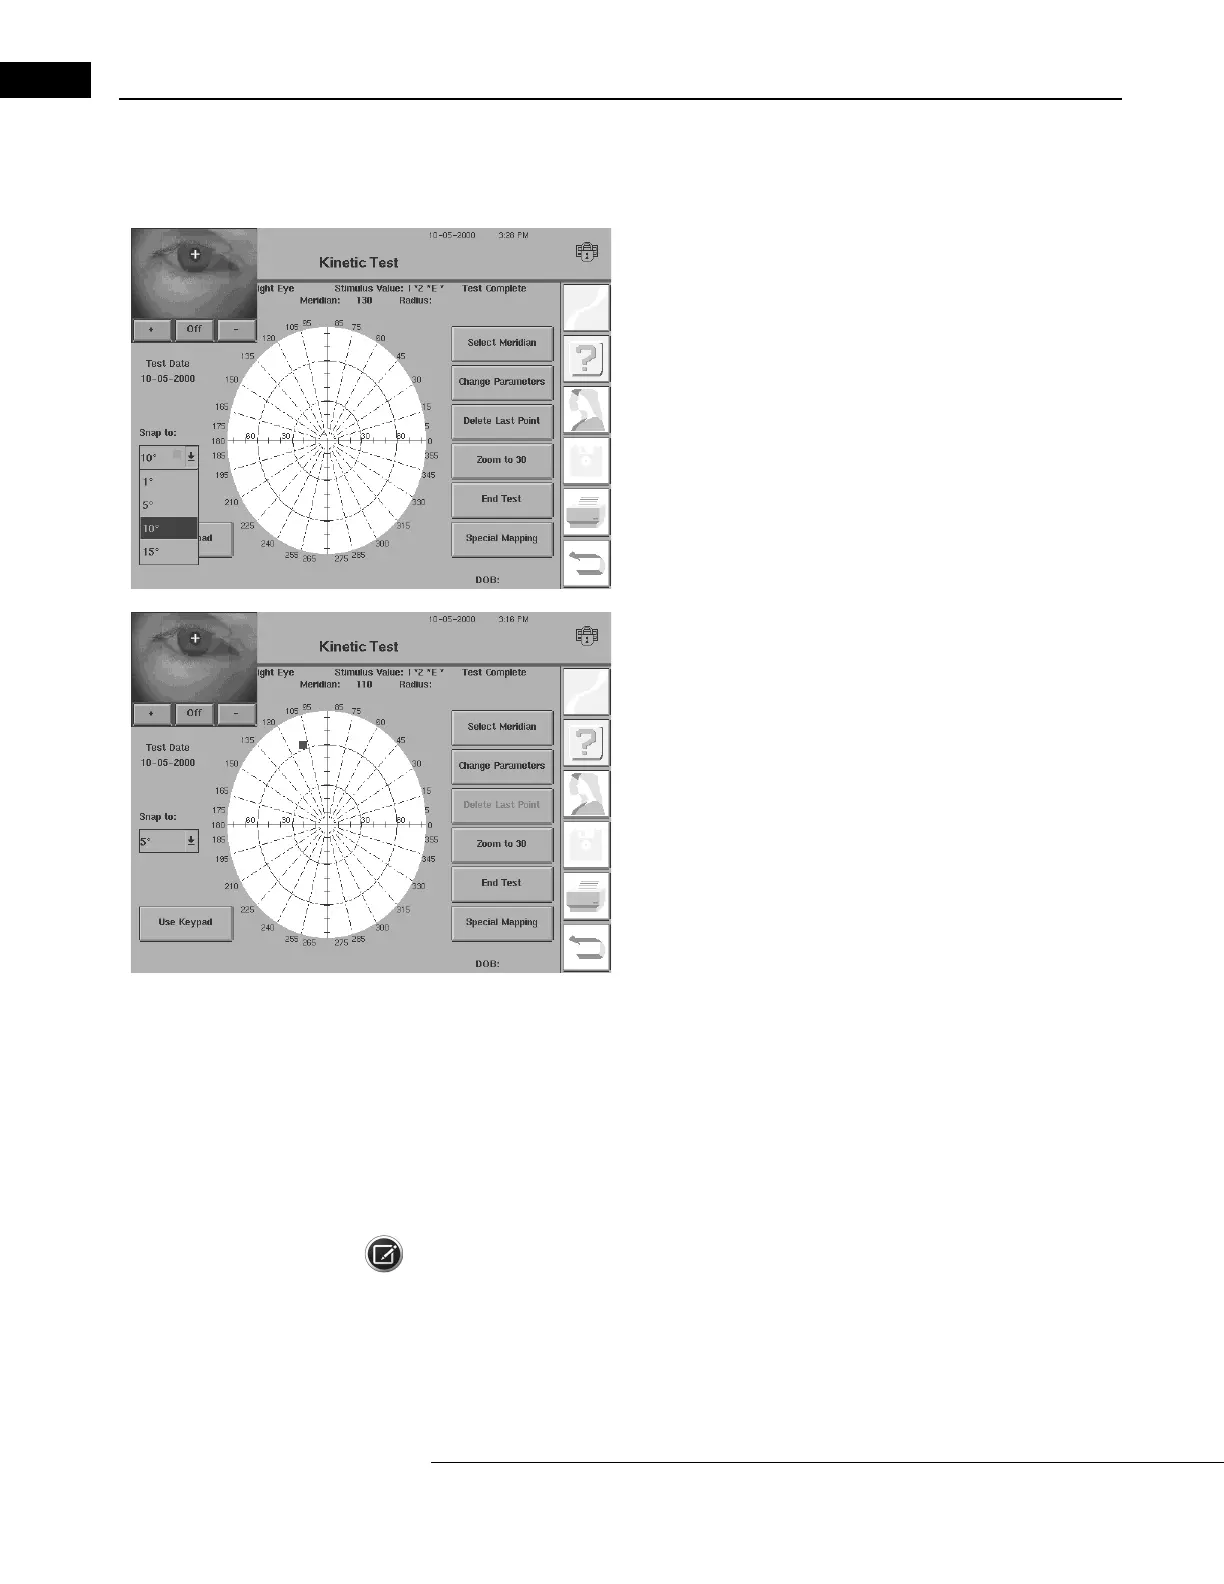
Selecting a Meridian with the Cursor
To present a stimulus manually to a patien
t using the Cursor, follow the steps below:
1You can adjust the Cursor to various incremental values, for
assistance in selecting the desired meridians. Select the sensitivity of
the cursor by pressing the SNAP TO pull-down box to choose between
1, 5, 10 or 15 degree increments.
2Move the Cursor to the desired location. You can move the position
of the cursor using the glidepad, a trackball, or a mouse. You also may
hold your finger on the touch screen and move the cursor to the
desired location by sliding your fingertip. The actual location is noted
on the screen in the “Meridian” area above the visual field. In this
example, the Cursor is registering its location in 5 degree increments.
You do not need to press the glidepad button to locate the starting
position. This method only selects the meridian, it does not locate the
starting position away from fixation (the radius). The starting position
is fixed by whether you choose the Full Field or Central size selection.
3 Prepare the patient for the test. Explain that the light will not be seen for a short time and then
it will move into the patient's field of vision. Ask the patient to press the response button as
soon as the light is seen. See “Preparing the Patient,” on page 3-24, for additional details.
4 Press ENTER on the keyboard, or SELECT MERIDIAN on the screen, to start the stimulus. After a
slight pause, the test stimulus will begin to move toward the fixation point in the middle of the
bowl.
Note: The Humphrey Field Analyzer II-
i
does not monitor the patient’s fixation automatically during
kinetic perimetry. Both Gaze Tracking and Blind Spot Monitoring are turned off. For reliable test
results, it is imperative that the operator constantly monitor fixation with the video eye monitor.
This testing sequence is continued on page 13-12

 Loading...


