Humphrey Field Analyzer II-
i
series User Manual 2660021145640 A
Networking Reference
I-23
Setting Up Work Lists for Non-DICOM EMR/PMS Systems and
DICOM Systems using DICOM Gateway 1.0
Note: It is strongly recommended that you use the
EasyConnect
RCT in Easy Mode instead of
manually configuring your network settings on your HFA II-
i
instruments (see “EasyConnect RCT
1.0,” on page G-1).
Work Lists are used to save time and lessen the chance of human err
or when entering in patient
demographic data. Once you have licensed HFA-NET Pro and purchased and licensed the DICOM
Gateway 1.0, and purchased and installed an EMR system or a PMS, you can use the following steps
to set up work lists.
Note: If you have licensed DICOM Gatew
ay 2.0, but wish to use HFA-NET Pro (CZM-XML via FEP) or
DICOM Gateway 1.0 work lists, WORK LIST must be unchecked in the DICOM Gateway Services
screen (see “Enable/Disable DICOM Gateway Services:,” on page H-4).
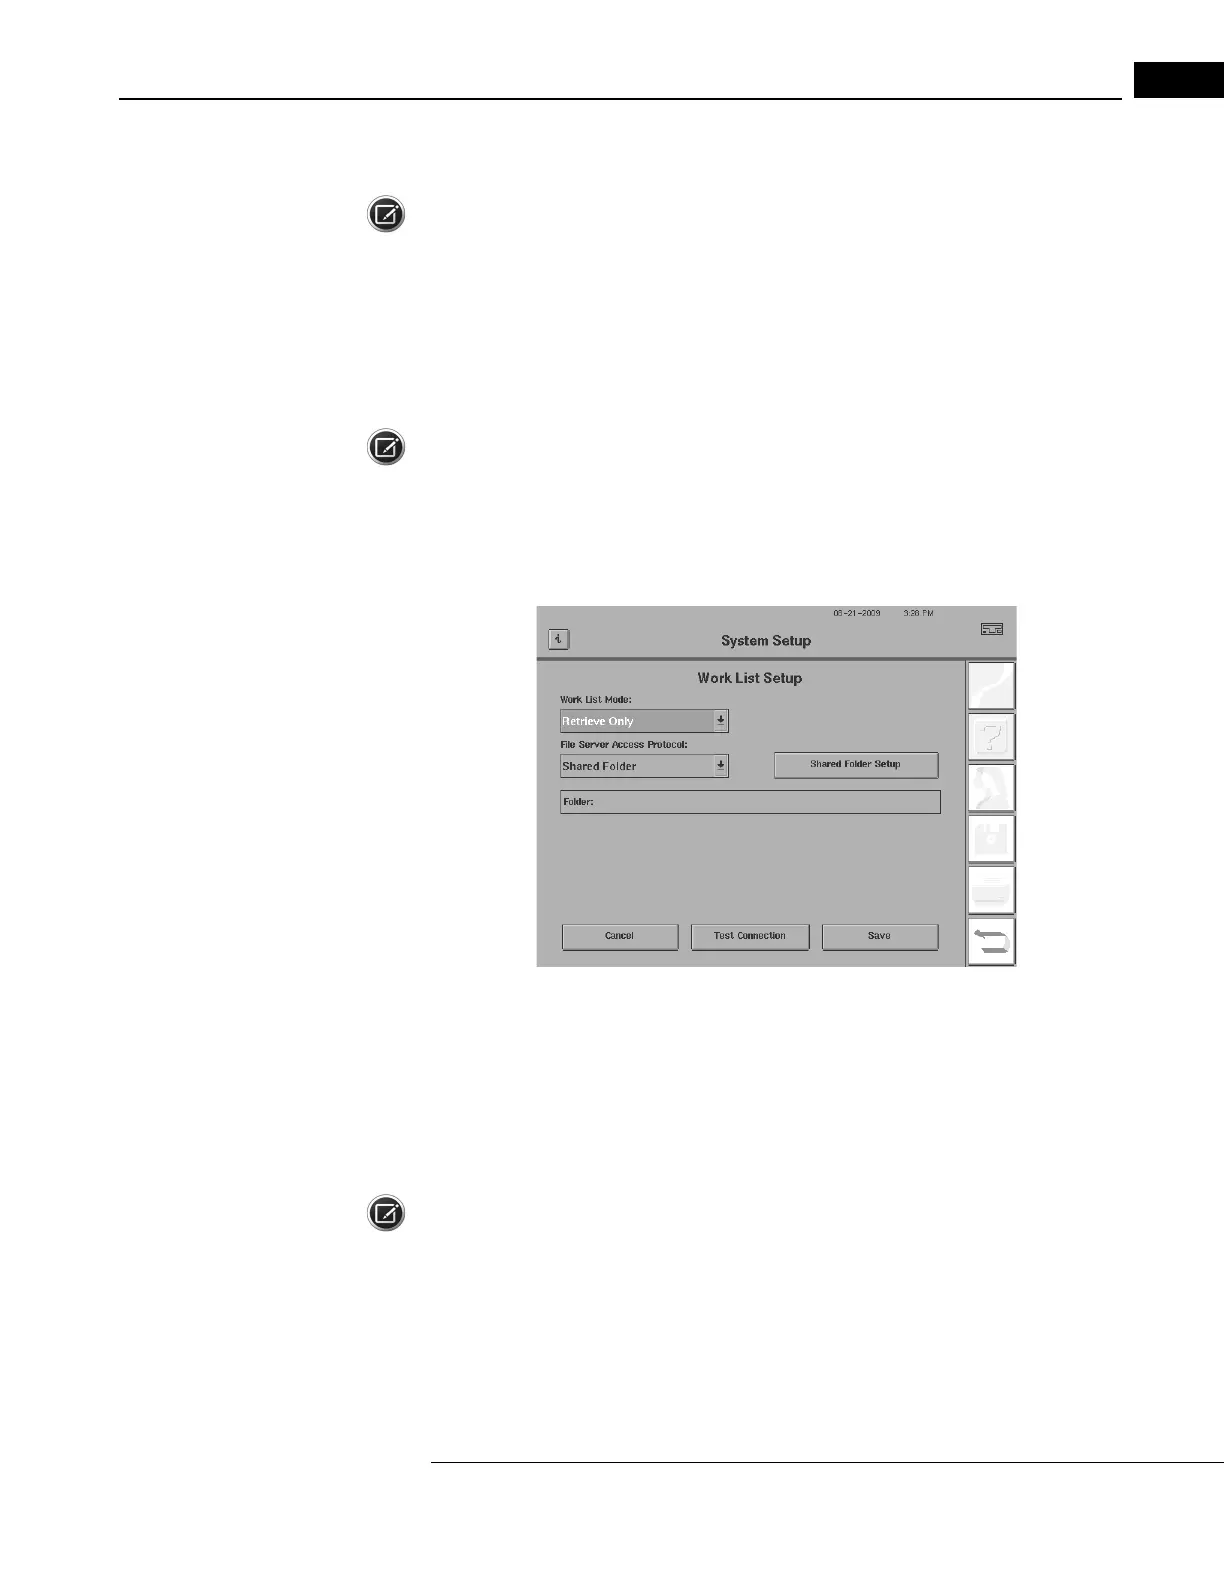
1 From the Main Menu, select
SYSTEM SETUP
>COMMUNICATIONS SETUP>WORK LIST SETUP.
The Work List Setup screen will open.
Figure I.27 Setting Up a Work List for EMR/PMS/DICOM Export
2 In the Work List Mode box, you can select one of two options: RETRIEVE ONLY or QUERY AND
RETRIEVE.
• Select RETRIEVE ONLY, if you wish to retrieve a work list that you know exists.
• Select QUERY AND RETRIEVE, if you are unsure if a work list exists. If it does exist, it can be
retrieved.
Note: Your EMR/PMS/DICOM provider should advise you which of the two preceding options works
be
st with their system.
3 In the File Server Access Protocol drop-down box, select either FTP or Shared Folder. If you
selected FTP, go to “Setting Up FTP,” on page I-9. If you selected Shared Folder, go to “Setting
Up a Shared Folder,” on page I-11. Upon completion of one of those setup procedures, press
SAVE.

 Loading...


