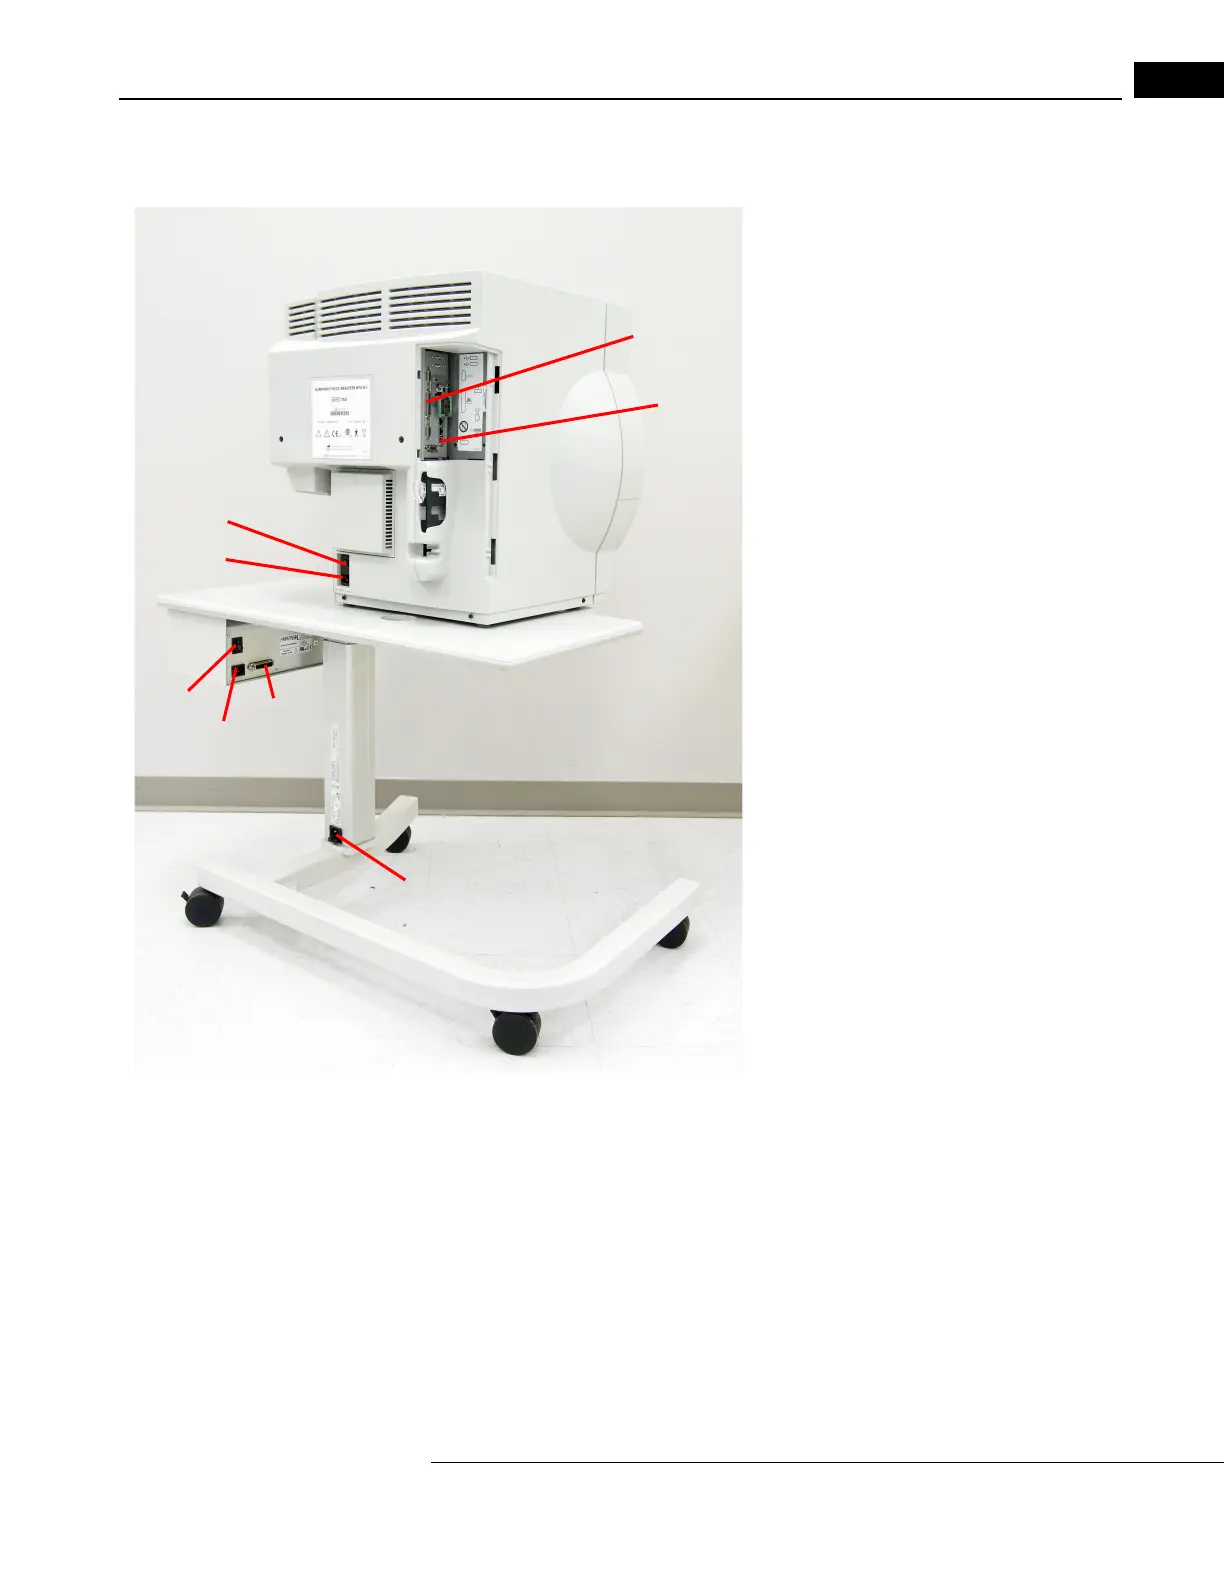
1 Open the panel on the back of HFA II-
i
. Connect
the printer cable to the Printrex printer and to
the HFA II-
i
at rear of the unit (see close-up view
in Figure 1.8).
2 Attach Printrex power cord to special outlet on
underside of table.
3 Connect power cord from back of HFA II-
i
to
power outlet on underside of table.
4 Attach PS/2 splitter adapter and then keyboard,
glidepad or mouse to connectors on adapter, if
desired.
5 Replace rear panel, being careful to run cables
out through slot at bottom (see Figure 1.5).
6 Attach Patient Response Button see Figure 1.4
for connector location).
7 Attach power cord at base of table and connect
to wall outlet.
8 Turn on power to the Printrex printer.
9 Turn on power to the HFA II-
i
.

 Loading...


